Twilio API Key and Set Up
Integrating your Twilio account with Seamless allows you to unlock powerful insights and features within Call Connect and Connect Engagement. This guide walks you through the integration process, including accessing API credentials, setting up the connection in Seamless, and managing user phone numbers.
Brand refresh in progress
We recently launched a new brand, so some images and videos may differ from what you see in-product. All workflows and guidance remain accurate while we update visuals.
Getting Started
Users can connect their Twilio account quickly with OAuth or manually with Twilio API Credentials. If you are a current Twilio user looking to manually, follow the steps below in the How to Access Twilio API Credentials section to get started.
If you do not already have an account, head over to Twilio’s website where you can contact their sales team, or start with a free trial account.
The Twilio free trial gives you access to a limited amount of credits, allowing you to test out core features like phone number provisioning, messaging, and voice calls.
Setting up is quick and easy:
- Go to https://www.twilio.com/try-twilio.
- Sign up using your email address and verify your account.
- Follow the prompts to complete setup, including verifying your phone number.
- Once inside the Twilio Console, you’ll receive trial credits to start testing immediately.
Once Twilio is connected, admins can:
- Assign Twilio phone numbers to specific users within Seamless.
- Manage call settings to ensure proper call routing and tracking.
Upgrading to a Paid Twilio Account
To set up a paid license, simply log into your Twilio Console and navigate to the billing section. From there, you can add a payment method and upgrade your project from trial to a fully active paid account.
Learn more about Twilio’s Pricing and Plans here
When connecting your Twilio account with Seamless, Account Admins can integrate quickly through OAuth or with an API Key. This article will walk you through both methods, but both processes will begin with accessing your Call Settings in Seamless.
Accessing Call Settings
Seamless account owners or admins can follow these steps to integrate their Twilio account with Seamless:
- Log into Seamless and navigate to Settings, through your initials in the bottom left corner.
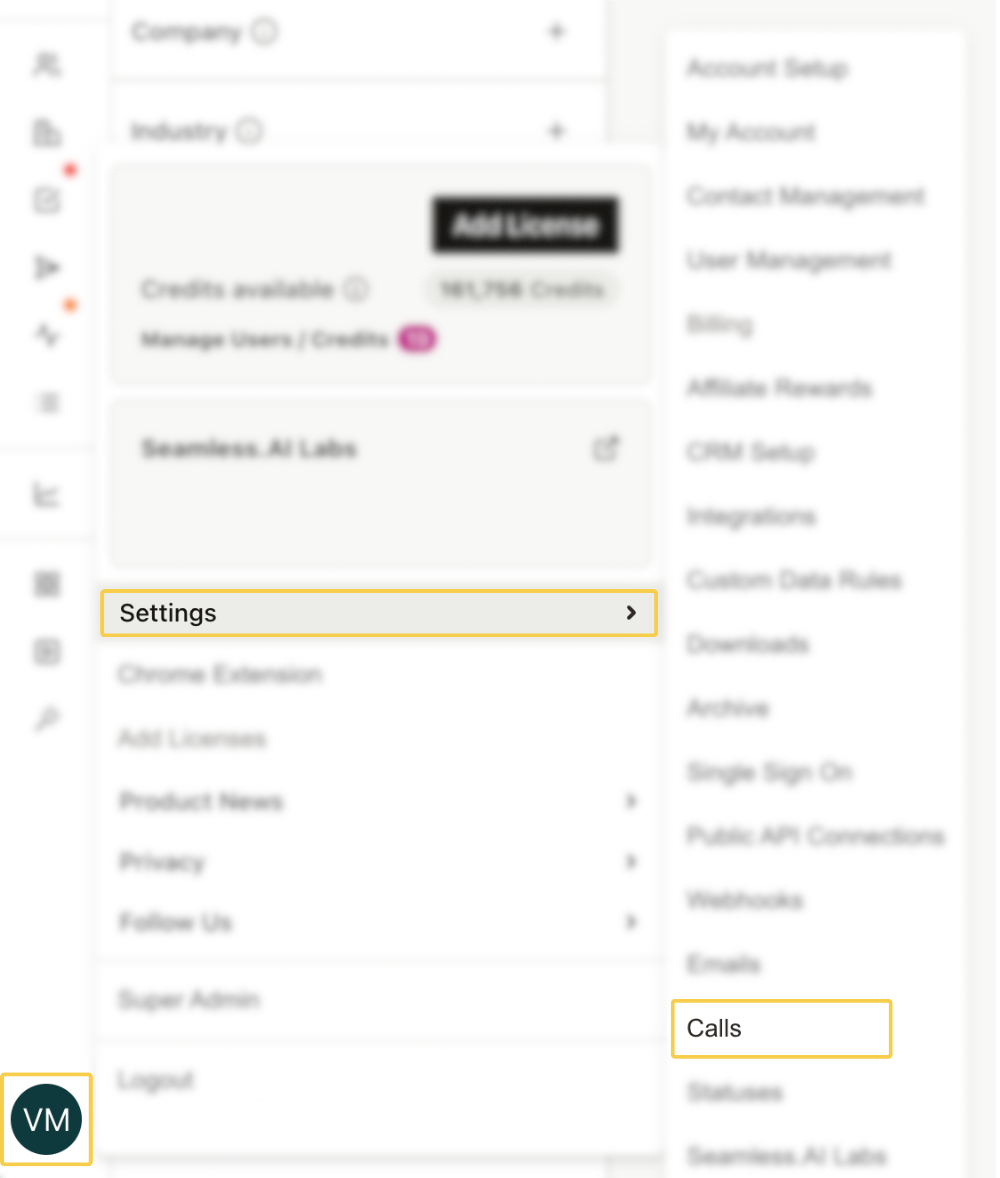
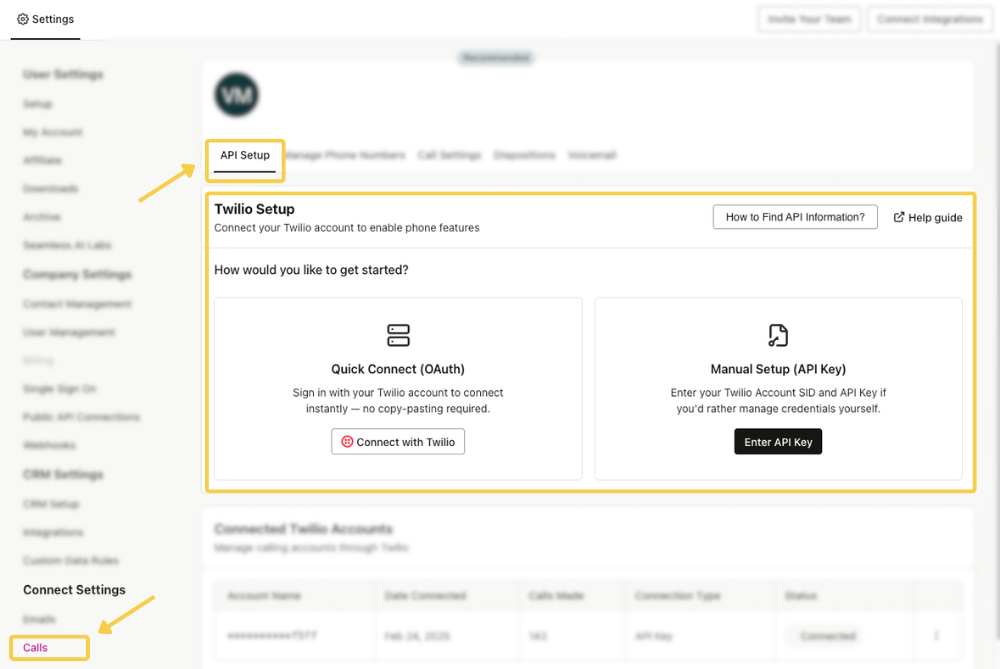
- Go to Calls Settings and locate the API Setup section.
- Locate the needed Twilio credentials, the required fields for Twilio and Seamless API key set up. These credentials will be found in your Twilio account, the steps for locating these credentials are shared below.
How to Connect Twilio Without API Key Credentials
You can connect Twilio with Seamless Connect quickly through OAuth, using your login credentials. This method allows for quick and efficient set up.

On the Call Settings page in Seamless, click the “Quick Connect (OAuth)” option and log into your Twilio account in the popup modal.
Note: You must be a Twilio account administrator to connect your account to Seamless via Oauth.
How to Connect Twilio With API Keys
Retrieve Twilio Credentials
Before integrating Twilio with Seamless, account administrators need to obtain the necessary credentials from Twilio:
- Log into your Twilio account and navigate to the Account Dashboard (located in the top left corner).
- Locate the Account Info section in the middle of the page. You will need to review the following details:
- Account SID
- Authentication Token
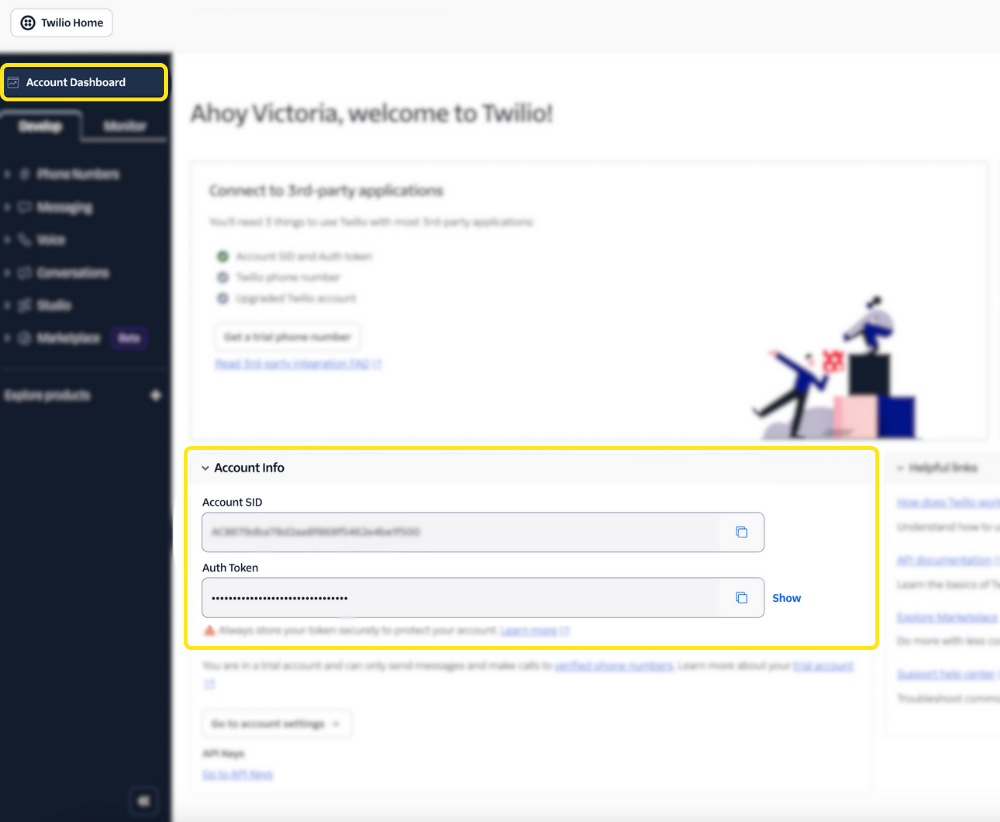
Note: Use the copy icon next to each credential to quickly copy them.
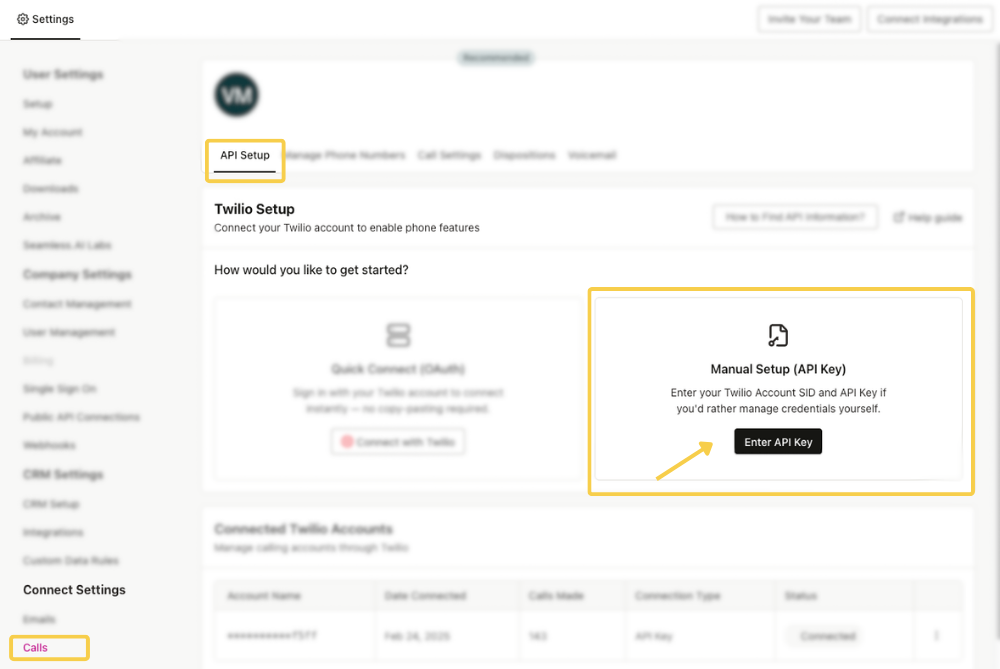
- On the API Setup page in Seamless.AI Call Settings, ensure the “Use an API Key” option is toggled off. Then paste the Account SID and Auth Token credentials into their respective fields.

- Click Save.
How to Access and Connect Twilio API Credentials
Users can integrate Twilio to Seamless through API Credentials as well, providing a more secure and manageable way to connect platforms. API keys let you control exactly what the connection can do, track its usage, and revoke access at any time without affecting your main account credentials. They’re ideal for integrations and automations because they’re safer, easier to manage, and designed for programmatic access.
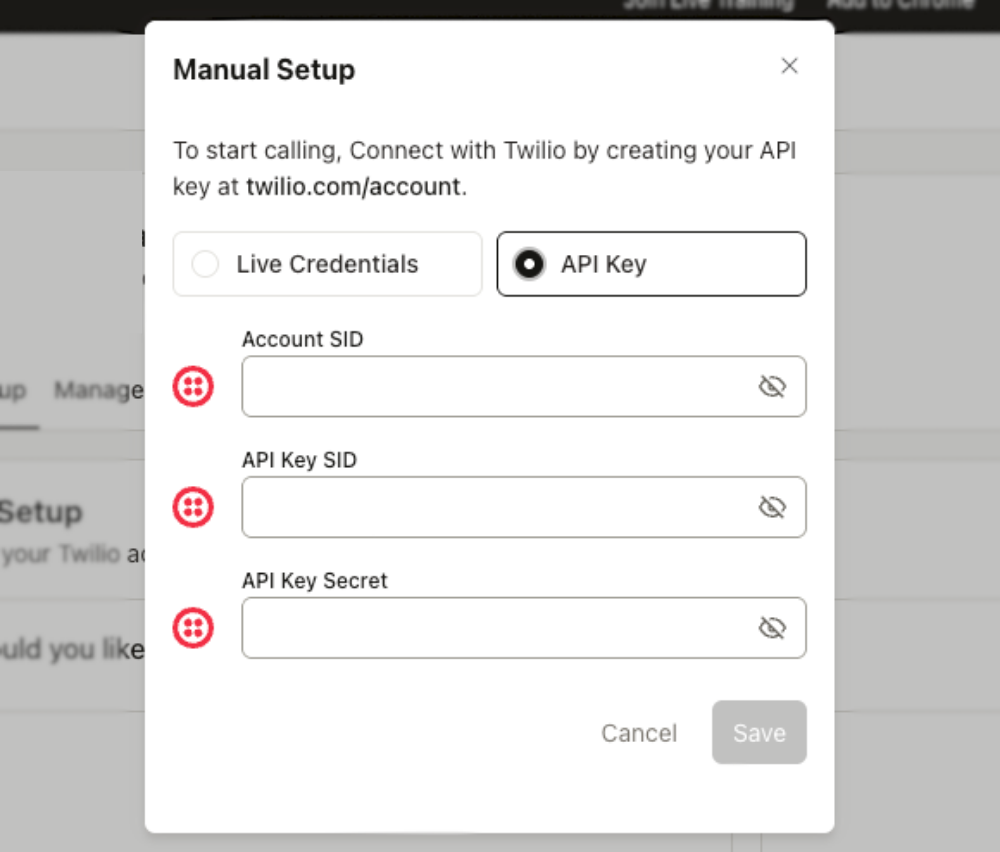
Users choose to integrate with API Key or live credentials.
Retrieve Twilio API Credentials
Before integrating Twilio with Seamless, account administrators need to obtain the necessary API credentials from Twilio:
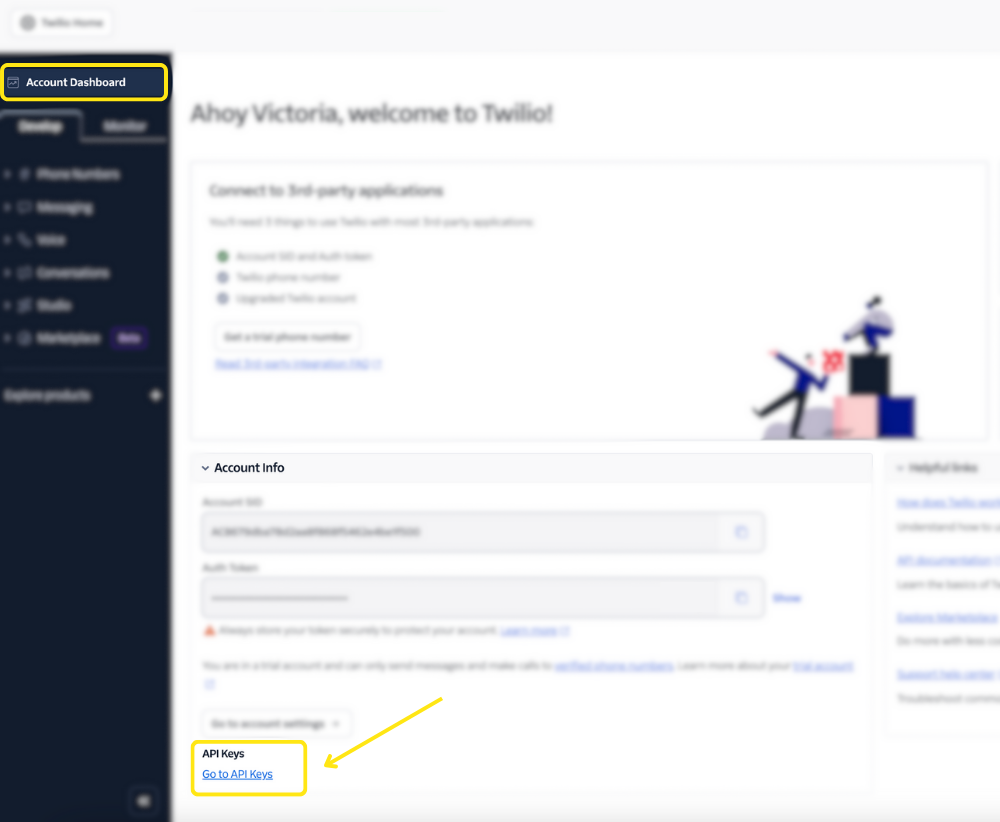
- Log into your Twilio account and navigate to the account dashboard (located in the top left corner).
- Locate the Account Info section in the middle of the page. Click the link for “Go to API Keys” to the bottom left of the section.
- You will need to retrieve the following API details to integrate with Seamless Connect.
- Account SID
- API Key (this is the API Key SID in Twilio)
- API Secret
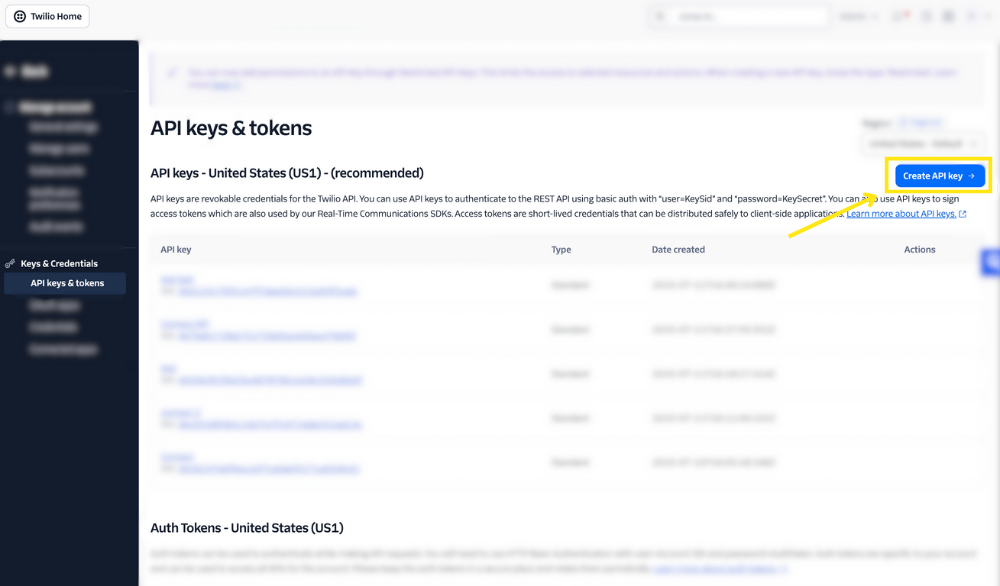
Gather the Account SID Code on the API Keys & Tokens page. Navigate to the Auth Tokens toward the bottom, and find the Account SID under “Live credentials.”
- Create a new API Key by clicking “Create API Key” in the top right corner.
You will need to create a new API Key in order to access the required API Secret Credential code, as it is only shown one time!
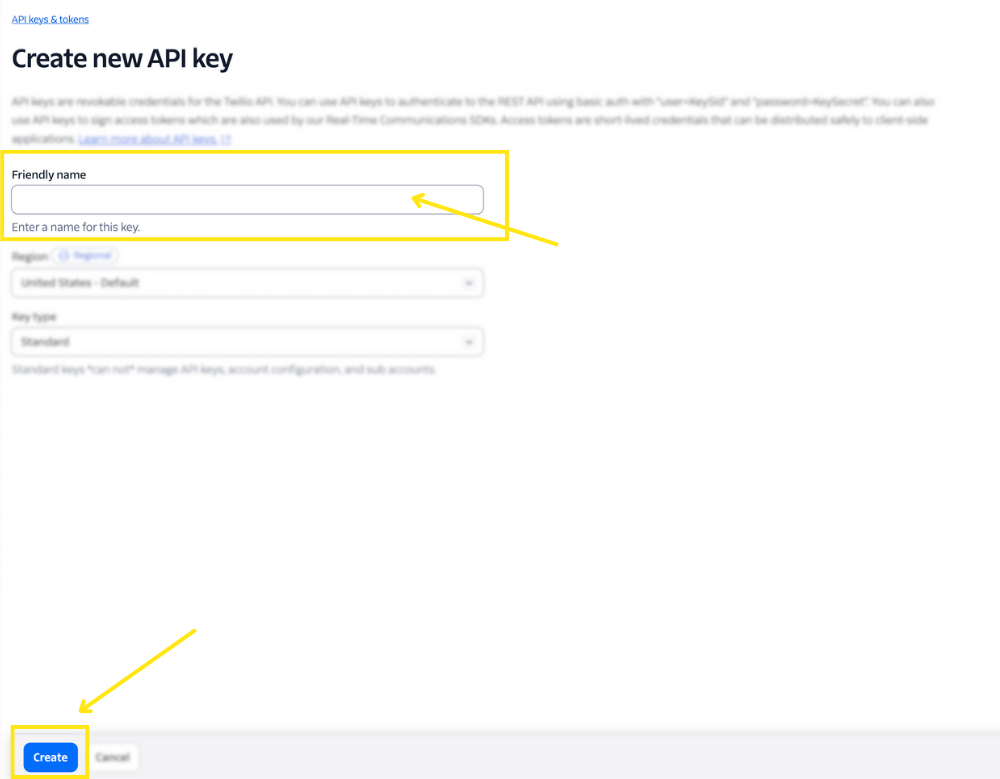
Name this new API Key and click “Create.”
(Optional) If preferred, create a main API key or a restricted API key with the appropriate access scopes for added security.
Note - You can use a previously created API Key, only if you have the Secret key that was originally shown saved to your records. Since this secret key is only shown once, it may require you to make a new key.
To learn more about the Twilo API Key Creation and key details, we recommend checking out this Twilio help article: Create API keys in the Twilio Console
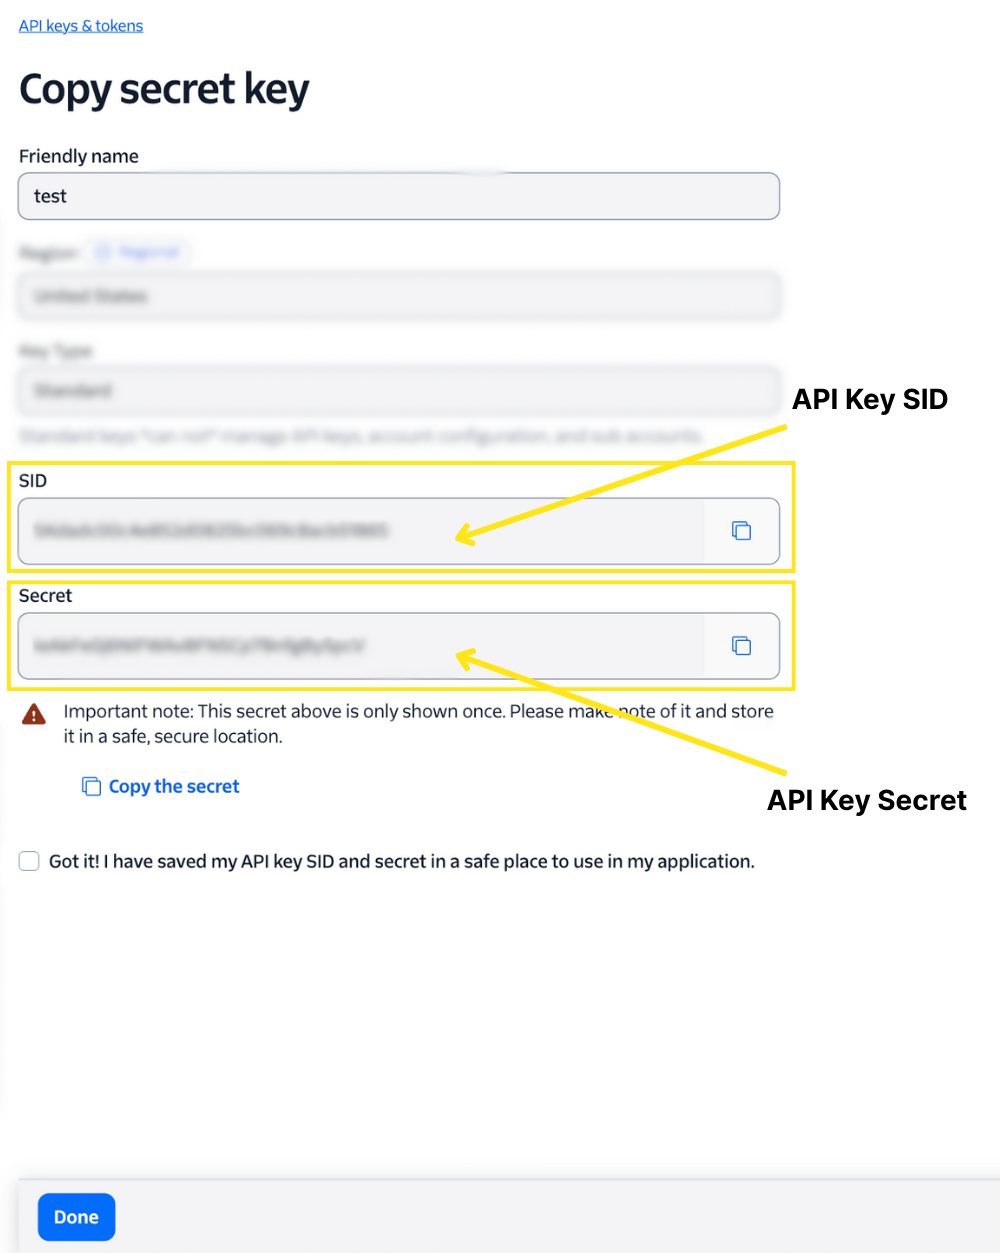
- You will be directed to a “Copy Secret Key” page. On this page, you will want to copy the API KEY SID code and Secret Code.
Be sure to copy Secret code, or note it down somewhere safe, as this will be the only time it is shared for this API Key.
- On the API Setup page in Seamless Call Settings, ensure the “Use an API Key” option is toggled on. Then paste the Account SID, API Key (the API Key SID Code in Twilio), and API Secret credentials into their respective fields.
7. Ensure the details are accurate to enable call logging and engagement tracking. Click Save.
To learn more about properly navigating and setting up the call feature, check out this Knowledge Base Article: Call Connect
By following these steps, your Twilio integration with Seamless will be successfully set up, enabling seamless call tracking and engagement insights. If you encounter any issues, refer to Twilio’s API documentation or reach out to Seamless support.