Call Connect Overview
Learn how to use Seamless Connect's Calling feature to streamline and personalize your outreach. This guide covers setup with or without Twilio, using call scripts, recording, logging dispositions, and leveraging bulk calling through the Connect screen.
Brand refresh in progress
We recently launched a new brand, so some images and videos may differ from what you see in-product. All workflows and guidance remain accurate while we update visuals.
Seamless Connect Call Feature is designed to optimize your outreach and help you connect with prospects more efficiently. With this feature, making and managing calls has never been easier.
Using Twilio
To use the calling features, you’ll need to connect through Twilio or ensure you’re using a computer with dialing access. Once set up, you’ll have complete flexibility in how you manage your calls, including selecting the number you want to call from (if you have multiple options) and choosing the phone number for each contact. To help you with calls at the best possible times, you’ll also be able to view the local time zone of each contact before dialing.
Without Twilio
Users can still log and track calls with disposition and sentiment in Seamless without the Twilio integration. You can use your mobile phone, or computer to make calls and log the activity from the call modal, or the Activity page.
Learn more about Call Connect Settings in this helpful article: Call Connect Settings
Enhanced Call Features to Improve Your Outreach
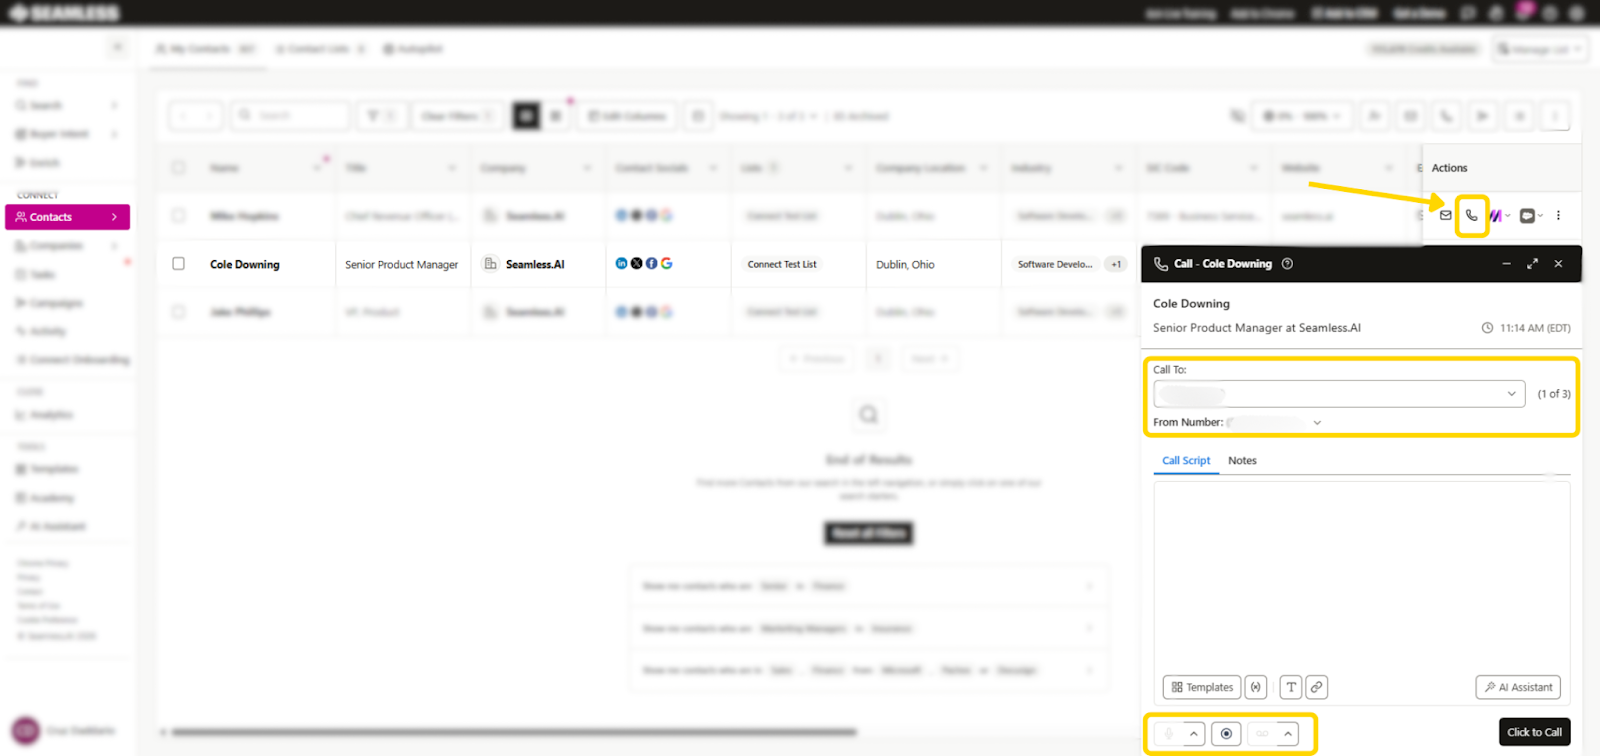
Once on a call, you’ll have access to several powerful tools to make conversations more productive. If you rely on guided scripts, you can pull up a call script directly within the platform, ensuring you stay on message. Additionally, you can take real-time notes during the call, allowing you to capture key details without switching between different applications.
If needed, you’ll also have the ability to record your calls, providing a reference for follow-ups, internal training, or compliance purposes. After each call, you can log call dispositions and sentiment, giving you a record of how the interaction went.
Tracking and Managing Calls in the Activity Tab
All of your calls will be logged within the Activity Tab, here you’ll gain visibility into your engagement metrics. From this view, you can track key performance indicators such as the total number of outgoing calls, how many calls were answered, and how many were marked as positive interactions. You’ll also be able to cross-reference call activity with email engagement to get a more comprehensive view of how prospects are interacting with your outreach efforts.
For each logged call, you’ll be able to review detailed records, including the call duration, timestamps, and recipient information. Any notes or descriptions you’ve added during or after the conversation will also be saved, allowing you to revisit details when following up.
Additionally, you can track overall engagement by reviewing the engagement type and status for each contact. This helps you identify patterns, such as whether certain prospects respond better to calls or emails, allowing you to refine your outreach strategy.
To further streamline your workflow, you can manually log call activities if needed, ensuring all interactions are documented. The Activity Tab also allows you to customize your table view, so you can arrange columns in a way that best suits your workflow. Plus, you can update a contact’s status to reflect where they are in your deal process, keeping your sales pipeline organized and actionable.
Optimize Your Workflow with Bulk Calling
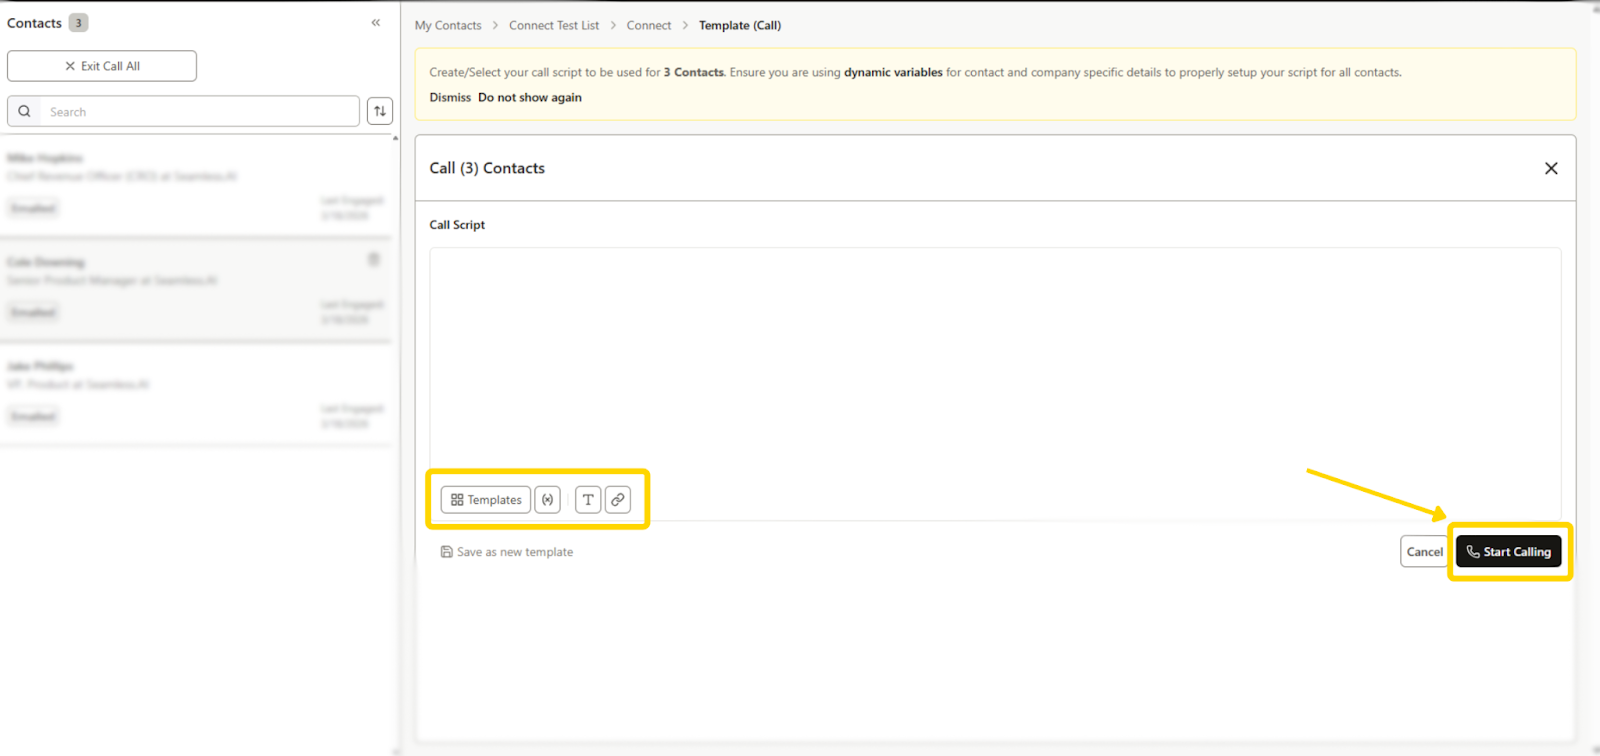
After applying filters to find the right contacts, click the phone icon in the top-right corner. This will take you to the Connect screen, where all selected contacts will be queued for calling.

Once in the Connect tab, click Call All. From here, you can type out a custom call script or load a saved template with dynamic variables personalized to each contact. When you're ready, click Launch to begin calling. This will load the first contact in the queue and populate the script with their information.
Click Click to Call to initiate the call. Before dialing, a pop-up window will appear with a “Compliance & Responsibilities” message. You must click Agree & Continue to proceed.

The call will then begin. Once the call ends, you’ll be prompted to:
- Select a Call Disposition (e.g., No Answer, Connected, Left Voicemail)
- Choose a Call Sentiment (e.g., Positive, Neutral, Negative)
- Add Call Notes to capture key takeaways

When finished, click Log & Next Contact to move on. A gray checkmark will appear next to each contact in the queue once their call has been completed, helping you keep track of progress.
Once you’ve completed all calls in the queue, a screen will appear stating “All engagements are complete.” From here, you can click to return to your My Contacts tab and continue managing your outreach.
Managing Call Tasks in the Tasks Dashboard
Call tasks in Seamless help you stay on top of your outreach by organizing scheduled calls into a manageable, actionable queue.
To create a call task, select Call as the task type, assign it to a contact, choose a relevant script template, and set a due date, time, and priority. Once created, call tasks appear in your Tasks Dashboard, where you can filter, sort, and prioritize them by urgency or deadline.
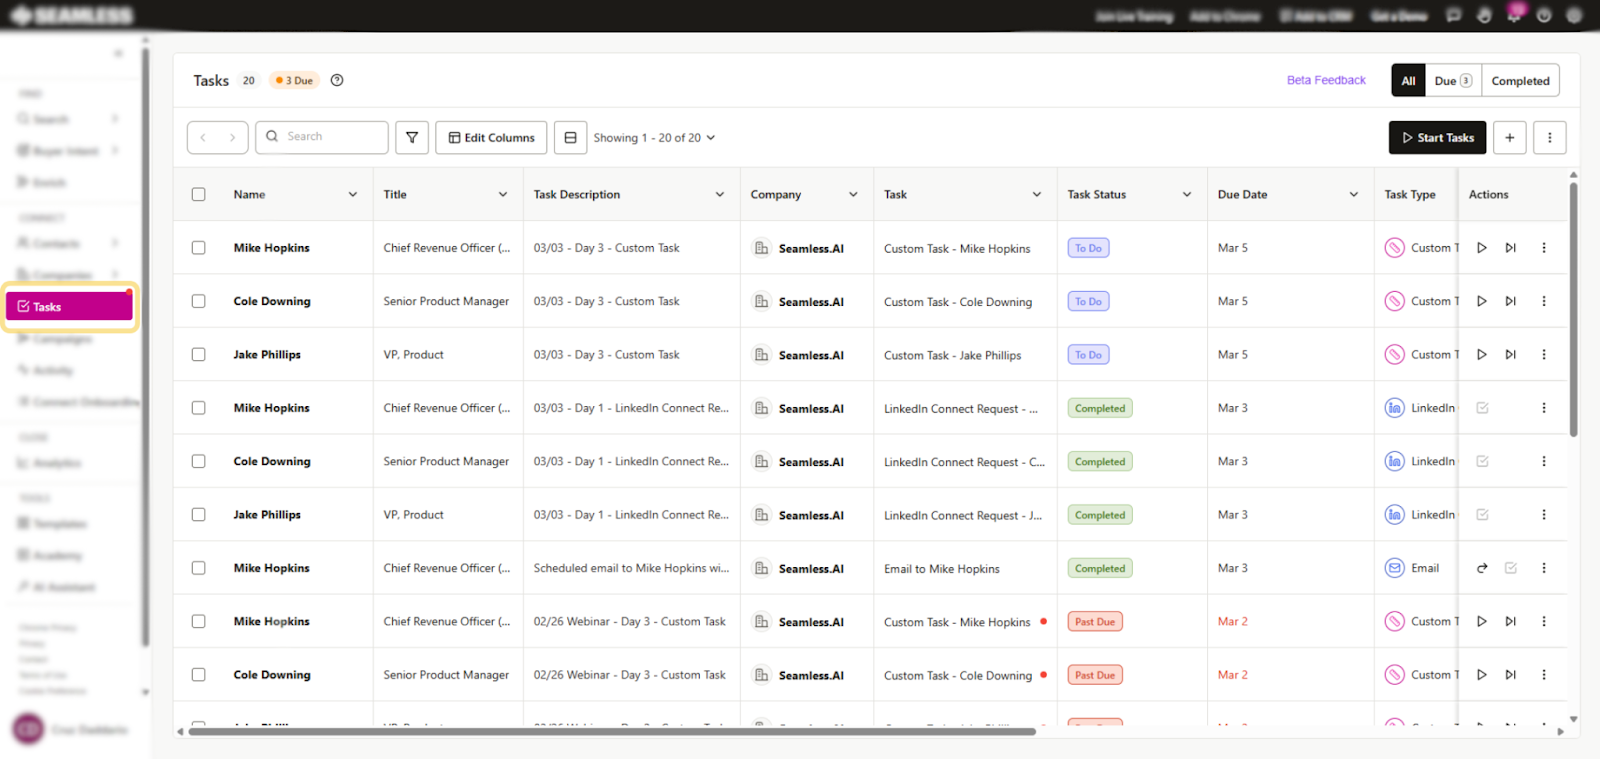
When you're ready to start calling, use the Start Tasks button to enter a focused queue—each call task will open with the contact's number, a call script, and logging tools, so you can complete your outreach efficiently and track progress in real time. This centralized approach ensures no calls slip through the cracks and provides visibility into completed and upcoming engagements.
If you are interested in learning more about Tasks, check out this article: Creating and Managing Tasks