Call Connect Set Up & Settings
Call Connect in Seamless allows users to manage call settings, assign phone numbers, and customize features such as call tracking, local dialing, and voicemail via integration with Twilio. This guide provides a step-by-step walkthrough to help account owners and admins configure their call settings for optimal use.
Accessing Call Connect Settings
To begin setting up Call Connect:
- Click on your initials in the bottom left-hand corner of Seamless.
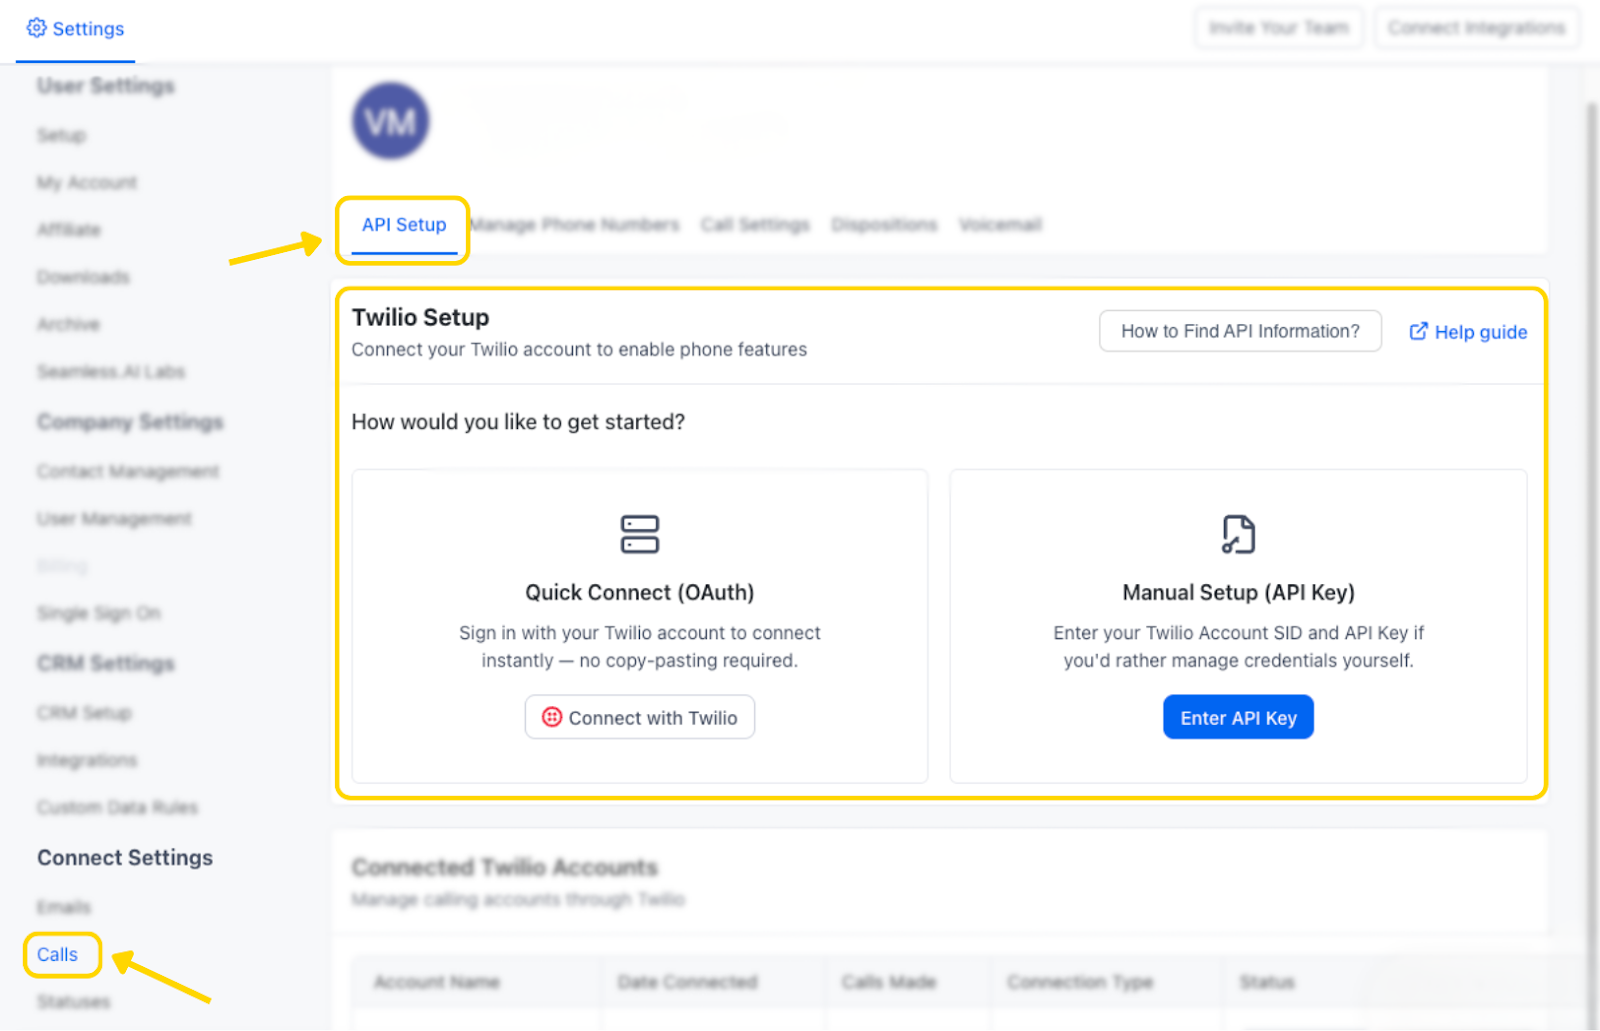
- Navigate to Settings > Calls to access Call Connect settings.
- Note that only account owners and admins have access to API Setup, Manage Phone Numbers, and Dispositions. All other users can access Call Settings and Voicemail to manage their preferences and save voicemails.
If your organization uses Twilio, standard users may still use calling features that have already been configured for them, but only account owners and admins can complete the Twilio setup and assign phone numbers.

Integrating Twilio
Only Seamless.AI Account Admins can set and integrate the Twilio API Key. If you are a Seamless.AI user or not integrating with a Twilio, you will not need to access this page. If you are a user in your organization, we recommend reaching out to your Seamless admin to complete the Twilio API Key setup.
If you are using Twilio for calling, follow these steps:
- Under the API Setup tab, enter your Twilio API Key (found in your Twilio account).
- Fill in the required Twilio credentials in the appropriate fields.
Please note, only Seamless account owners or admins have access to set up the Twilio integration. If you as an user in your organization, we recommend reaching out to the admin of your Seamless account to set up the Twilio API Key.
For more details on setting up Twilio API Key, please check out this article: Twilio API Key and Set Up
Assigning Phone Numbers
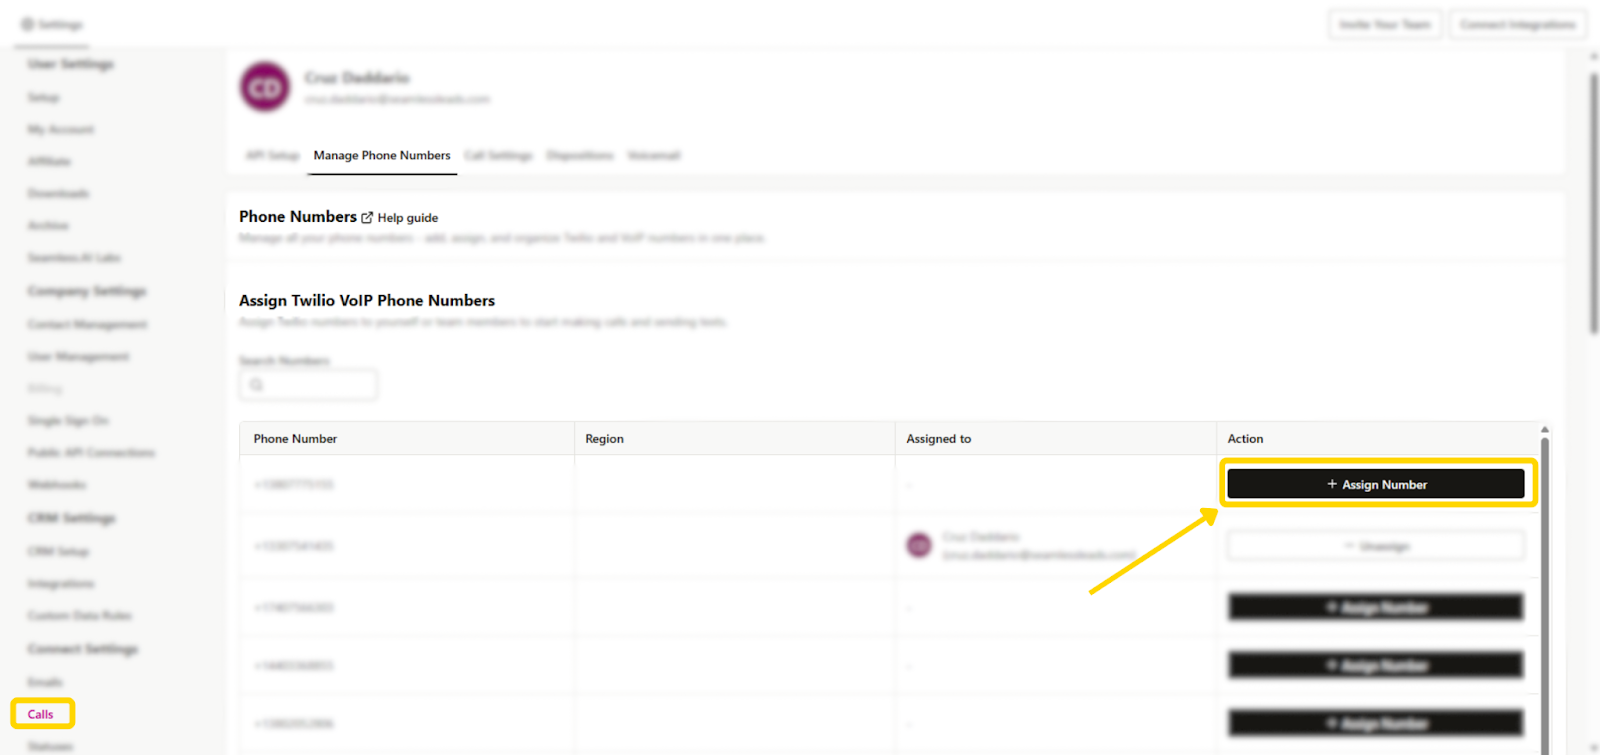
Admins can assign Twilio phone numbers to users in Seamless:
- Locate available Twilio phone numbers through the Manage Phone Numbers tab
- In the Action column, click Assign Number. Select a user from the list and confirm the assignment.
Please note, only Seamless.AI account owners or admins have access to set up the Twilio integration. If you as an user in your organization, we recommend reaching out to the admin of your Seamless account to assign Twilio numbers.
The user’s name and Seamless.AI account email address will populate in the Assigned To column.
To add new numbers to Twilio VoIP Options:
- Scroll down to the Add New VoIP Phone Numbers. Scroll or use the search feature to find available numbers. Select the desired number and click Add to Twilio Numbers.

Customizing Call Settings

Pass-Through Calling
- Users can enable Pass-Through Calling to allow calls to be routed through an external device (e.g., a cell phone).
- To activate, enter the desired pass-through phone number in the Call Settings tab.
To complete setup:
- 1. Locate the Pass-Through section in the Call Settings tab.
- 2. Enter the phone number you want calls routed to. This is typically your cell phone number or another device you will answer from.
- 3. A verification call will be placed to that number.
- 4. Enter the 6-digit code shown on your Seamless screen to validate the number.
- 5. Once validated, your pass-through number is ready to use.
User Edit Permissions
- Admins can enable or prevent users from editing specific call settings.
- To allow user edits, check the "Allow User Edit" box; to restrict edits, leave it unchecked.
Outgoing Call
- If enabled, all outgoing calls will automatically be routed to the passthrough number for that user.
- Admins can allow users to edit this by checking the "Allow User Edit" box.
Incoming Call
- If enabled, all incoming calls will automatically be routed to the passthrough number for that user.
- Admins can allow users to edit this by checking the "Allow User Edit" box.
Recording Settings
- Recording Settings: If enabled, voice call recording will be available to users for all outgoing and incoming calls.
- If “Record all calls by default” is selected, all outgoing and incoming calls will be recorded.
Local Dialing
- Local Dialing must be enabled for users individually.
- Local Dialing: If enabled for a user, they will have the option of using a number with a local area code matching the contact’s location. To enable local dialing for specific users, find the user’s name in the settings, Toggle on Local Dialing.
Select Phone Types to use in Connect
- Users can select which phone number types they want to use for calling.
- The selection here will drive the types of numbers available when making calls. Users can choose between contact only, company only, or contact and company phone numbers.
Set Total AI Limit for Phones in Connect
- Users can set the minimum Total AI score they want to use for calling.
- Any phones below the set threshold will not be displayed when making calls.
Set Priority Order of Data in Connect
- Users can set desired priority of phone types they want for calling (Mobile Phone, Contact Phone, Company Phone)
- The order set here will determine the order of available numbers displayed when making calls.
Dispositions & Tracking
Dispositions and Sentiments are recorded after calling a contact through Call Connect, or manually logging a call, offering additional notes and insights to track previous calls. Admins can set up call tracking, dispositions, and sentiments to log call outcomes.
Call Tracking
Admins can determine if Disposition or Sentiment is required to log a call. Admins can allow users to edit this by checking the "Allow User Edit" box.
- If Require Disposition is toggled on, users must select a disposition in order to log a call.
- If Require Sentiment is toggled on, users must select a sentiment in order to log a call.

Call Dispositions & Sentiments
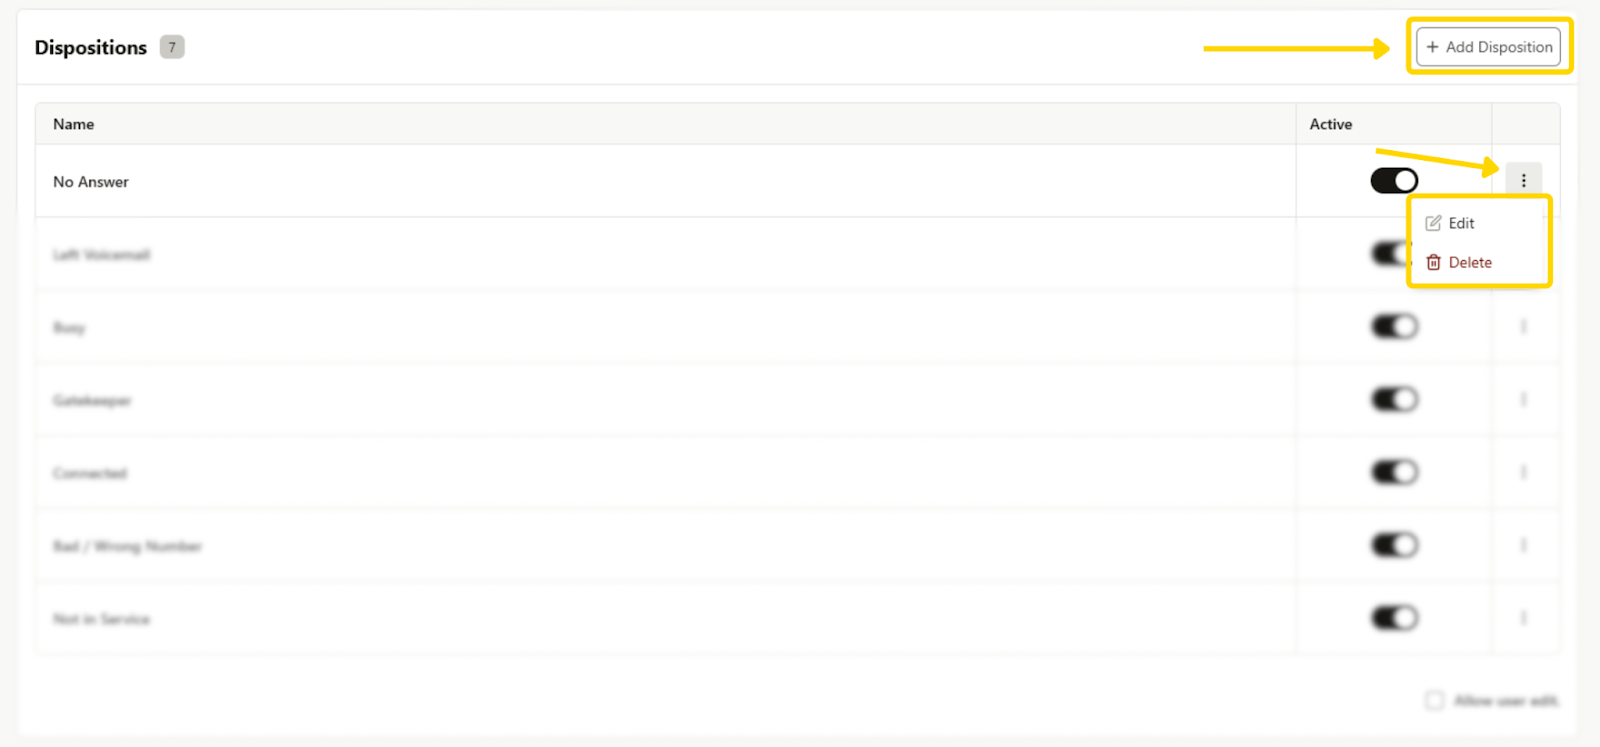
- Navigate to the Dispositions tab.
- Enable or disable the requirement for users to log dispositions and sentiments after a call.
- Create a new disposition by clicking + Add Disposition, entering a label (e.g., “No Answer” or “Gatekeeper”), and saving it as active.
- Edit or delete existing dispositions by clicking the three-dot menu next to a disposition.
Sentiments help users record the overall mood or receptiveness of the call, such as whether the conversation was positive, neutral, or negative.
Voicemail Setup
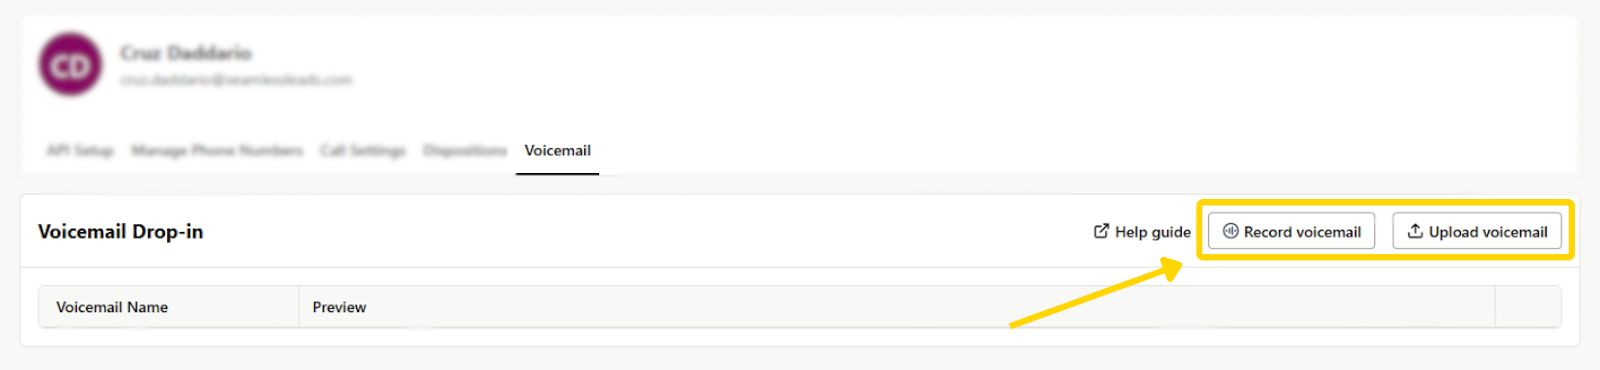
Admins can configure voicemail settings within Call Connect:
- Record a New Voicemail: Click Record, allow microphone access, record your message, and give it a title.
- Upload a Voicemail File: If you have a pre-recorded voicemail, use the Upload option to add it to your settings.
By following these steps, admins can ensure seamless call management, logging, and tracking within Seamless. If you have additional questions, refer to the support knowledge base or contact customer support.