Creating and Managing Tasks
Learn how to create, organize, and manage outreach tasks in Seamless. This guide covers task types, prioritization, filtering, and using the Tasks Dashboard to stay on top of follow-ups and streamline your sales workflow.
Brand refresh in progress
We recently launched a new brand, so some images and videos may differ from what you see in-product. All workflows and guidance remain accurate while we update visuals.
The Tasks feature allows you to complete emails, calls, followups and more, ensuring you never miss an important engagement. With this tool, you can create structured tasks, prioritize them, and manage all upcoming outreach efforts in one location.
Once a task is created, it will be stored in your Tasks Dashboard, where you can view, organize, and complete your assigned tasks. Whether you’re following up on a prospect or setting reminders for future interactions, the Tasks page keeps everything streamlined and actionable.
Accessing the Tasks Feature
You can access your Tasks by navigating to the Tasks page on the left-hand panel if it’s open. If the panel is closed, simply click the box with a checkmark to open the page.
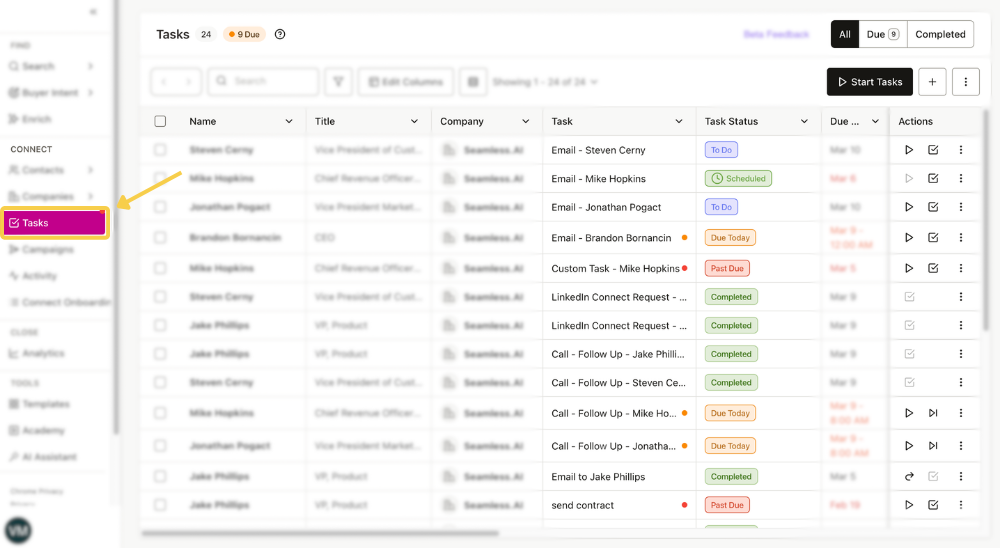
Inside, you’ll find your Tasks Dashboard, where all of your scheduled tasks are listed with relevant details, including due dates, priority levels, and related contacts.
At the top right of the Tasks Dashboard, you’ll see three filter tabs you can use to control your view:
- All – Displays every task you’ve created or completed.
- To Do – Shows tasks that are still pending.
- Completed – Displays all tasks that have been marked finished.

Below these tabs, you’ll also find additional tools:
- Start Tasks – Launches a queued task experience.
- ➕ Button – Create a new task manually.
- Three Dots – Access bulk actions like completing or deleting tasks.
Creating a New Task
To create a new task, click the "+" icon in the top right corner. Keep in mind that tasks can only be created for contacts already found with Seamless.
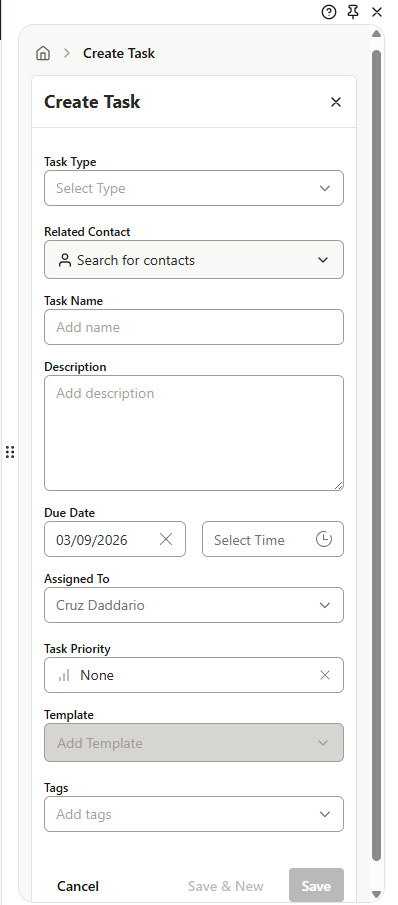
When creating a task, a setup module will appear where you can:
- Select a Task Type – Choose between an Email, Call, Contact Research, LinkedIn, or create your own Custom task.
- Assign a Contact – Select the prospect the task is related to.
- Name the Task & Add a Description – Provide details about the task.
- Set a Due Date & Time – Schedule when the task needs to be completed.
- Choose a Priority Level – Mark the task as Low, Medium, or High Priority for better organization.
- Select a Template – Every task requires a call or email template to be selected.
- Tag the Task – Use pre-created lists to categorize tasks for easy tracking.
Once all details are entered, you can either Save & New to create another task or Save to finalize it.
Tracking and Managing Tasks in the Dashboard
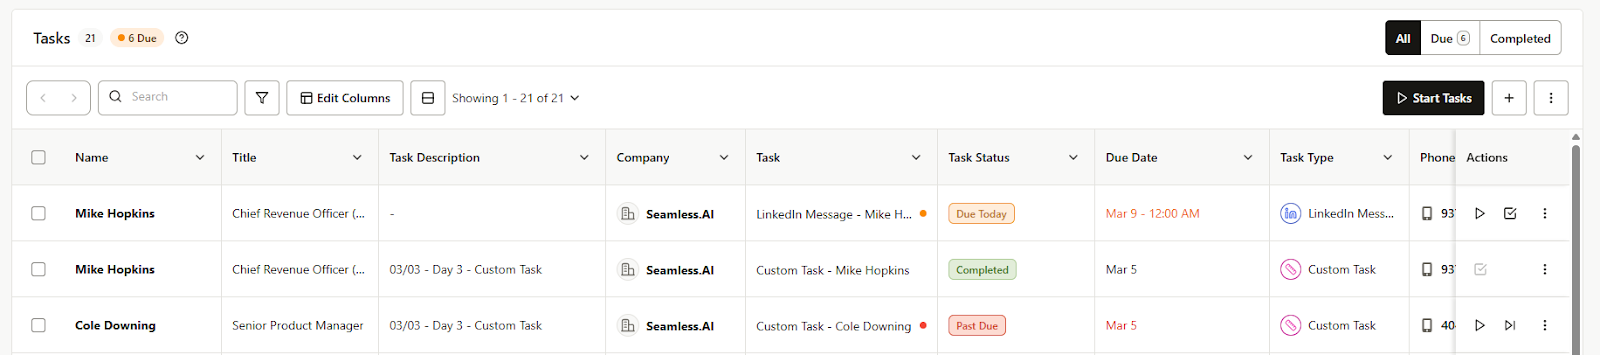
All created tasks will be stored within the Tasks Dashboard, giving you a complete overview of your pending and completed tasks. This view allows you to stay on top of your scheduled efforts while ensuring that no important follow-ups are missed.
From the dashboard, you’ll be able to track task details, including:
- Task Name – The name assigned to the task.
- Due Date & Time – When the task is scheduled for completion.
- Related Contact – The prospect or client associated with the task.
- Priority Level – Whether the task is marked as Low, Medium, or High Priority.
- Task Status – Indicates whether the task is pending, in progress, or completed.
- Task Type – Specifies whether the task is for a call or an email.
- Date Completed – Displays when the task is finished.
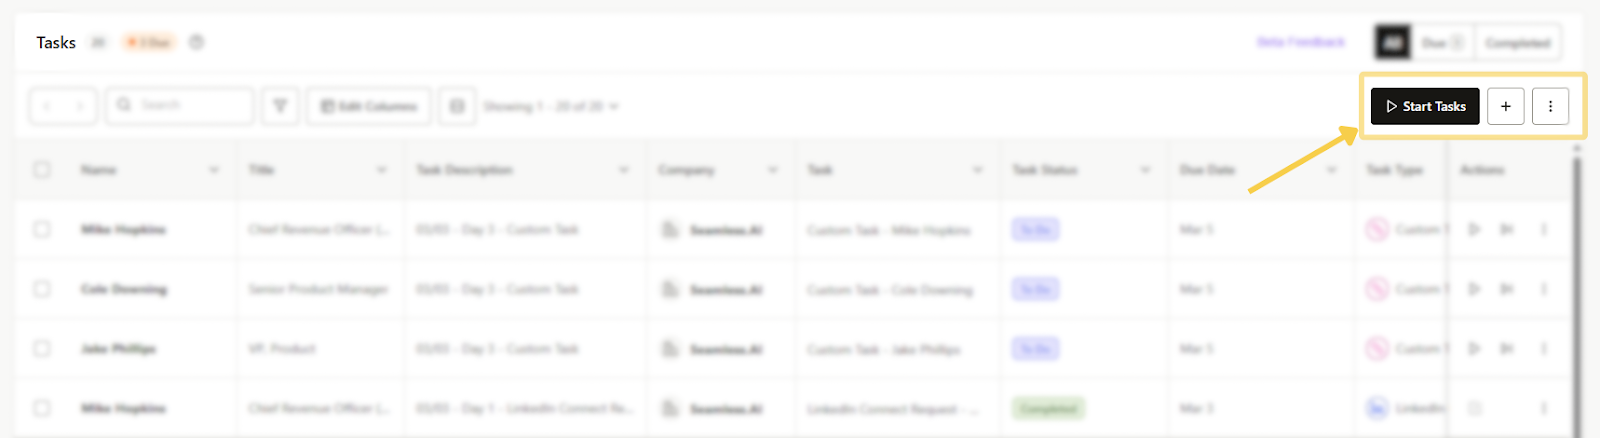
To begin working through your scheduled tasks, click the "Start Tasks" button in the top right, which will queue up the tasks that need to be completed.
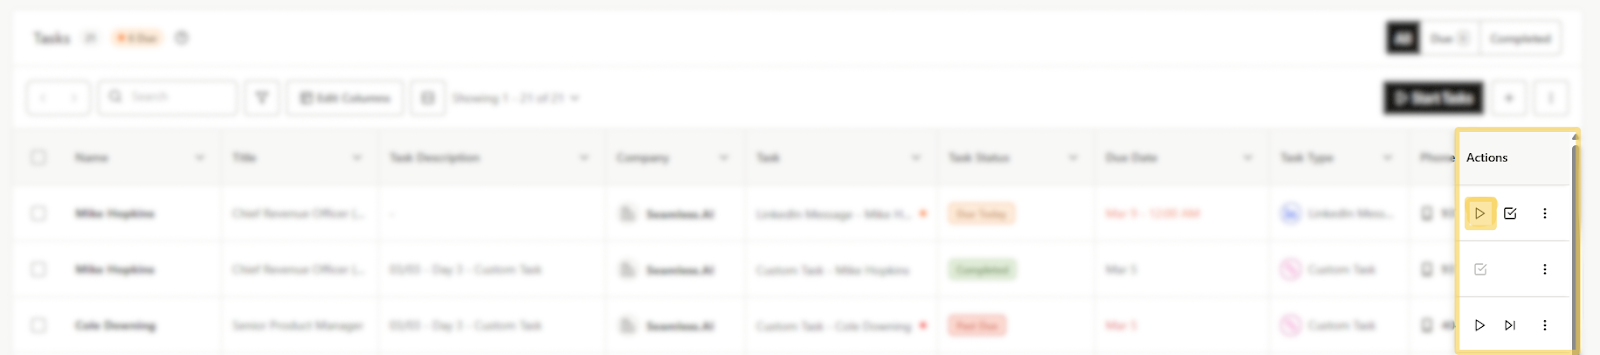
Within the Actions column, users can individually:
- Complete a Task – Mark the task as done.
- Create Follow-Up Task – Quickly add a follow-up tied to the contact.
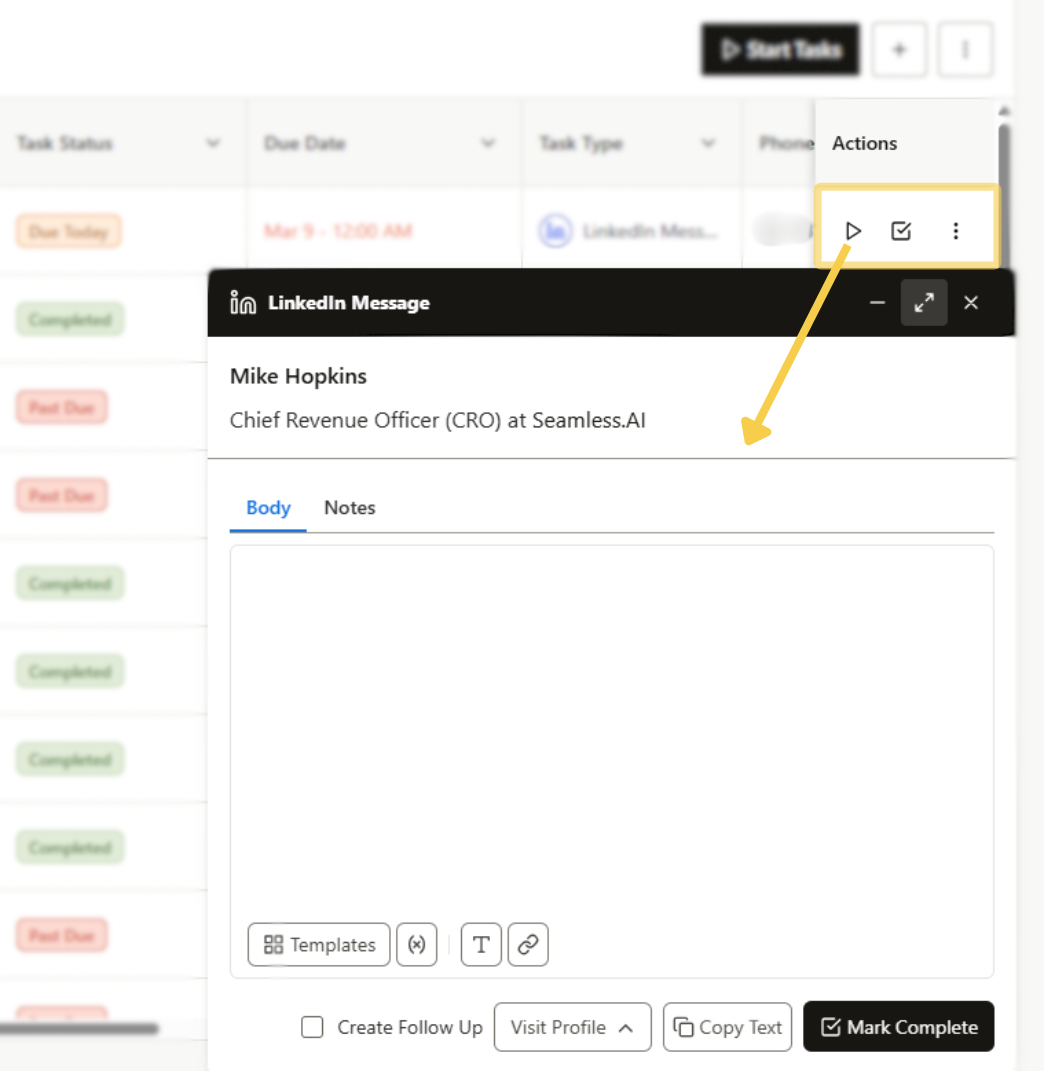
- Play Icon – Opens a module tailored to the task type (email, call, etc.) so you can complete the activity.
- Three Dots – Use to duplicate the task or take additional actions.
Filtering and Customizing Tasks
To help manage outreach efforts efficiently, the Tasks Dashboard includes filtering and customization options. Users can:
- Filter tasks by Task Name, Task Type, Due Date, Task Status, Contact, Priority, Last Contacted, Engagement Status, Contact Status, and Completed At to quickly drill into specific task categories and timelines.
- Customize the layout of the dashboard by rearranging columns to fit their workflow.
Start Tasks: Work from a Focused Queue
Once you’ve created your tasks, you can streamline your workflow by clicking the “Start Tasks” button in the top-right corner of the Tasks Dashboard.
This will launch you into a dedicated queue, presenting all tasks that are currently pending and need to be completed. Within this view, you’ll see:
- Task Name – The title you assigned to each task.
- Priority – Low, Medium, or High to help you triage.
- Due Date – When the task is scheduled for completion.
As you move through the queue, each task module will dynamically adjust based on the type of task:
- Email Tasks – The email editor module will appear so you can write or review your outreach.
- Call Tasks – The call module will populate with the contact’s number, script, and call logging tools.
- LinkedIn, Research, or Custom Tasks – The appropriate workspace will appear with relevant instructions.
If you encounter a task you no longer want to complete, you can simply delete it from your queue using the in-line controls, keeping your workflow clean and distraction-free.