Setting up Email Engagement
Seamless Connect allows users to streamline their outreach by sending emails directly within the platform. To get started, users need to connect their email account to enable emailing capability. This guide will walk you through the quick and easy steps to integrate your Gmail and Outlook email.
Accessing the Email Connection Settings
To connect your email, start by navigating to your Settings within Seamless. You can access the email connection settings in two ways:
Click into Emails from the main Settings menu.

If you’re already inside your full Settings panel, find Emails under Connect Settings.
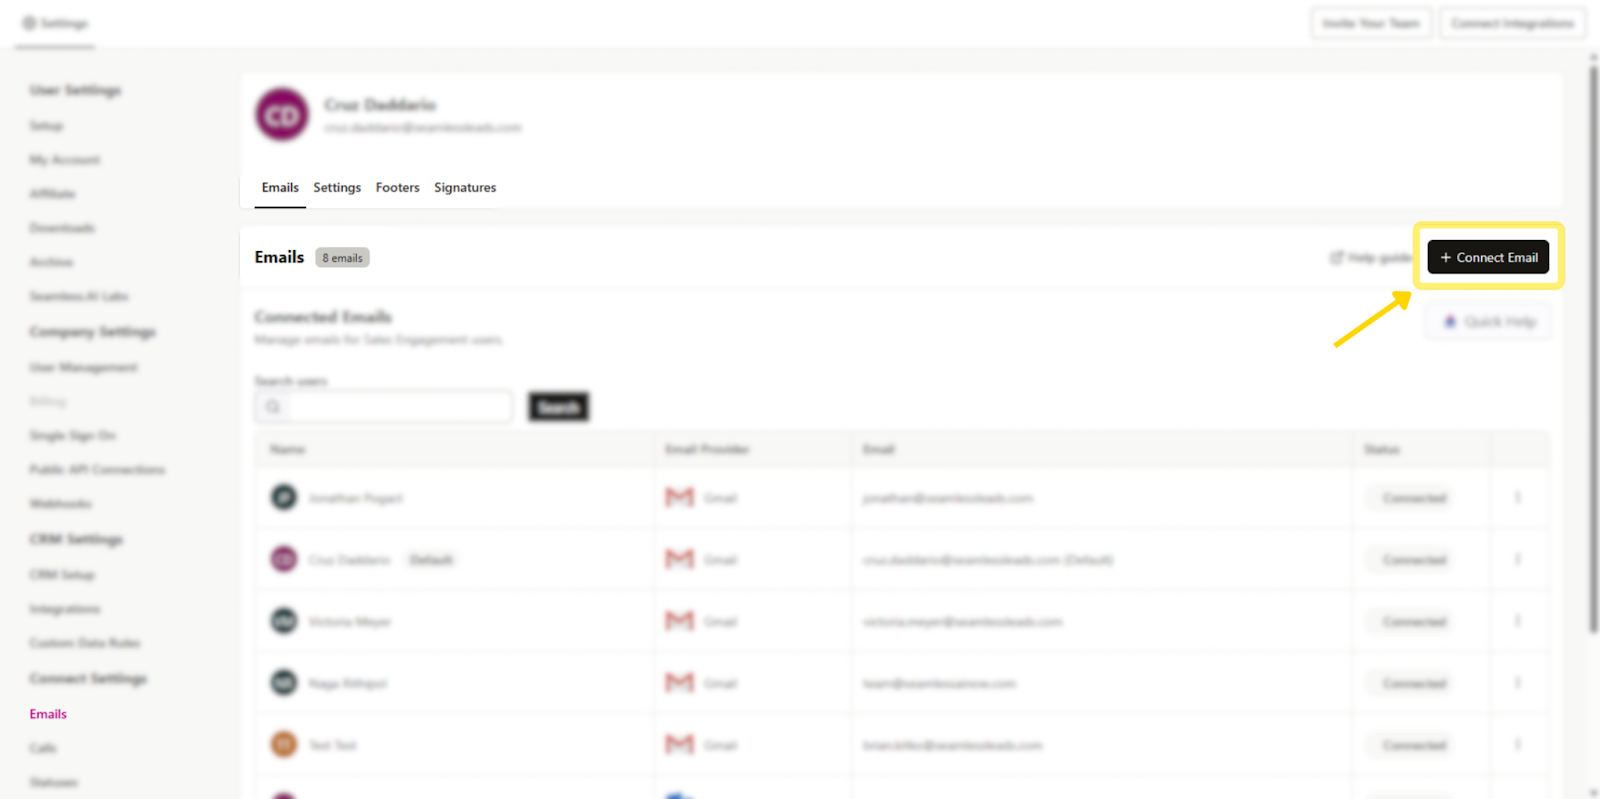
Connecting Your Email
Once inside the Emails tab, click “+ Connect Email” to begin the setup process. A window will appear, giving you the option to connect a Gmail or Outlook account.
After selecting your preferred email provider:
- A new window will open prompting you to choose the email account you want to connect to.
- You will need to review and agree to the Privacy Policy before proceeding.
- Once confirmed, allow Seamless access to enable email functionality within the platform.
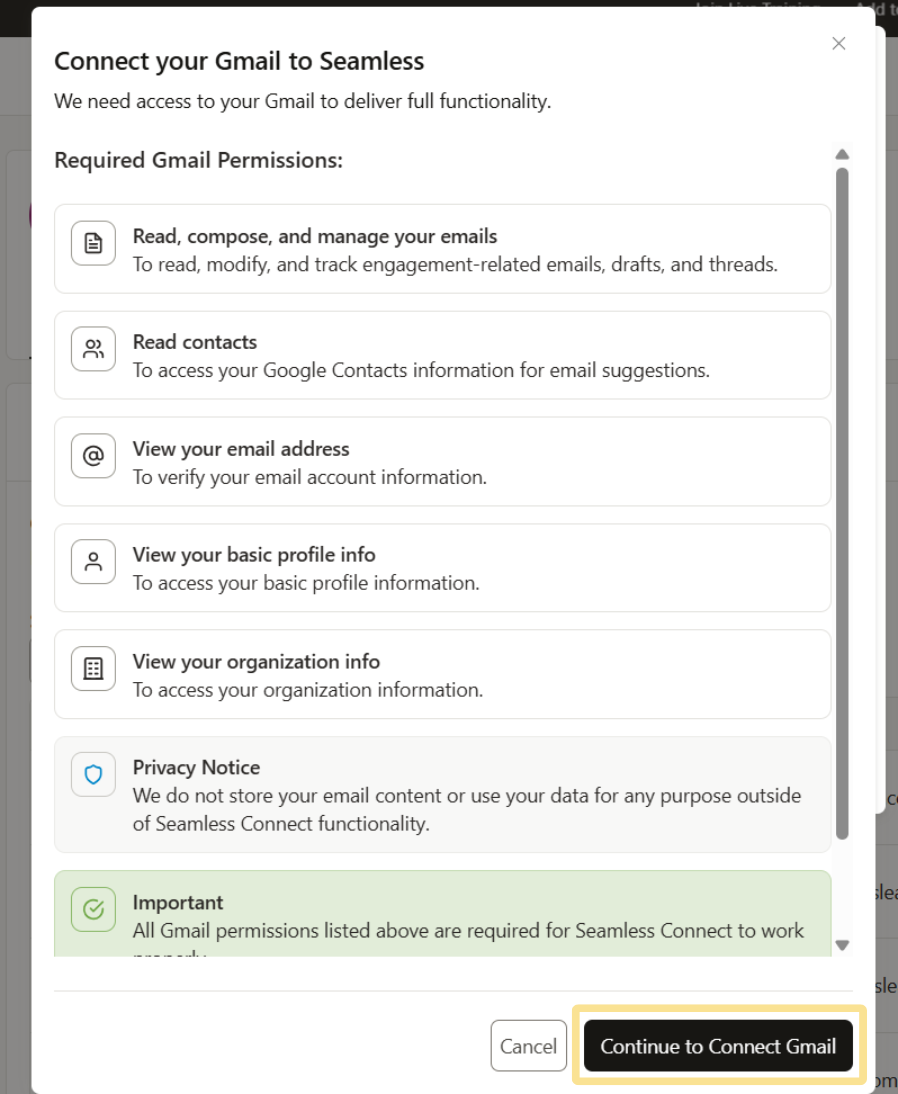
Once completed, your email will be officially connected, and you’ll be ready to send emails directly through Seamless’s platform.
Setting Up Your Footer (CAN-SPAM Compliance)
After successfully connecting your email, you will see a pop-up prompting you to set up your email footer. This step is required to comply with CAN-SPAM regulations and ensure proper email formatting.

Footers are required to be added to any email sent in bulk or automated as part of an email campaign. The footer is automatically included in every email sent from the platform, ensuring compliance with email regulations and maintaining deliverability. Without a properly configured footer, users will not be able to utilize the email engagement tool.
Footer Setting Preferences
Users can customize when email footers are included and customized for campaigns.
Automatically Include Email Footer: This setting controls whether Connect automatically adds the default email footer and unsubscribe link to outgoing emails.
- If enabled, you can choose whether the footer is added to all emails or only to campaign and bulk emails.
- If disabled, Connect will not automatically include a footer, which means users must manually add footer content and unsubscribe language when needed.
Enable Campaign Footer Settings: This setting controls whether footer settings can be customized at the individual campaign level.
- If enabled, organization members can modify footer settings for specific campaigns.
- If disabled, the same footer settings will apply across all campaigns, creating a more standardized experience.
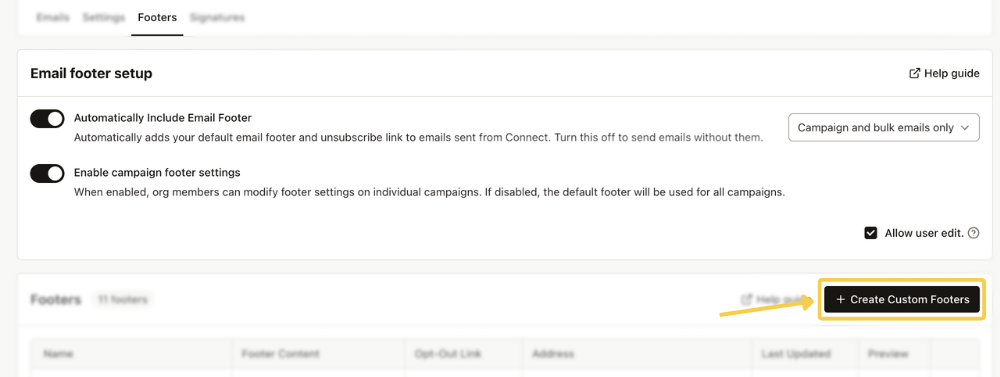
Create a New Footer
Click “Create Custom Footer.”
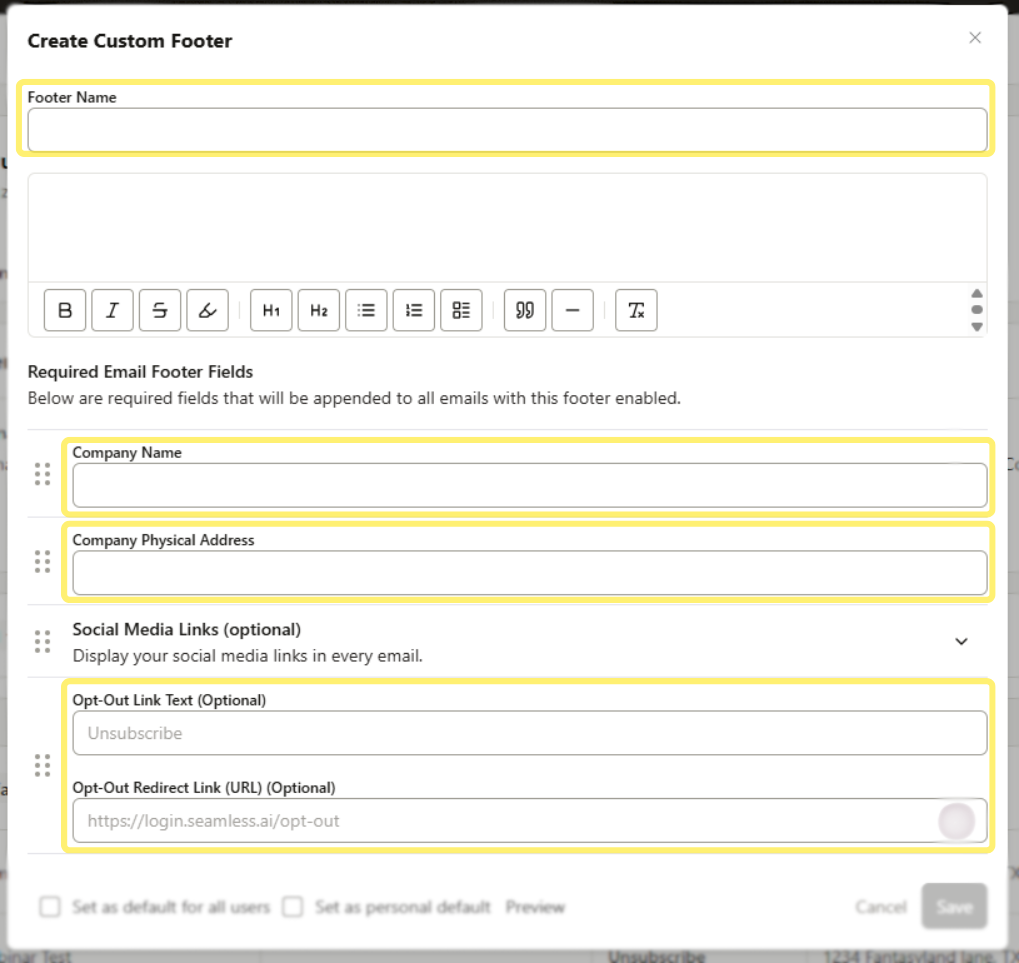
Required Email Footer Fields Include:
- Your Company Name
- Your Company Physical Address
- Opt Out Text and Link - Seamless provides an opt out link for you by default. However, if your organization has their own opt out link, you can use that one to overwrite the option Seamless provides.
Set a Footer as default. Seamless Owners and Admins have the ability to set a Footer as default for their other users.
Email Set Up Troubleshooting
Outlook connect keeps defaulting to the wrong account
If Outlook keeps auto-selecting your main Microsoft account (instead of letting you choose a different mailbox), it’s usually because Outlook is already signed in and defaulting to that account.
Fix:
- Close the Outlook desktop app completely.
- Open Outlook in your browser: https://outlook.live.com/mail/0/
- Add or sign into the other mailbox you want to connect (ex: sales@yourdomain.com) in the web version.
- Go back to Seamless AI and click Connect Outlook again.
You should now see a prompt to choose from multiple Outlook accounts. Select the correct one.