Scheduled Emails
Learn how to identify scheduled emails, use filters to view them, customize your table layout, and take action directly from the Activity Page. Discover how to send now, reschedule, edit, or cancel scheduled emails to keep your outreach running smoothly and on schedule.
Viewing Scheduled Emails in the Connect Activity Page
The Activity Page in Seamless Connect gives you a complete view of all your email activity, including scheduled emails. Whether your emails are manually scheduled or automatically scheduled as part of a campaign, you can easily view, filter, and manage them directly from this page.
Emails can be scheduled manually, by clicking the drop down next to the email send button, or as part of a campaign. Scheduled emails allow senders to determine the date and time they want the email(s) to be sent.
Where to Find Scheduled Emails
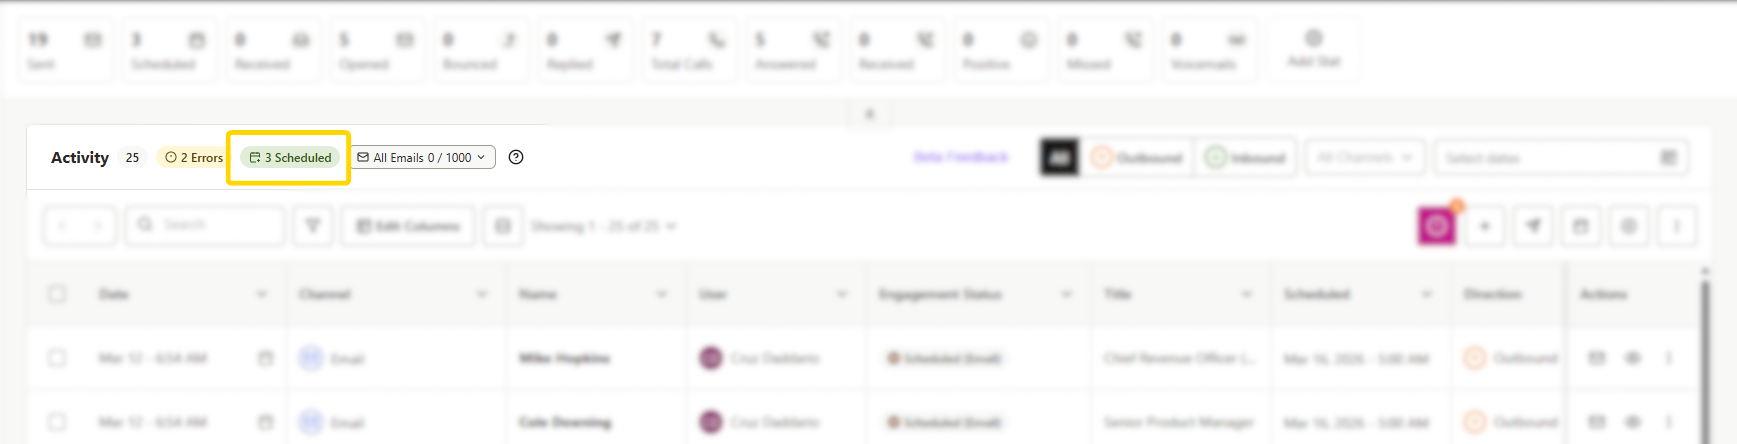
When you have emails scheduled to send later, a Scheduled Emails icon appears near the top left of your Activity Page.
- This icon displays the number of emails currently scheduled (i.e., “3 Scheduled Emails”).
- Clicking this icon will automatically filter your Activity Table to show only those scheduled emails for quick review.
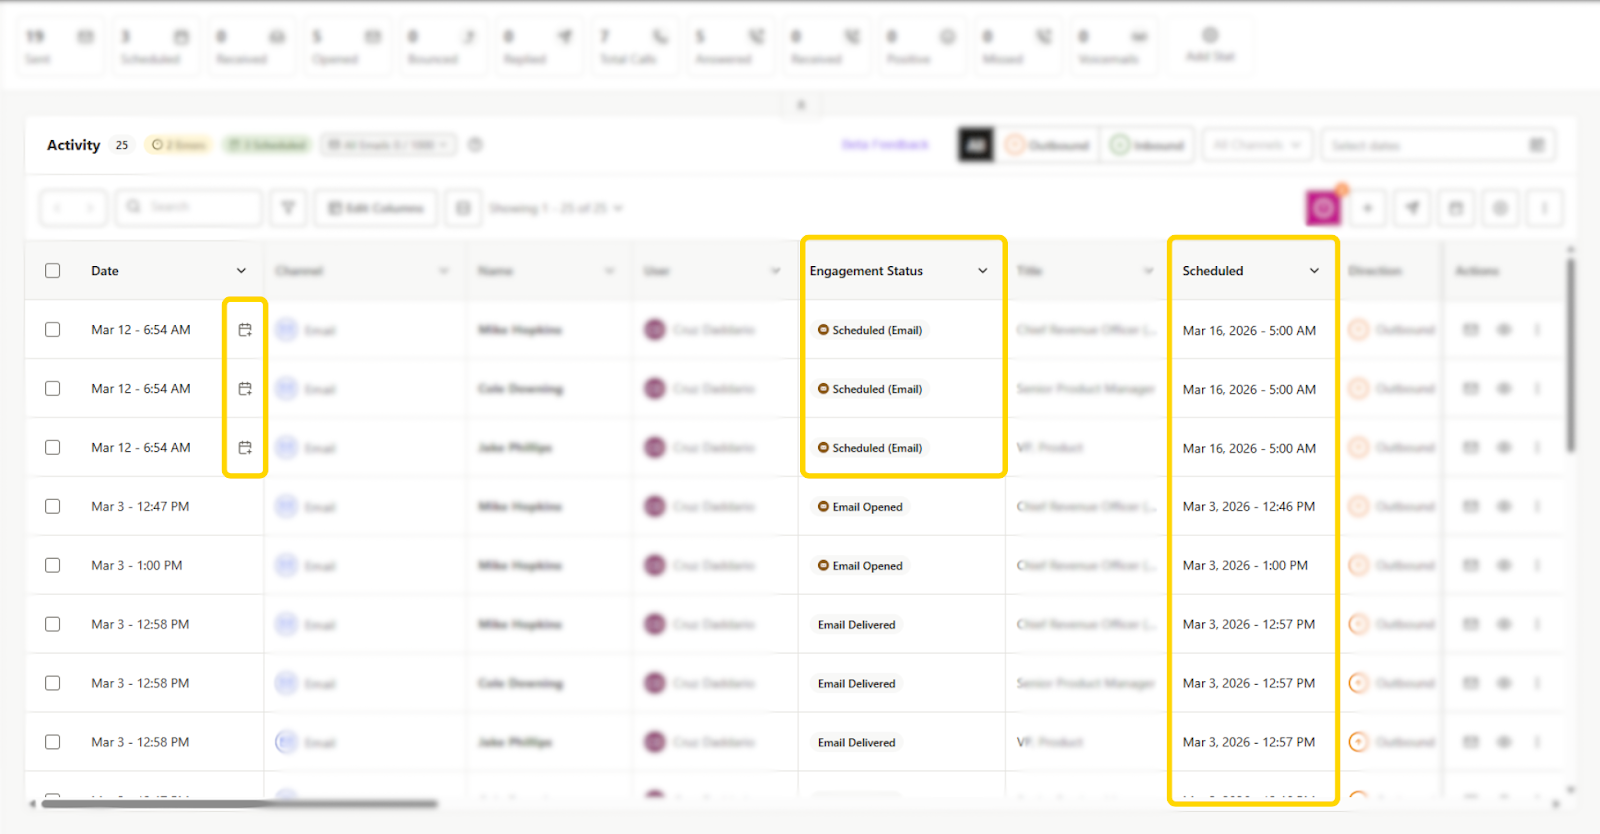
Scheduled emails are also listed within your Activity Table, alongside sent and outbound emails.
You’ll see:
- The scheduled date and time in the “Date” column. A scheduled email icon is listed for quick reference that it is a scheduled email.
You can also add a Scheduled column to your table layout to view emails that are:
- Scheduled for a specific date and time.
- Delayed or queued to be sent later.
Note: Ensure your “Scheduled” column is displayed in your Dynamic Table view. To do this, customize your table view by clicking Customize Layout, then add or reorder columns as desired.
Filtering Scheduled Emails
You can filter your Activity Table to show only scheduled emails:
- Click the Filter icon in the top-right of the table. In the Scheduled section
- In the Scheduled section, sort emails by “Only Scheduled” or by newest to oldest or oldest to newest to organize your view.
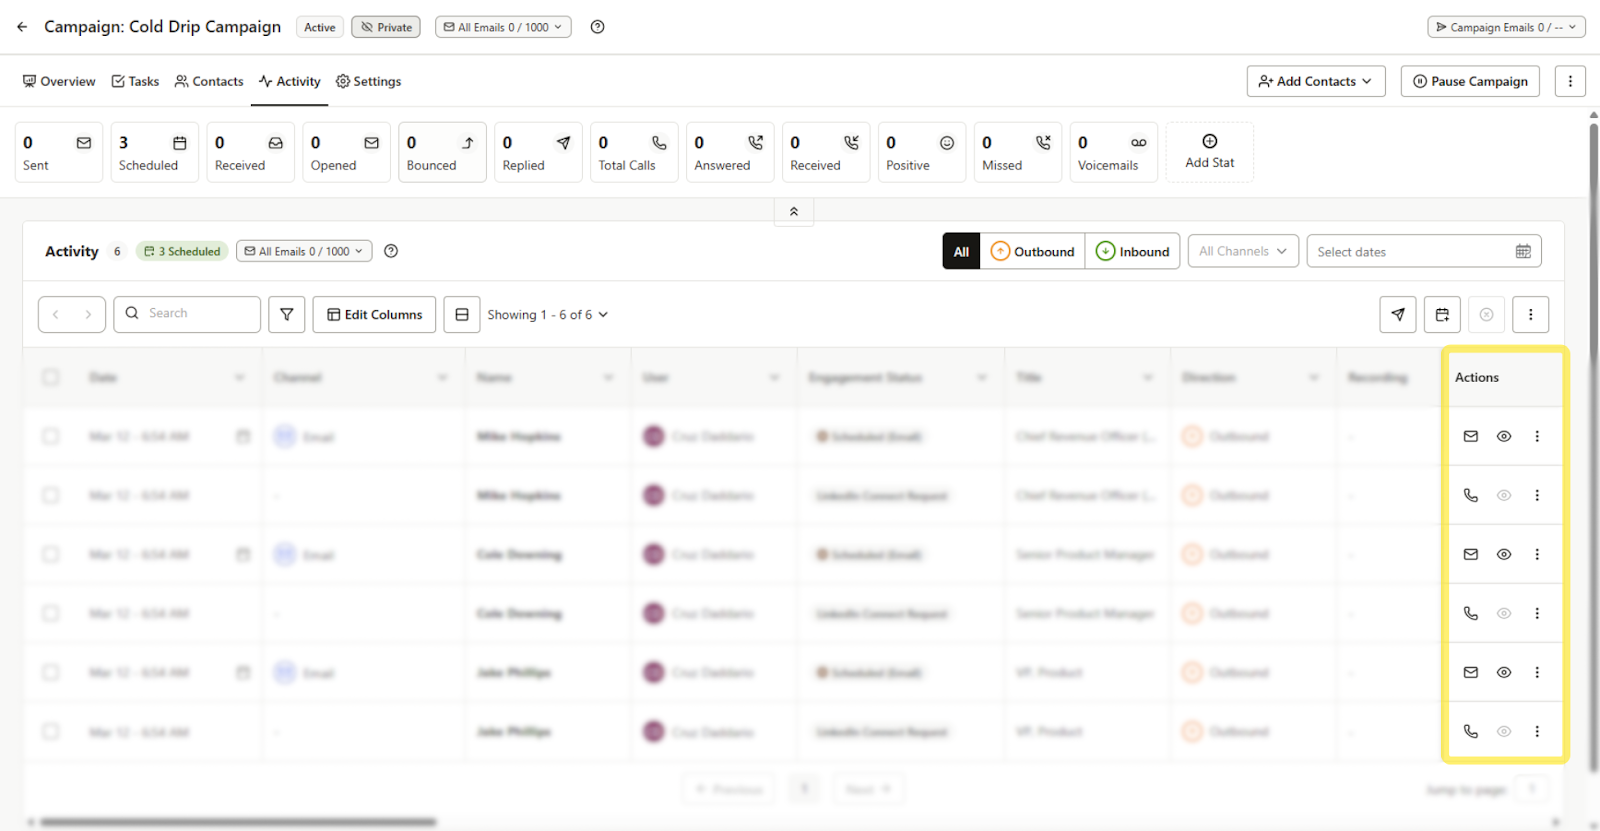
Managing Scheduled Emails
From the Actions column (three dots menu) on the Activity Table, you can manage individual or multiple scheduled emails:
- Send Now: Send the scheduled email immediately.
- Reschedule: Update the date and time using the calendar and time selector.
- Edit: Open and modify the email’s content before it sends.
- Cancel: Remove the scheduled email entirely (a confirmation prompt will appear).
You can also select multiple emails at once to bulk edit or cancel them.
Viewing a Scheduled Email
To preview or proof a scheduled email:
- Click the view icon in the Actions column, or click View Email within the email modal.
- You’ll see a banner at the top that says “An email is already scheduled for this contact.” From here, you can:
- View the scheduled message.
- Send now, reschedule, or delete the email.
If the scheduled email is part of a thread, you can click View Thread to open the full conversation. The same scheduled banner will appear at the top for context.
The Activity Page makes it easy to monitor and manage all scheduled emails in one place. With real-time filters, icons, and management options, you can quickly see what’s queued, when it will send, and make updates on the fly, ensuring every message goes out at the right time.