Managing Notification Settings in Seamless.AI Connect
Seamless.AI Connect provides flexible notification options so you can stay informed about important activities without being overwhelmed.
You can set notifications at two levels:
- Email Settings – For overall email-related notifications.
- Campaign Settings – For notifications tied to a specific campaign.
Viewing and Managing Notifications
Notifications appear in their relevant sections and in the bell icon at the top-right corner of Connect. The bell icon displays recent activity, including sent and received emails.

You after viewing a notification users can choose to:
Mark all as read – Clears the notification count and removes the banner.
Mark individual notifications as read – Removes the alert for that specific item.
Delete notifications – Permanently removes selected notifications.

Email Notification Settings
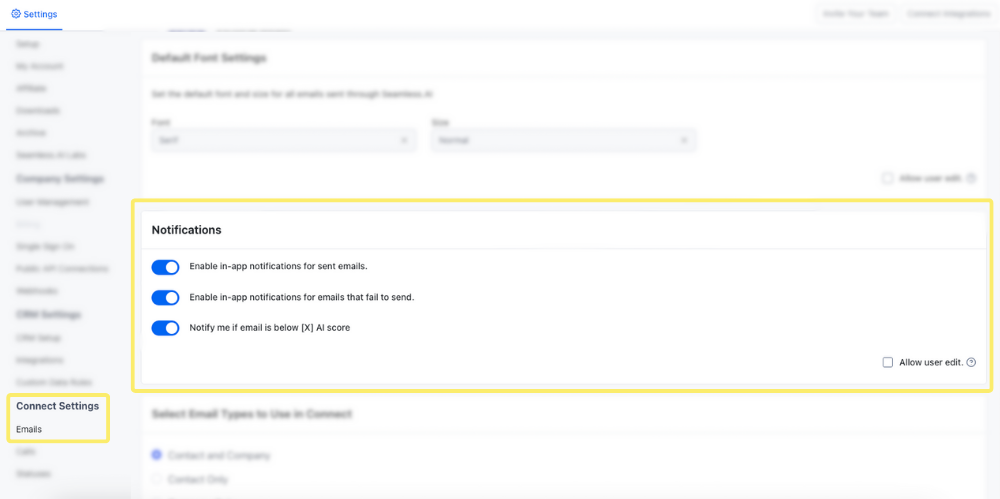
You can access your email notification settings by:
- Navigating to Settings.
- Selecting Emails under Connect Settings.
In the Notifications section, you can choose to enable or disable the following settings:
- Enable in-app notifications for sent messages.
- Enable in-app notifications for emails that fail to send.
- Notify me if email is below [X] AI score

Admin & Owner Controls:
Account owners and admins can choose whether users can edit their own notification settings by checking the “Allow user edit” box, or if these should be locked for the entire organization by leaving the box unchecked
Campaign-Specific Notification Settings
You can also customize notifications for individual campaigns. To adjust these:
- Go to the desired campaign.
- Click the settings gear in the top-left corner.
- Scroll down to the Notifications section for that campaign.

Available Campaign Notifications:
- Contact(s) added to the campaign.
- Contact(s) removed from the campaign.
- Contact(s) completed the campaign.
- Campaign status changed (e.g. Draft, Active, Paused)
- Campaign completed.
Tip: You can turn all campaign notifications off if you prefer not to receive updates for that specific campaign.
Best Practices
- Set critical alerts at the email level to ensure important messages are never missed.
- Use campaign-level settings for targeted notifications that only apply to high-priority outreach efforts.
- Regularly review your notifications to keep your workspace organized and distraction-free.
