Creating and Managing Templates in Content
This article explains how to create, customize, organize, and use reusable templates and AI Prompts in Content. These tools help streamline outreach by allowing users to save repeatable messaging, generate personalized content, and support emails, calls, LinkedIn steps, and other outreach workflows.
Note
This article explains how to create, customize, organize, and use reusable templates in Content. Templates help streamline outreach by giving users a place to build and save repeatable messaging for emails, calls, LinkedIn steps, and other outreach workflows.
Content also supports AI Prompts, which can be used to generate personalized outreach messaging from saved instructions. This gives users the option to either create traditional reusable templates or use AI-generated messaging for more personalized outreach at scale.
With Content, you can create and save reusable templates for emails, calls, LinkedIn messages, and custom outreach. This helps keep messaging consistent, saves time, and makes it easier to personalize outreach at scale. Whether you're sending a one-off email, making a call, building a campaign step, or using AI to generate messaging, Content helps you stay efficient and organized.
Accessing the Content Feature
To access your content, navigate to Content by going under the Tools section or clicking the four-box grid icon above your account initials.
This will bring you to the Content Dashboard, where you can view, create, and manage your saved templates and AI Prompts
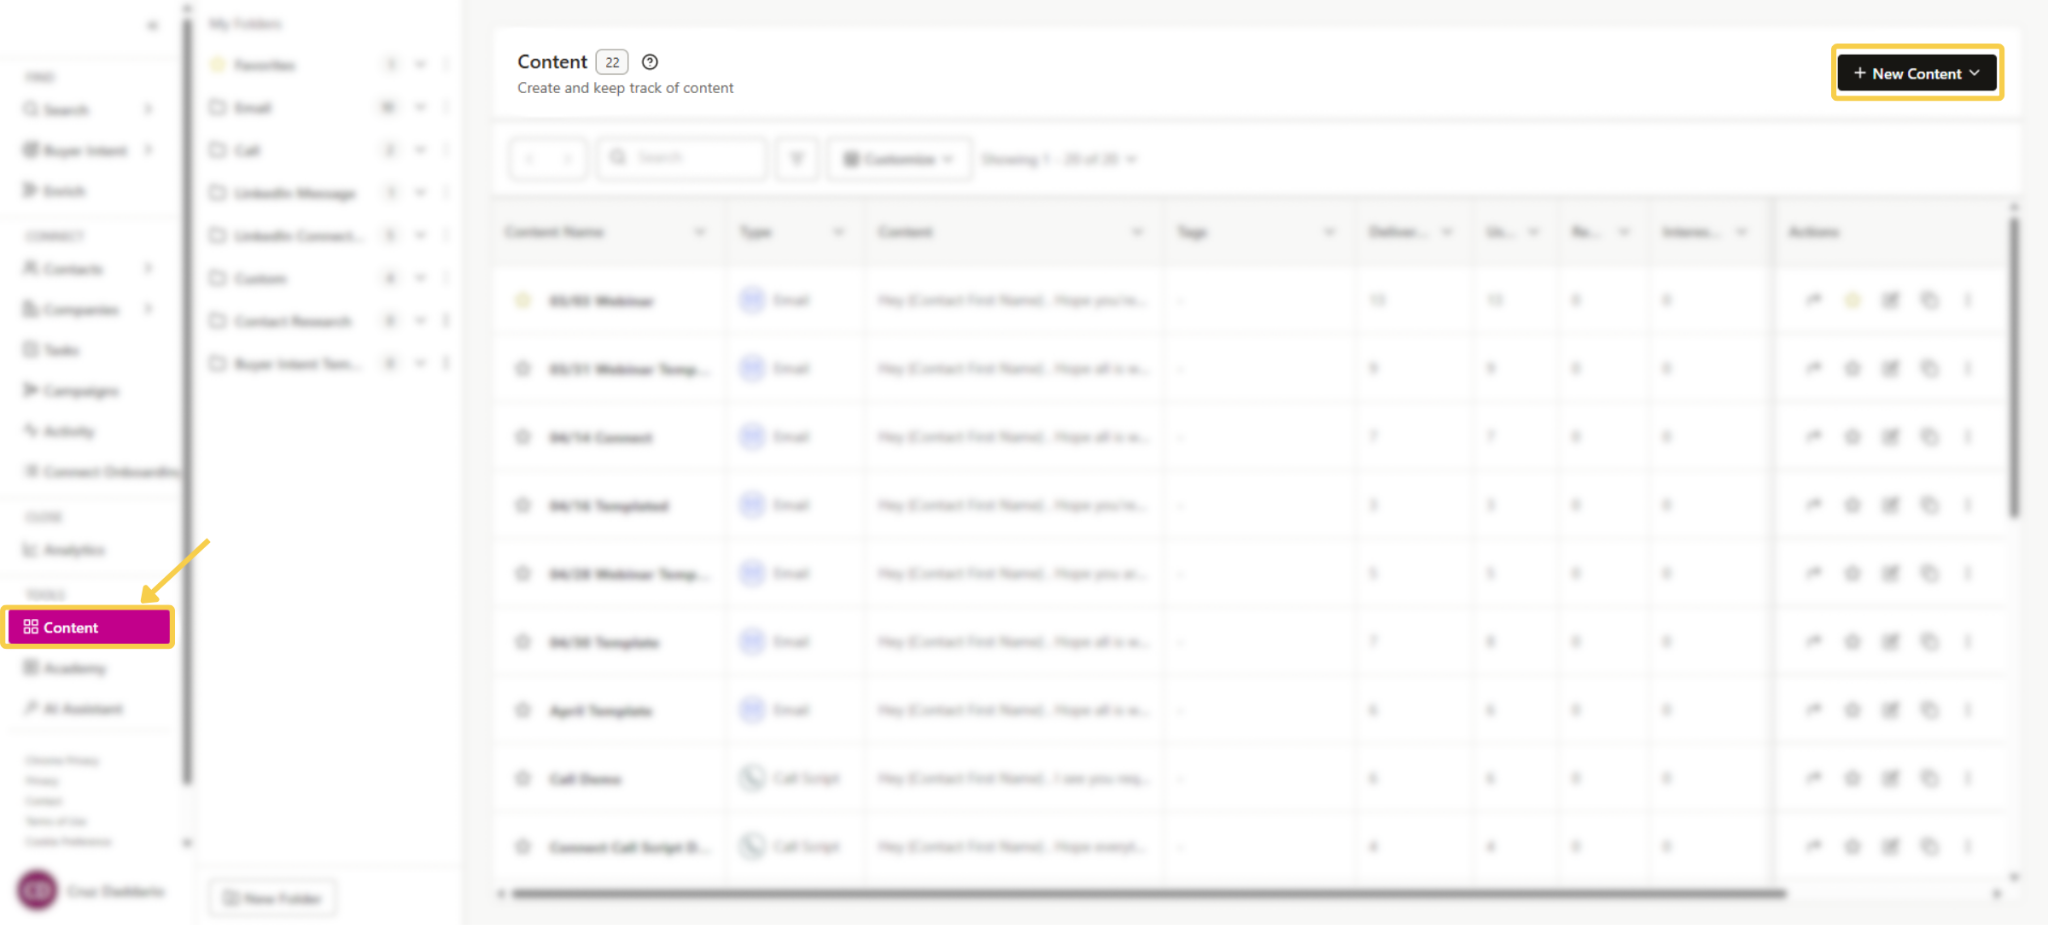
Building New Content
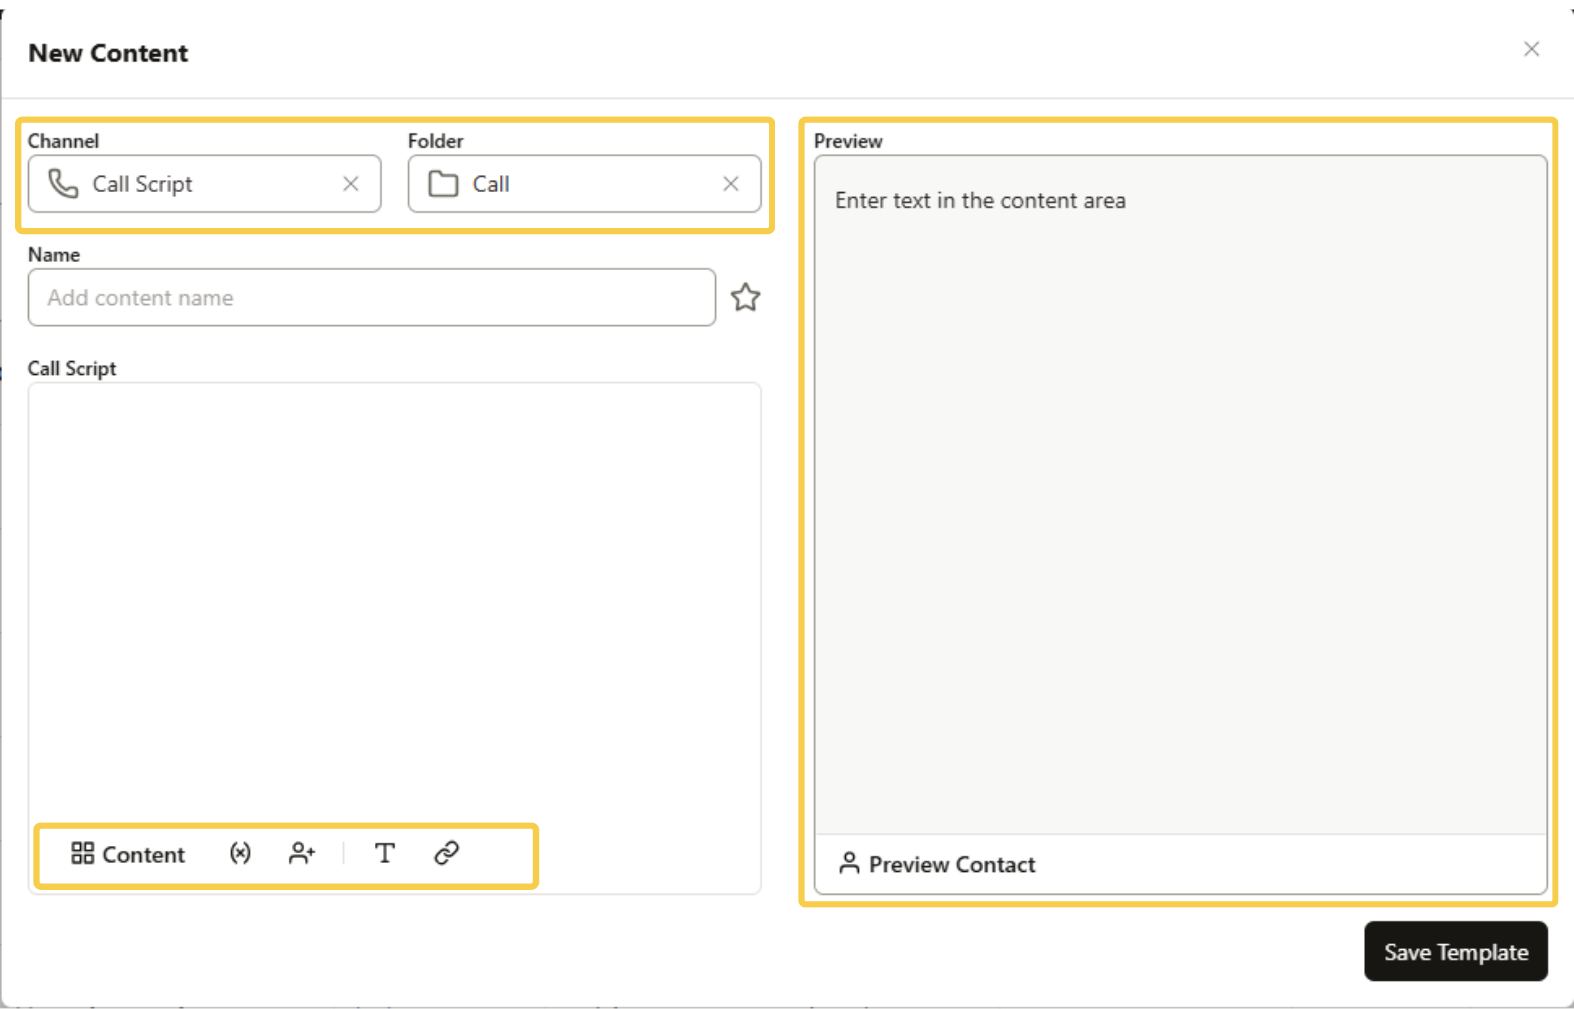
To create new content, click New Content in the top right corner. Select whether you are building AI Prompts or Templates in the top left of the content model. You’ll then choose between creating email, call, LinkedIn, or custom content.
Once you’ve made your selection, a setup module will appear, allowing you to:
- Name your content and optionally mark it as a favorite for easy access.
- Build out your message, adding key details and structure.
- Insert dynamic variables that automatically populate with prospect-specific details such as First Name, Job Title, Company Name, and Location.
- Customize text formatting, add links, and include a signature for emails.
- Preview your content in real time to see exactly how it will appear when used.
Interested in learning more about Dynamic Variables? Check out this article: Dynamic Variables
Templates can be tailored for a specific contact by using the Contacts button in the template editor. This allows you to personalize your approach by incorporating dynamic variables for any contact as you build out your script. Any dynamic variables added will automatically populate in the preview panel to the right, giving you a real-time view of how the final message will appear when sent.
Using AI Prompts in Content
In addition to traditional templates, users can also create and save AI Prompts in Content. AI Prompts tell Seamless what kind of messaging to generate for outreach.
Instead of writing every message from scratch, users can create a prompt with instructions for the AI, such as the type of message, tone, goal, and key talking points. Once saved, AI Prompts can be reused in outreach workflows, including campaign steps and individual emails.
To create an AI Prompt in Content:
- Click the AI Prompts tab, in the New Content modal.
- Enter a name for the prompt.
- Write the prompt you want AI to use for generating outreach content.
- Preview and refine the prompt as needed.
- Click Save Prompt to store it for future use.
AI Prompts are useful for users who want to generate more personalized outreach faster while still using a repeatable messaging framework.
For a full walkthrough on creating, saving, and using AI Prompts, check out this article: AI Prompts in Connect
Organizing and Managing Content
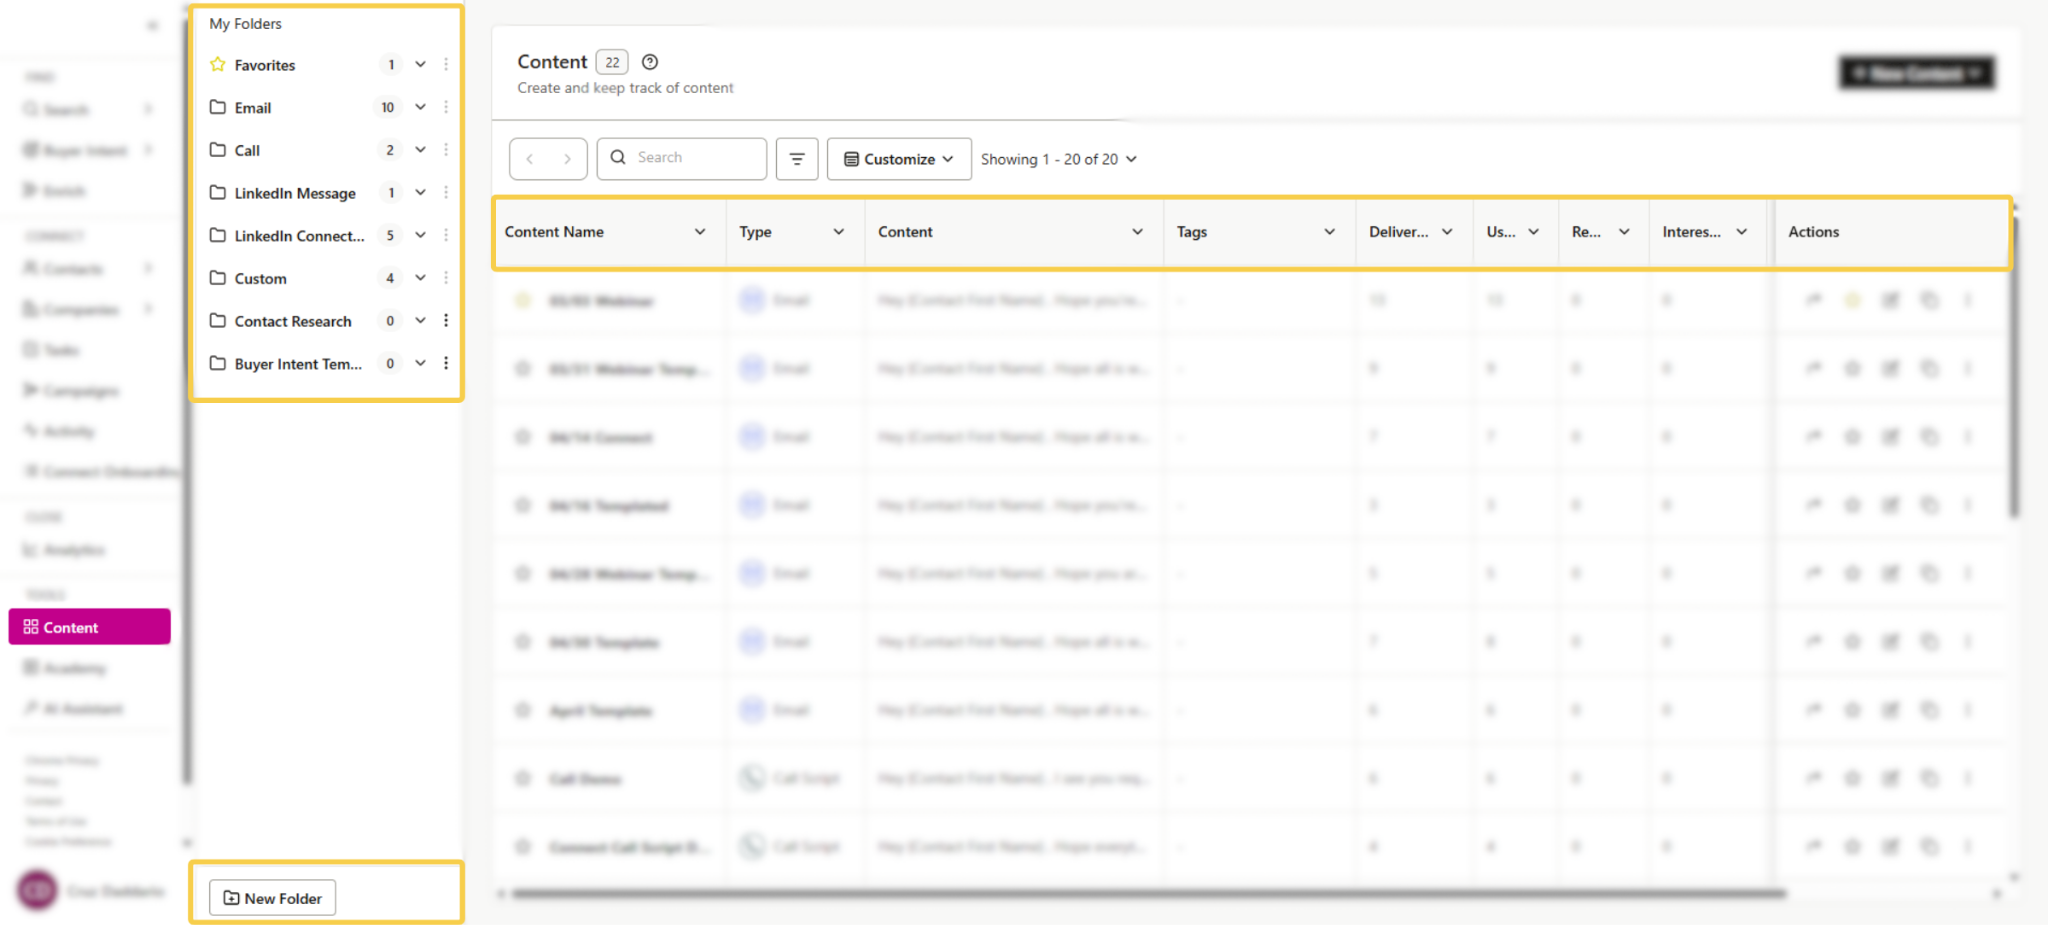
All templates and saved prompts are stored in the Content Dashboard, where you can view and manage your saved content.
The dashboard includes helpful details such as:
- Content Name and Type
- Tags and Folders for better organization or targeted outreach
- Usage Metrics, including Delivered, Used, Reply, Interested, Opt-Out, and Last Used, pulled directly from the Activity Page
To keep content organized, you can:
- Use the My Folders panel on the left-hand side to view and manage stored content.
- Create a new folder by clicking the New Folder button at the bottom of the panel.
- Move content between folders.
- Favorite, edit, copy, or delete content using the Actions column in the dashboard.
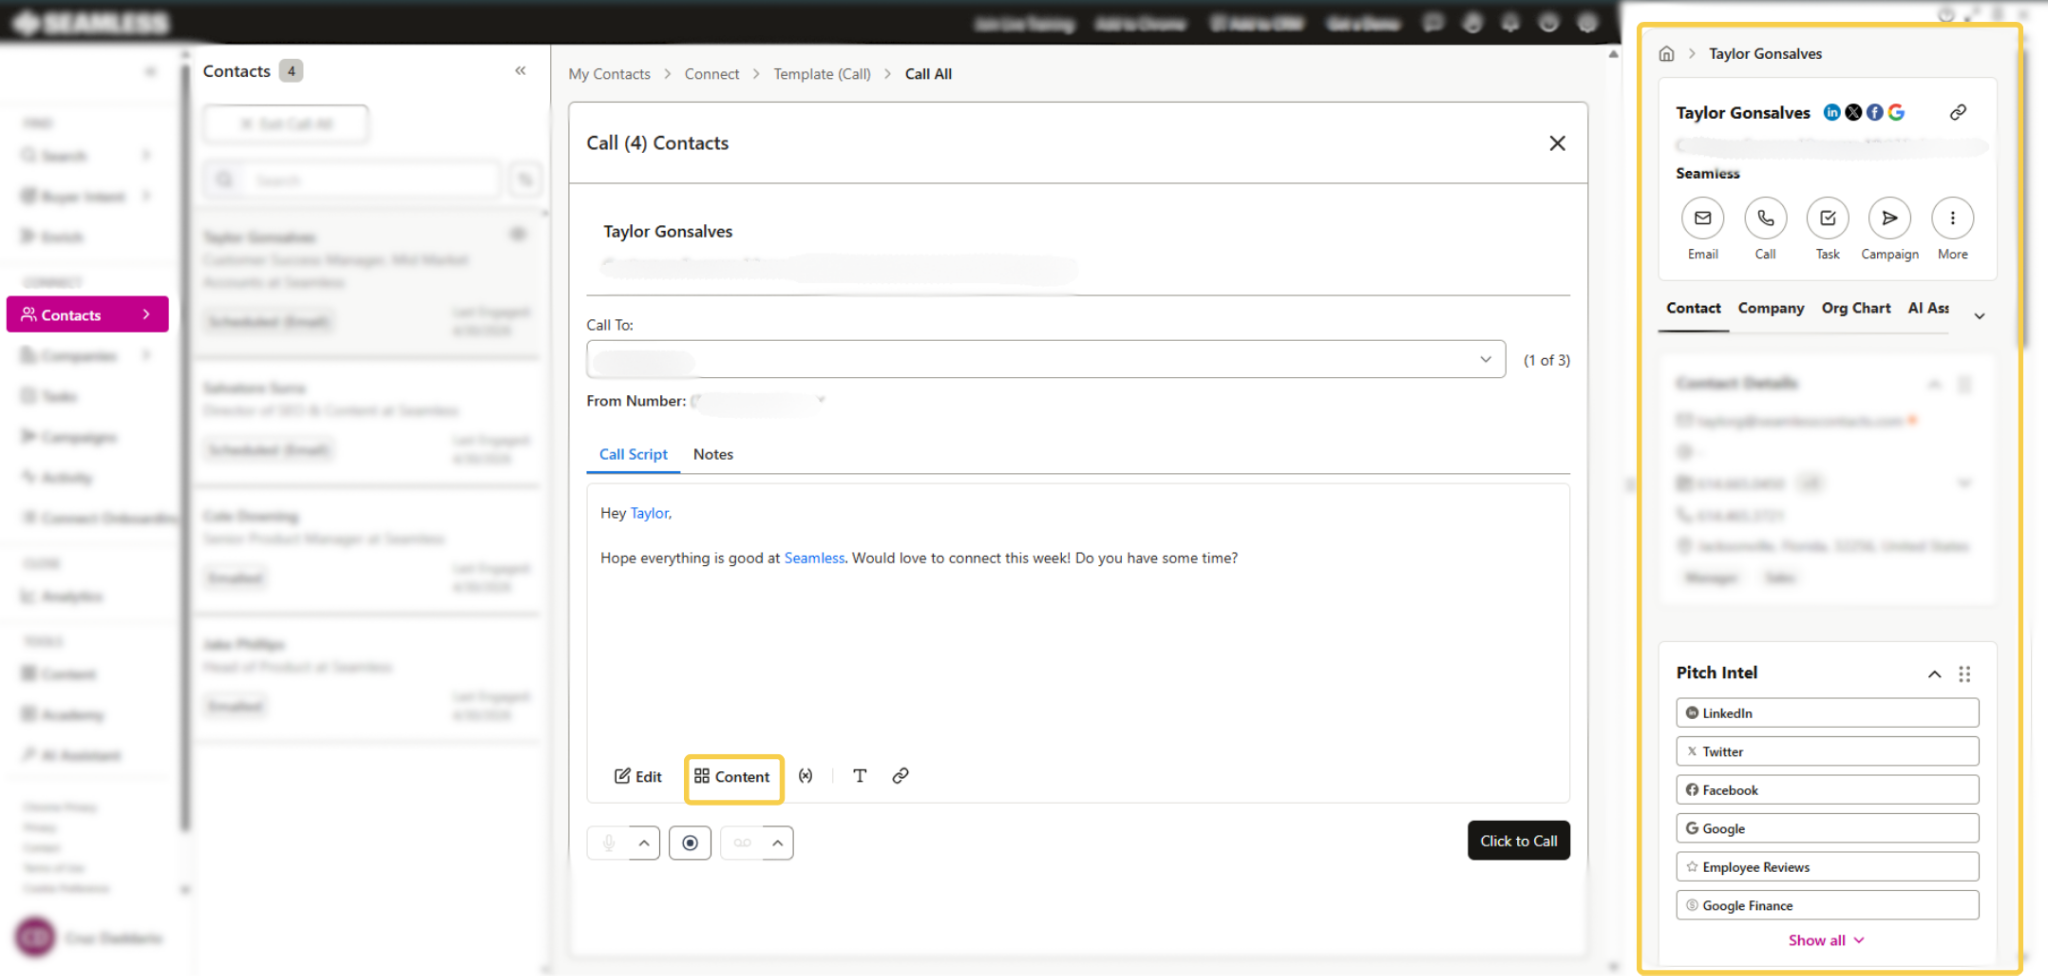
Using Templates for Calls and Emails
When making calls or sending emails individually or through bulk engagement, you’ll be able to select from your saved content for a scalable outreach experience. Only content relevant to the action you’re performing will be available for selection.
For templates, dynamic variables will automatically populate with the recipient’s details.
For AI Prompts, Seamless can generate a message based on the saved prompt and the selected contact. Users can then review the generated message, make edits if needed, and send when ready.
Content can be used for both individual outreach and bulk engagement, making it easy to scale your prospecting efforts while keeping messaging organized and consistent.
Once applied, users can further modify or personalize the content before sending.