Creating and Launching a Seamless Campaign
Learn how to build and launch your first multi-step campaign in Seamless—from setup and scheduling to tracking outreach performance.
Note
The Campaigns feature allows you to automate and streamline your outreach by creating structured, multi-step sequences across email, phone, LinkedIn, and more. With this tool, you can personalize communication, organize contacts, and manage outreach from a single platform—all while tracking performance along the way.
Once a campaign is created, it will be stored in your Campaigns Page, where you can view, launch, and manage campaign steps and engagement. Whether you're following up with prospects or building out long-term nurture flows, Campaigns help you scale your outreach efficiently.
Accessing the Campaigns Feature
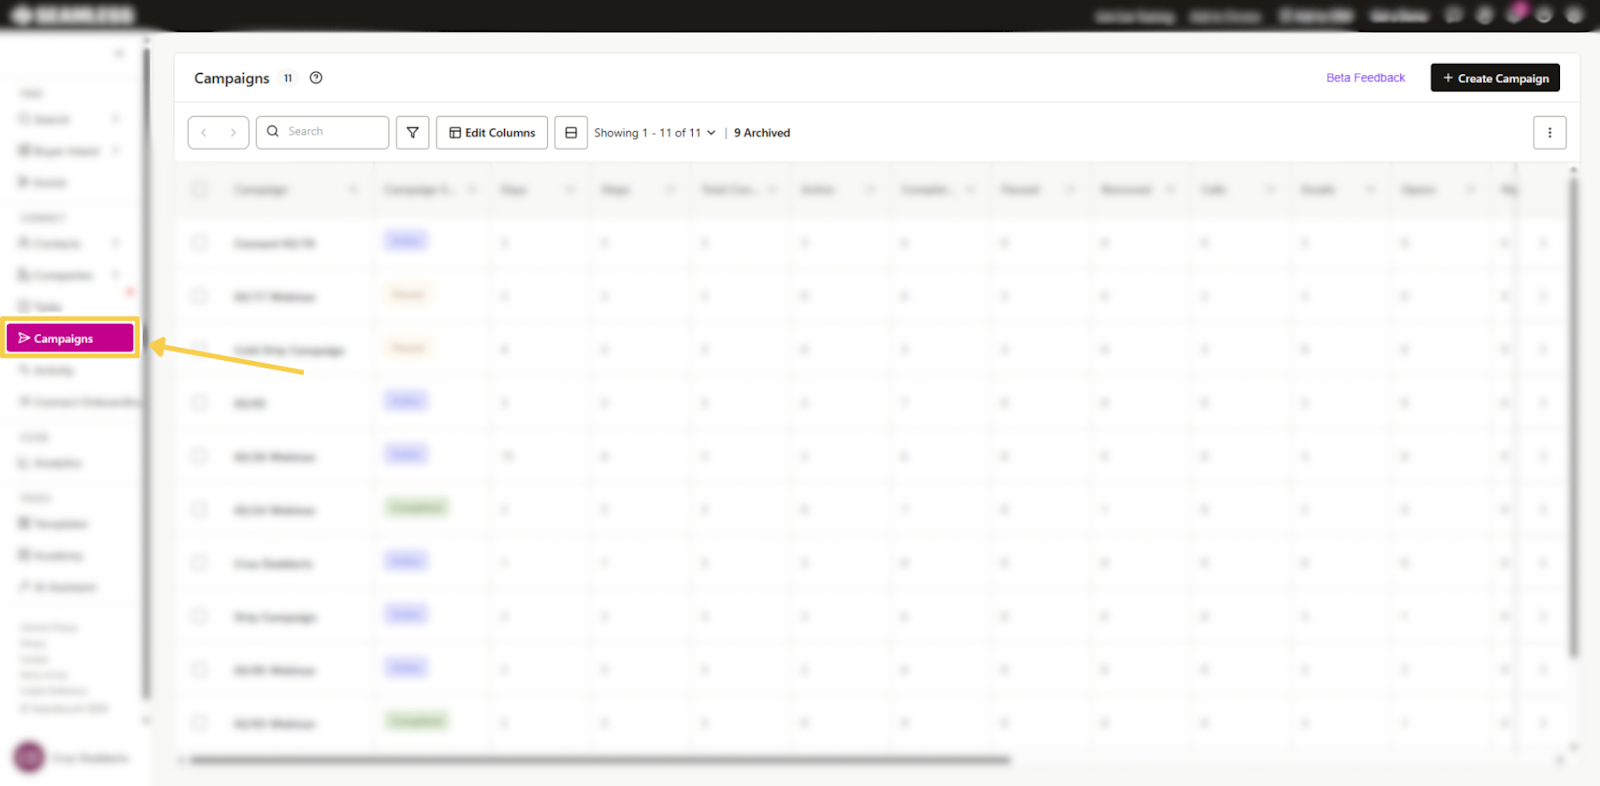
You can access Campaigns on the left-hand panel. If the panel is collapsed, click the paper plane icon to open Campaigns.
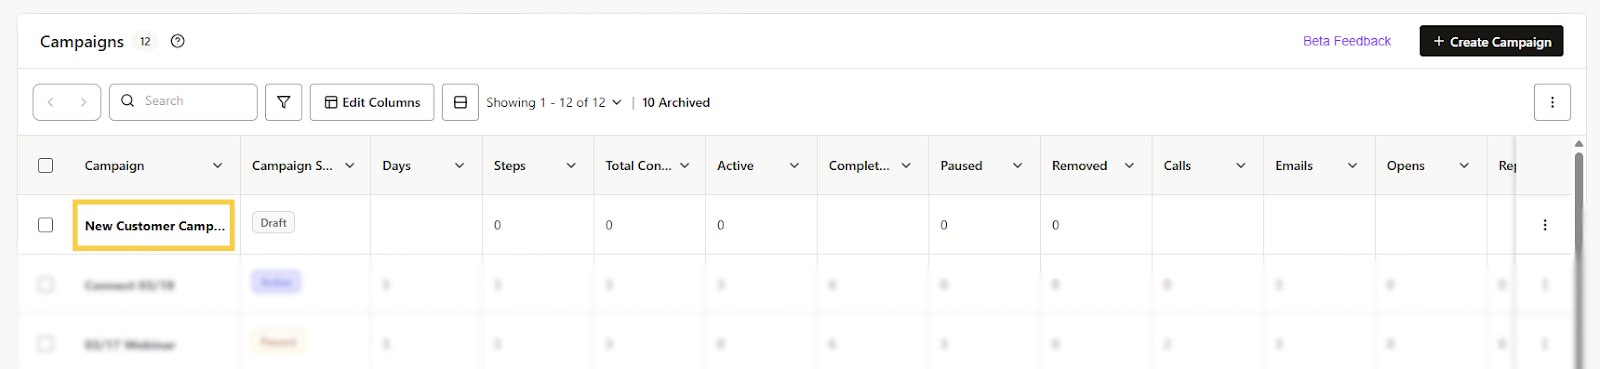
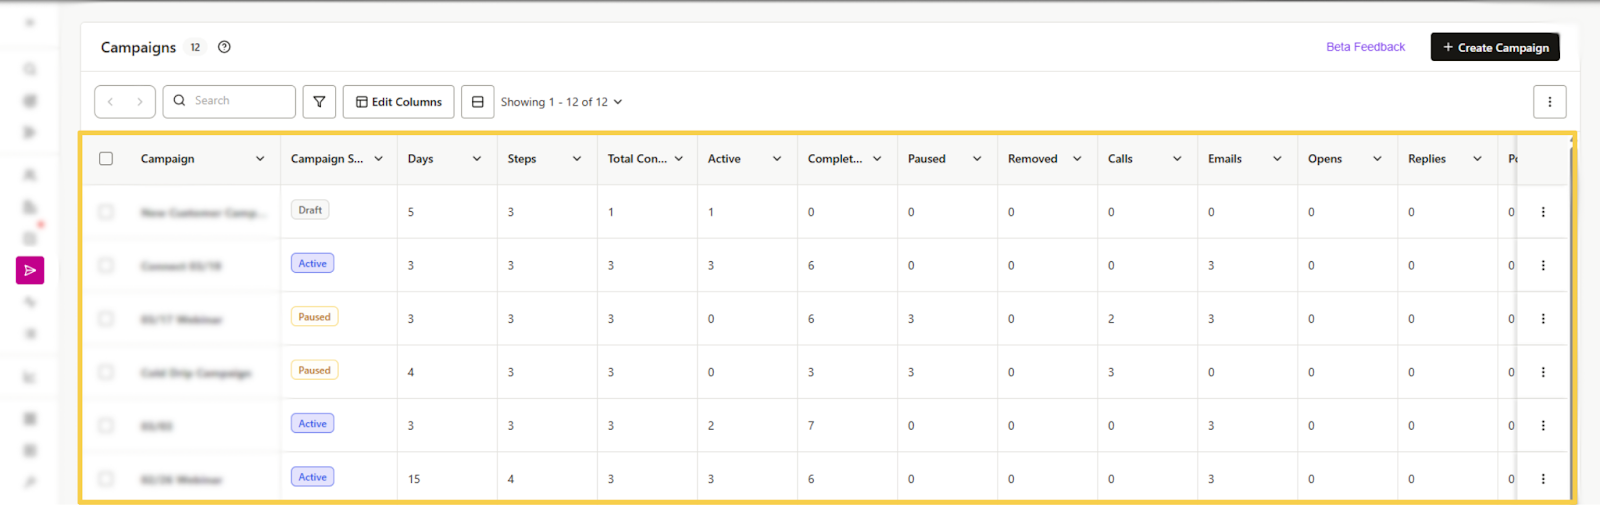
Inside, you’ll land on your Campaigns page, where all of your created campaigns will appear.
Creating a New Campaign
To create a new campaign, click “+ Create Campaign” in the top right corner.

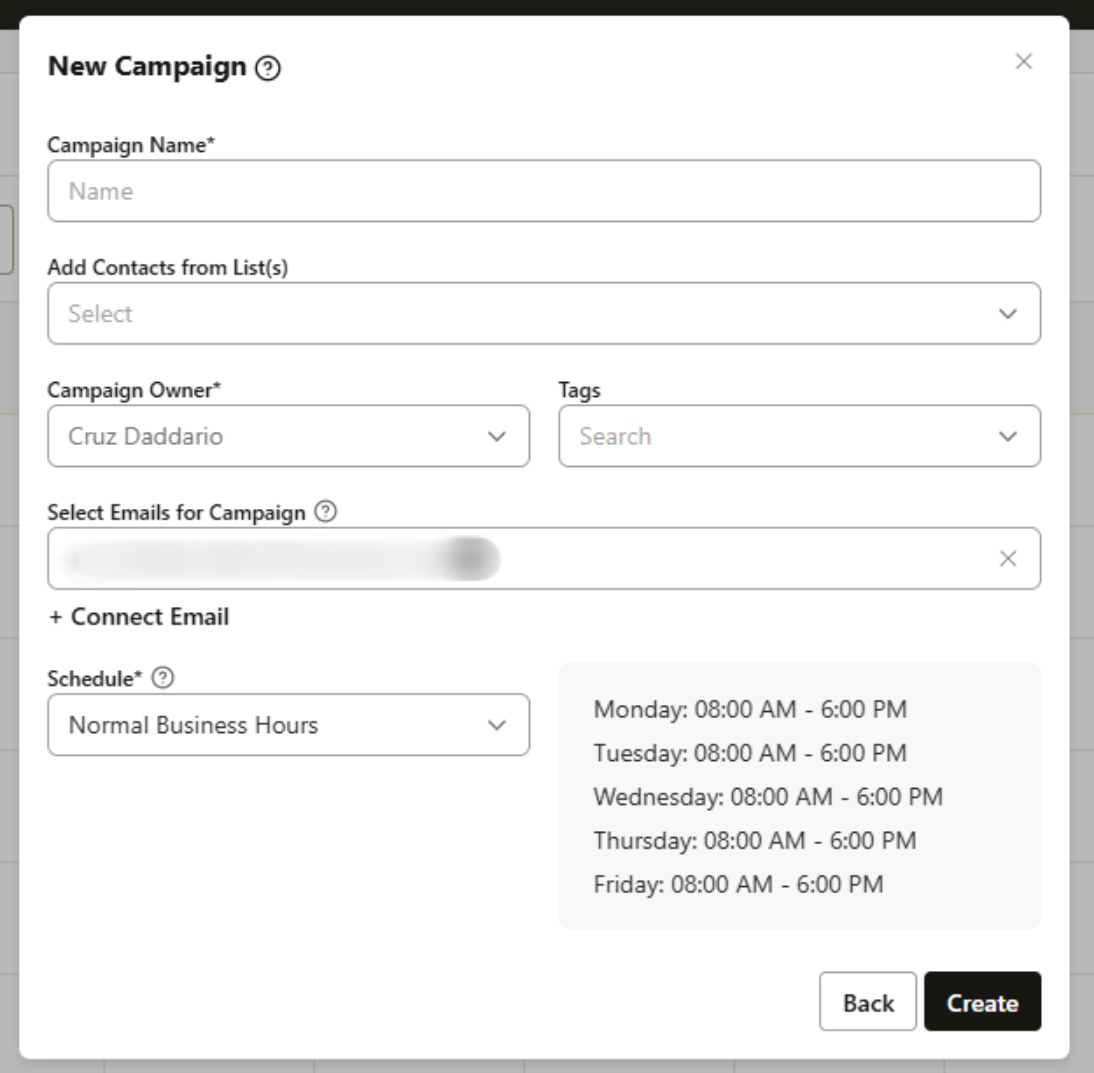
When creating a campaign, a setup window will appear where you can:
- Name the Campaign – Give your campaign a clear name.
- Add Contacts – Manually select contacts or choose from pre-created lists.You can also do this later if you decide.
- Set Tags – Apply list tags for filtering and grouping.
- Select emails to send with– Choose from the connected email accounts to send outreach from.
- Tip: Consider adding multiple emails if you plan to send a high volume emails to contacts. This allows emails to be processed through as previous emails reach their daily send limit.
- Tip: Consider adding multiple emails if you plan to send a high volume emails to contacts. This allows emails to be processed through as previous emails reach their daily send limit.
- Choose a Schedule – Pick a previously created schedule to define when steps will execute for your campaign.
Creating a Campaign Schedule
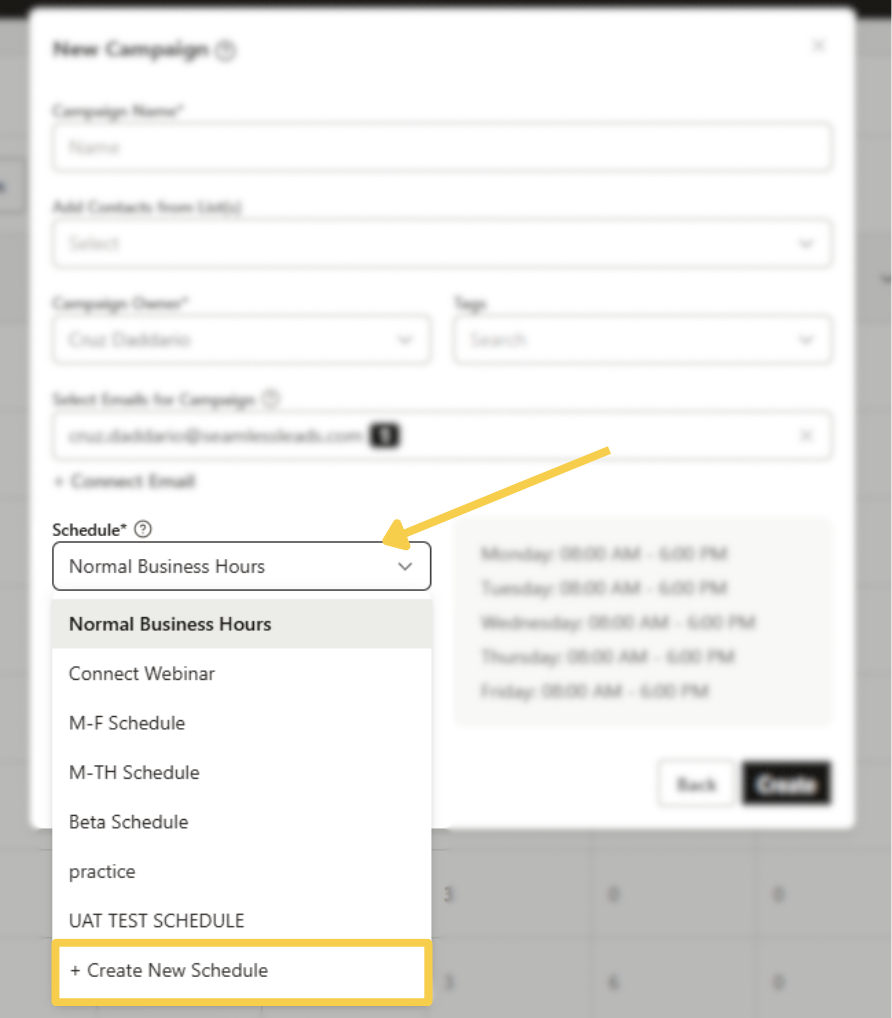
To create a schedule, you’ll need to:
- Name the Schedule – Something recognizable (e.g., “Weekdays 9–5”).
- Select a Time Zone – Choose the time zone that aligns with your outreach region.
- Choose Days of the Week – Specify which days steps should run.
- Set Business Hours – Define the window of time steps should execute each day.
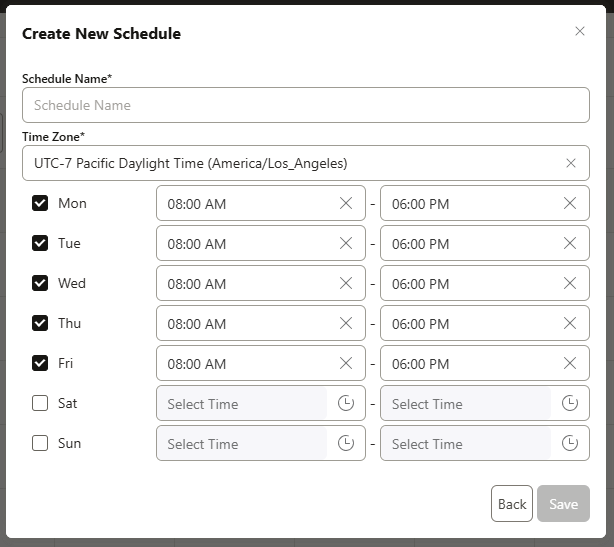
Once saved, the schedule will become selectable from the dropdown. A summary of the selected schedule will appear in a gray box for reference. Click “Create” to finalize your campaign and return to the dashboard.
Managing Campaign Settings
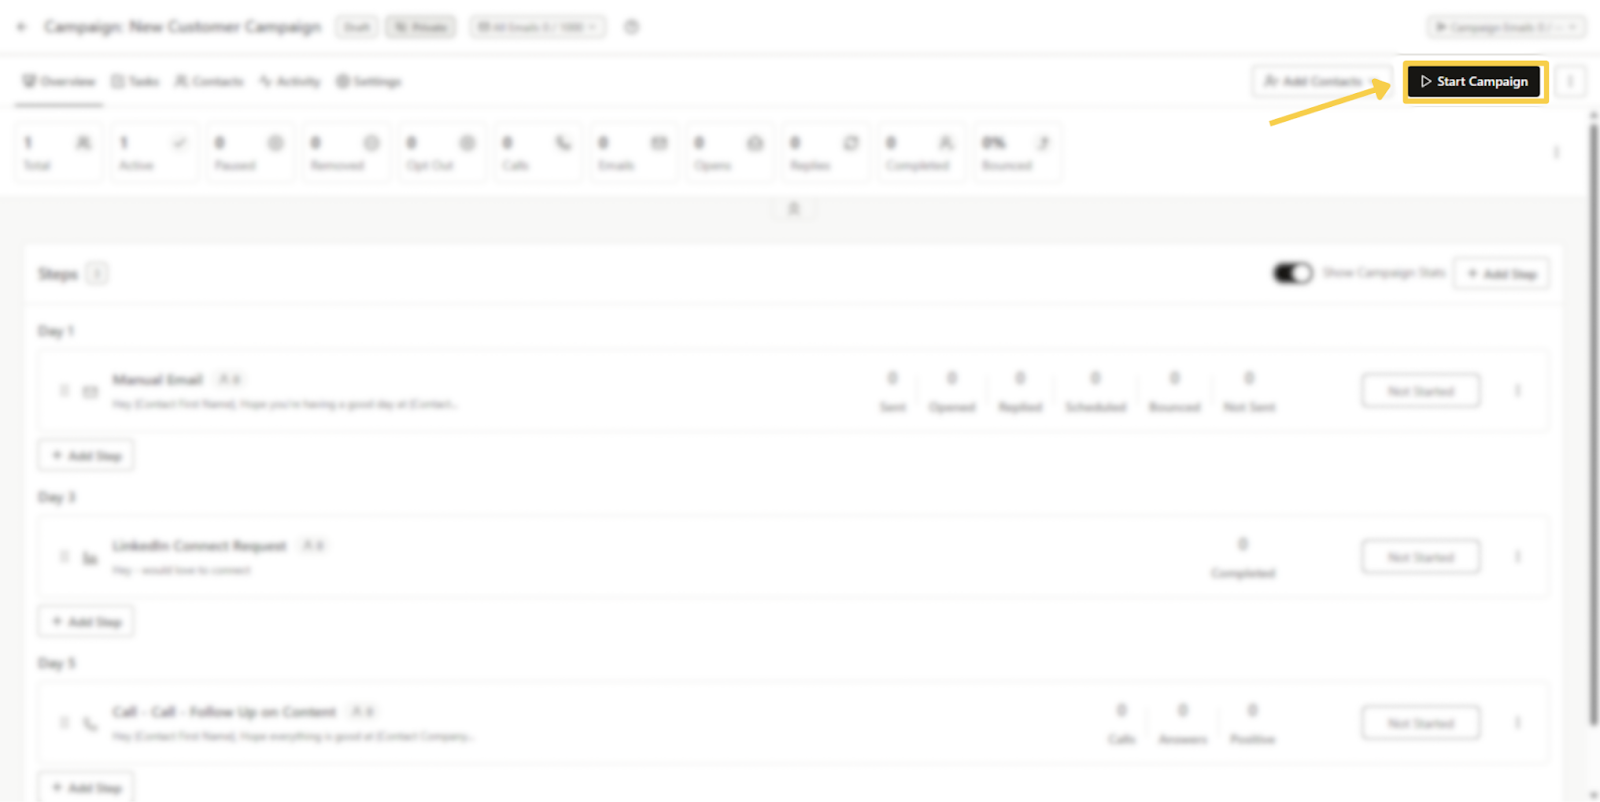
After creating a campaign, click into it from your Campaigns page. You’ll land on the Campaign Overview, where you’ll see the following:
- + Add Contacts – Add more leads to the campaign.
- Start Campaign – Begin executing the campaign once steps are set.
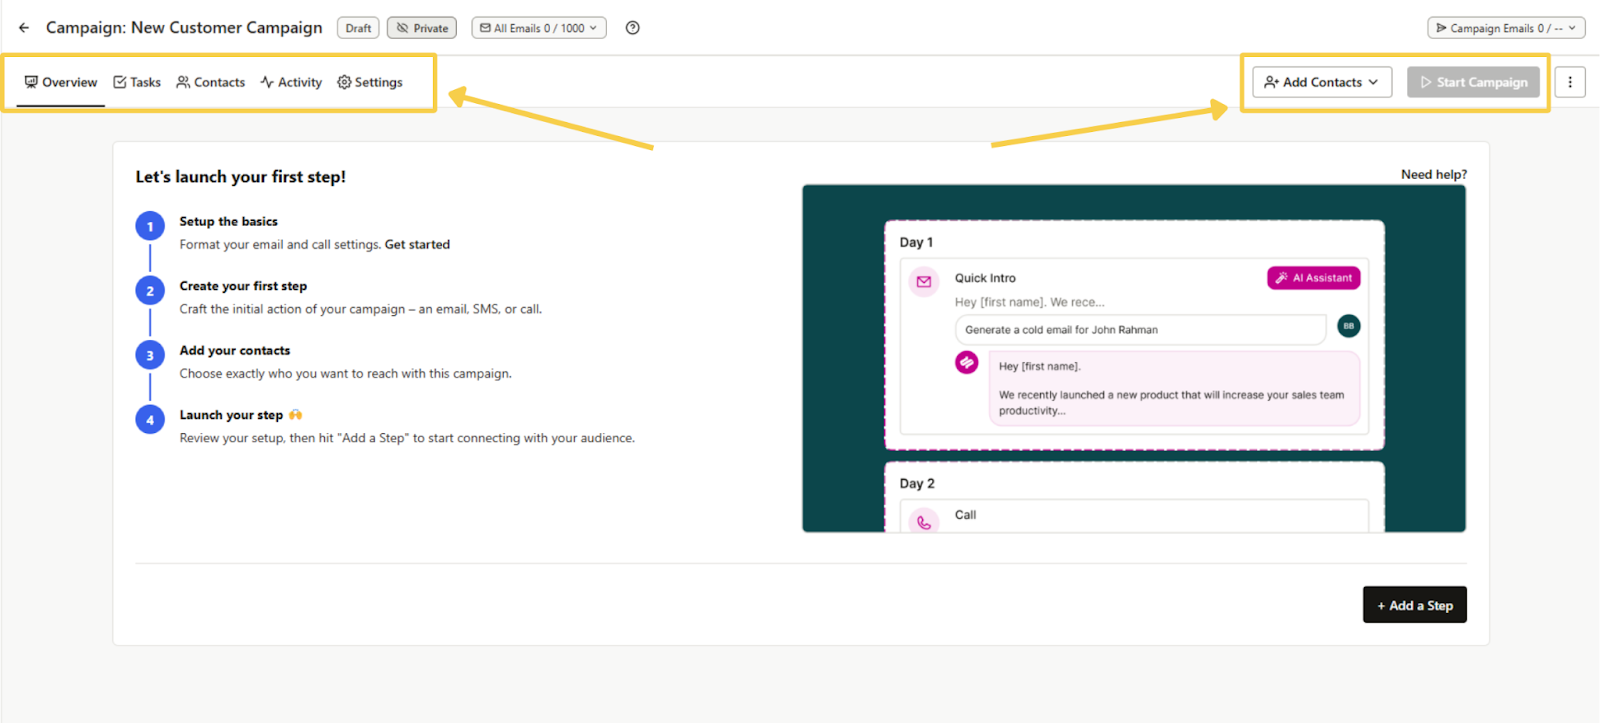
You’ll also see tabs for:
- Overview – Displays all campaign steps by day and helpful stats for the campaign’s performance and progress.
- Tasks – Tracks all manual task-based steps (calls, research, etc.).
- Contacts – View or add contacts associated with the campaign.
- Activity – Shows all engagement activity (emails opened, calls completed, replies received).
- Settings – Modify campaign-specific settings like schedule, tags, and sender email.
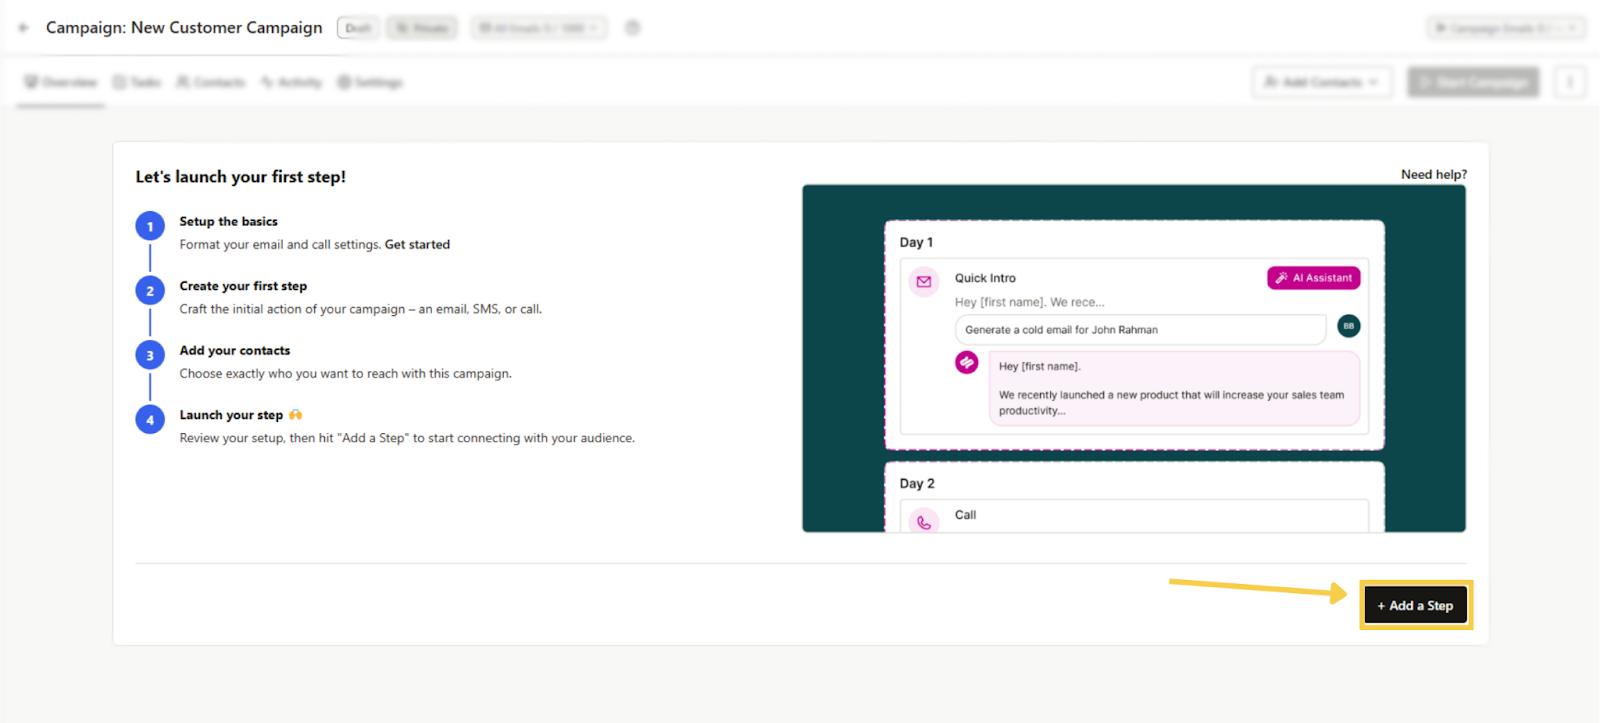
Adding Steps to Your Campaign
To begin building out your campaign, click “+ Add a Step” in the Overview tab.
A setup window will appear where you can:
- Select a Step Type – Choose from:
- Manual Email
- Automatic Email
- Call
- LinkedIn (Send Message)
- LinkedIn (Connect with New Contact)
- Contact Research
- Custom Task
- Manual Email
- Name the Step – Title each step for clarity.
- Add a Description – Optional notes about the purpose of the step.
- Choose the Step Day – Decide which day of the campaign this step should run.
- Set Priority Level – Mark task urgency as Low, Medium, or High.
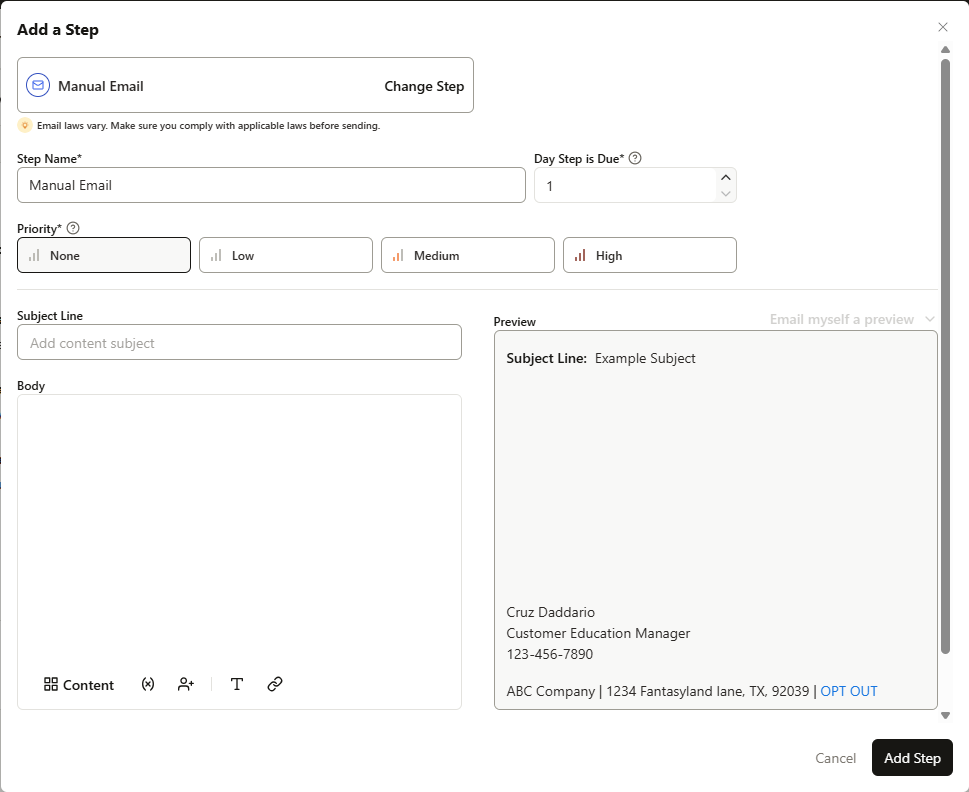
Once complete, click next.
Steps will now appear in the Overview tab in order by day the step will be completed.
Advanced Settings
Automatic Email Steps
When building a campaign email step, you can use Advanced Settings to control whether follow-up emails send in the same thread or start a new one.
After creating the first email step, add a second automated email step. In that step’s Advanced Settings, you’ll see the Email Thread option. This setting lets you choose between:
- Reply in existing email thread — sends the follow-up email as a reply to the most recent campaign email sent to that contact, keeping the conversation in the same thread.
- Start a new email thread — sends the follow-up email as a separate email instead of continuing the previous thread.
This gives you more control over how your campaign emails appear in the recipient’s inbox.
Call Steps
When you select Call as your Step Type, an Advanced Settings option will appear. Here, you can fine-tune how calls are handled:
Phone AI Threshold – Set the minimum confidence threshold for calls based on Phone AI quality scoring.
Phone AI Threshold Warning – Choose how you want the platform to respond if the phone data falls below your set threshold:
- Show a warning banner during the campaign step.
- Block or Skip the contact if it’s under the Phone AI threshold.
Phone Type for Bulk Sending – Choose which number type the system should use when dialing in bulk:
- Company Phone
- Contact Phone
- Both
Launching and Using Your Campaign
Once steps are added, return to the Overview or Contacts tab and click Start Campaign to launch. Campaign steps will run automatically or appear as tasks (depending on type) based on the schedule you've selected.
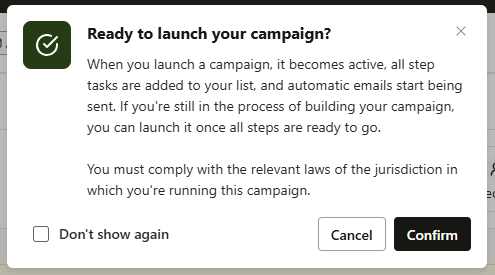
Then simply confirm you are ready to launch your campaign!
Connecting with Campaigns
Once contacts enter your campaign steps tasks will automatically be created for you. You can access them by clicking on the blue “X Due” button on each step. This tells you how many contacts are on each step and if any tasks are due. Automatic email steps will schedule and sent emails automatically so no tasks are created for those.
Tasks are accessible from the Tasks page, the Campaign’s Task tab, or in the Chrome Extension. Complete tasks from anywhere!
Tracking and Optimizing Performance
Use the Campaign Statistics to track how your campaign is performing:
Turn them on with the toggle “Show Campaign Stats” next to the “Add Step” button.
- Monitor opens, clicks, replies, and call completions
- Identify which steps are most effective
- Adjust timing or messaging based on engagement trends
With Campaigns in Seamless you can scale personalized outreach, track performance, and never miss a step in your workflow.
Important Tips & Basic Campaign Management
Campaign steps can’t change type or be moved once the campaign has started and contacts have entered that step. You can easily duplicate or add a new step if you need to move a step.
You can also pause steps by clicking “Pause” in the ellipsis menu on the right of the step card.
Pause steps have two options: Allow contacts to skip over the paused step, or prevent contacts from proceeding past the paused step.
Editing steps is easy. The step name, description, priority and template can be updated. Note that doing this with open tasks on the step will result in those tasks being updated as well.