Create and Manage Lists in Seamless
Lists help you organize, save, and manage contacts and companies in Seamless. This article explains how to create Lists, set a default List, manage existing Lists, and move contacts into Lists across different areas of the platform.
Lists are one of the best ways to stay organized in Seamless. They help you group, manage, and revisit the contacts and companies you save while prospecting, making it easier to keep your research structured and actionable.
Why Lists Matter
Using lists helps you:
- Organize contacts and companies by campaign, territory, account set, or workflow
- Keep track of the data you’ve already researched
- Make it easier to return to a saved group of records later
- Control where newly researched contacts are automatically saved
How to Create a List
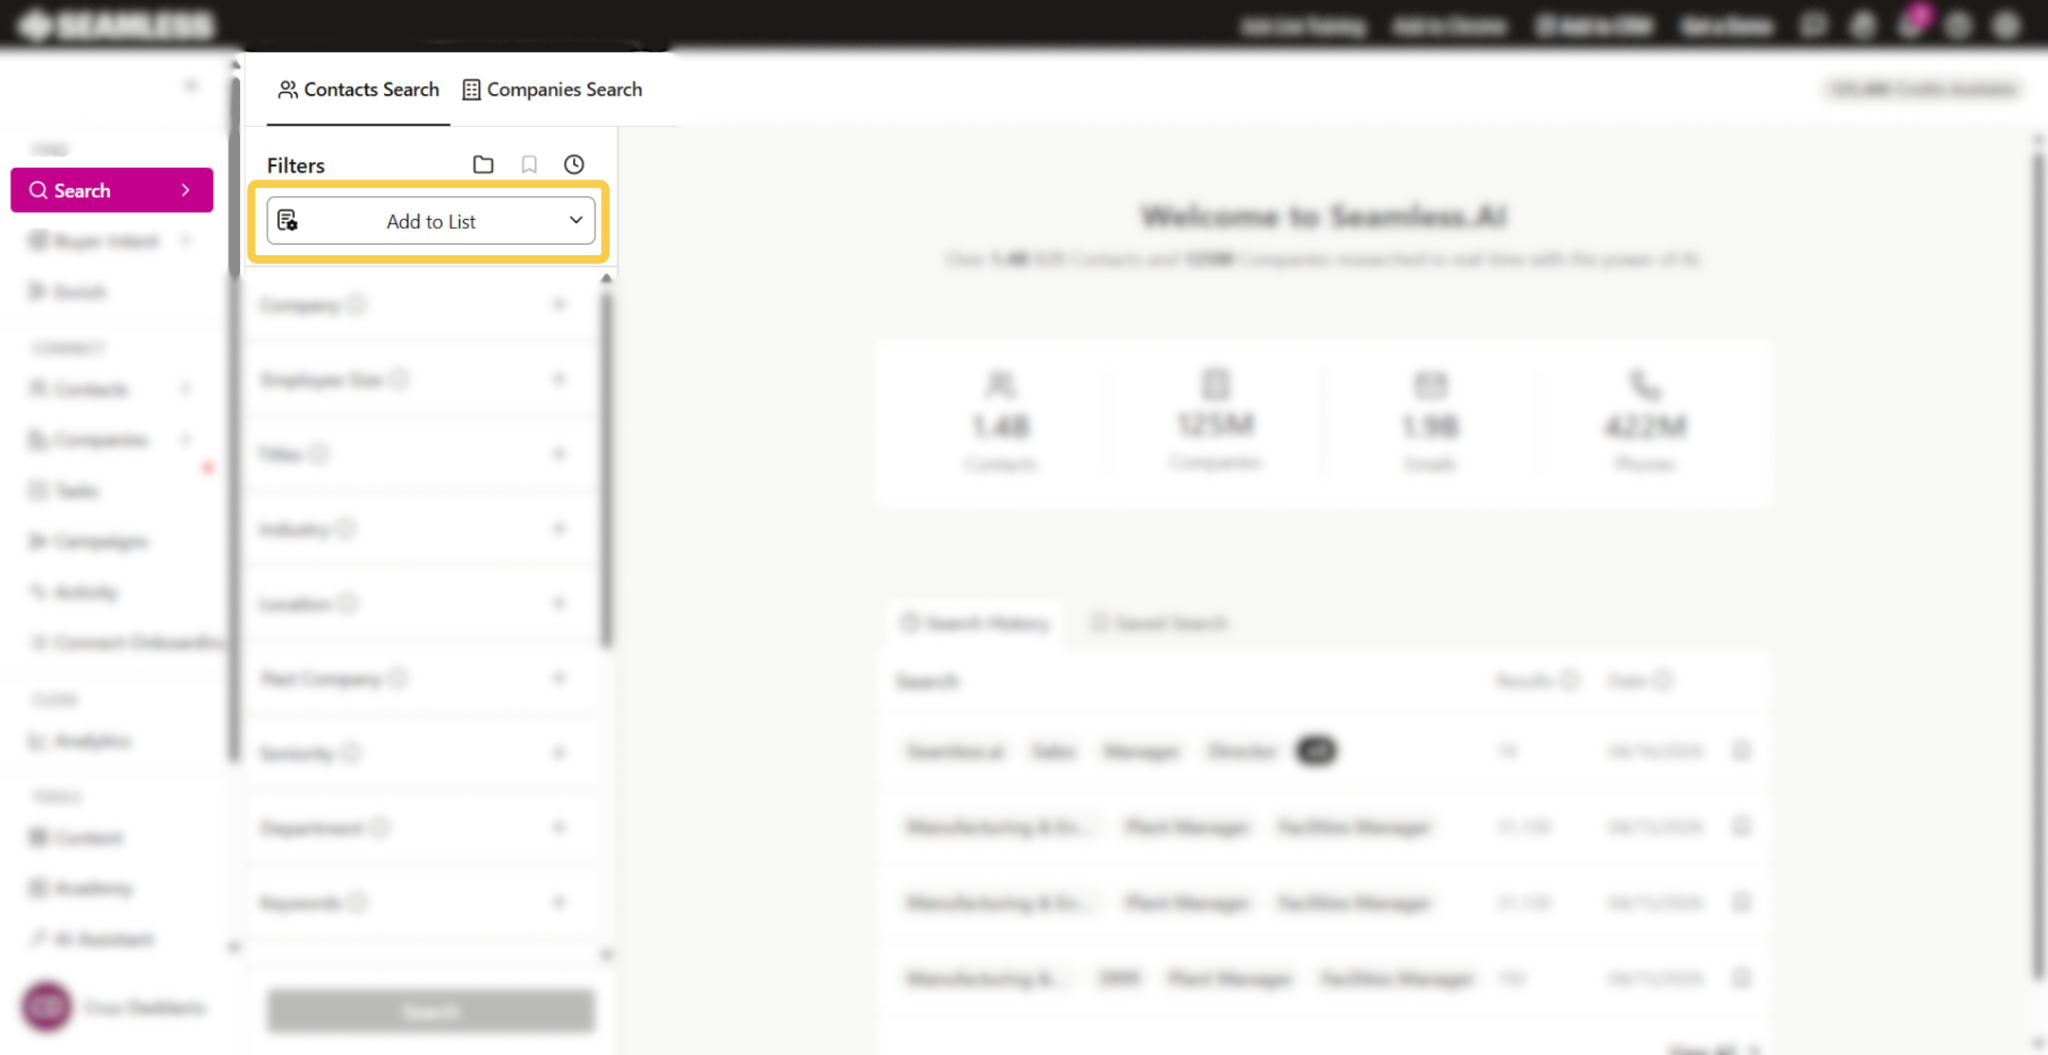
Users can create a list directly from the Search page.
- Go to the Search page
- Click the Add to List box
- If you already have a default list set, you may see that list name displayed instead
- In the window that opens, select the option to create a new list
- Enter a name for your list
- We recommend using a name that will help you quickly remember what type of data is being saved there
- Choose whether you want to set the new list as your default list
- Click + Create List
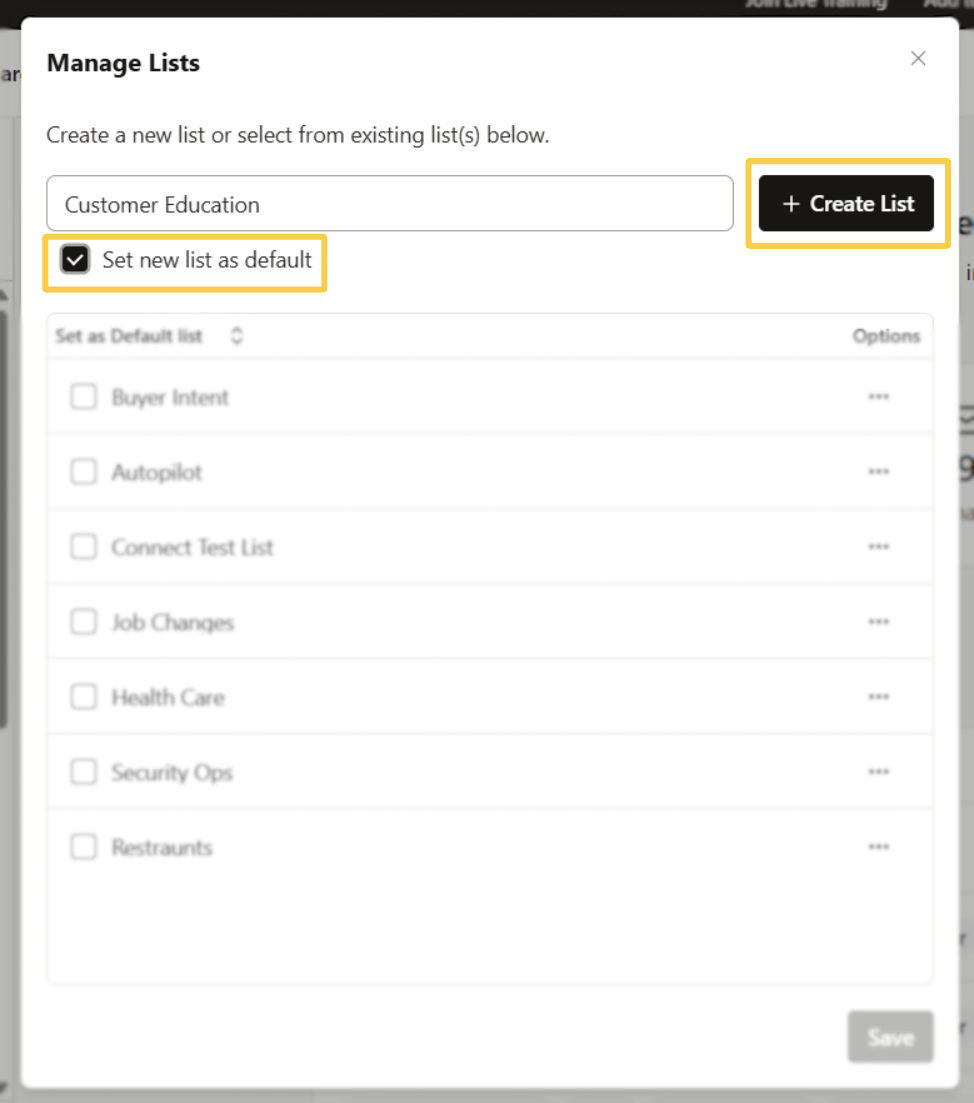
Once created, your new list will appear in the list window.
How to Know a List Is Set as Default
If a list is set as your default:
- You will see a black checkmark next to the list
- You will also see a Default tag
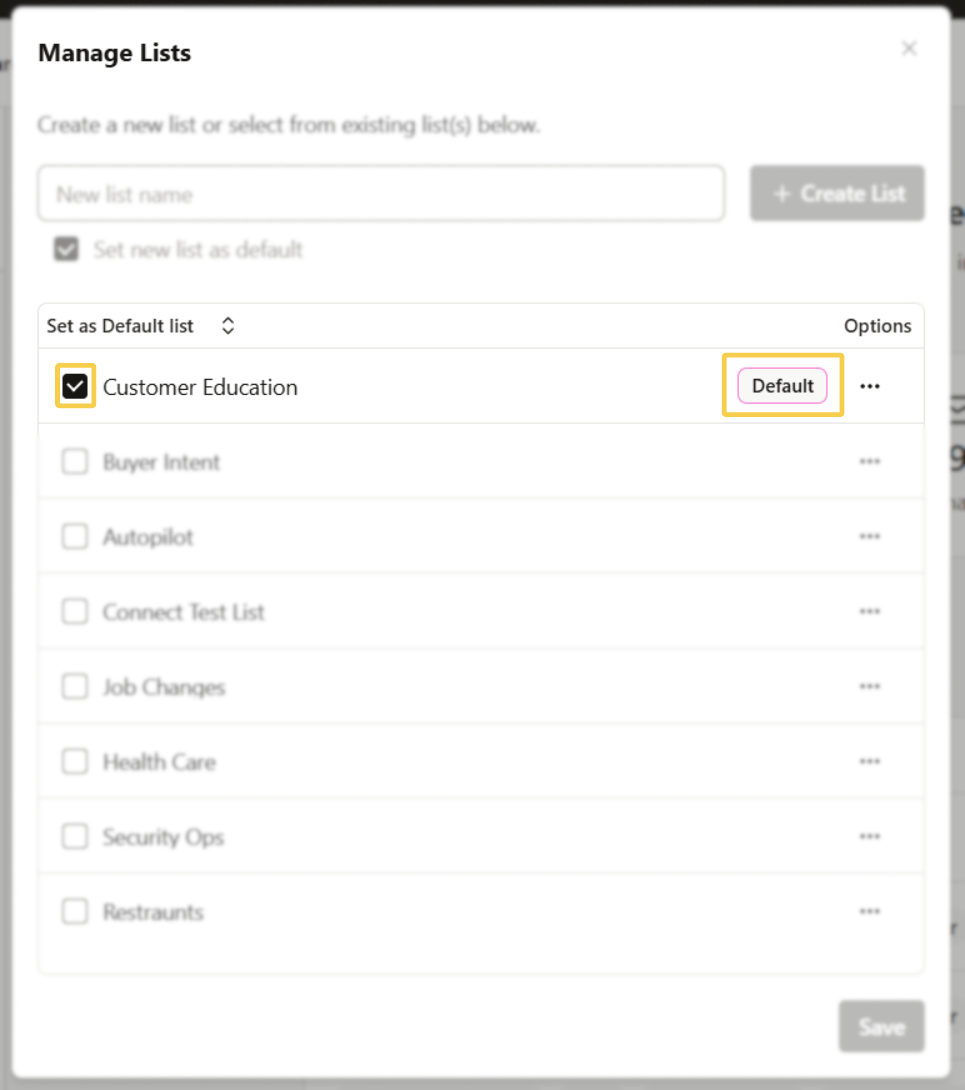
When a default list is set, any time you pull contact information using Seamless, the AI will automatically save that data to the default list.
How to Change Your Default List
You can return to the same list window at any time to:
- Create a new list
- Switch your default list to another existing list
- Review lists you’ve already created
To set a different default list, open the list window and select the list you want to use as the new default.
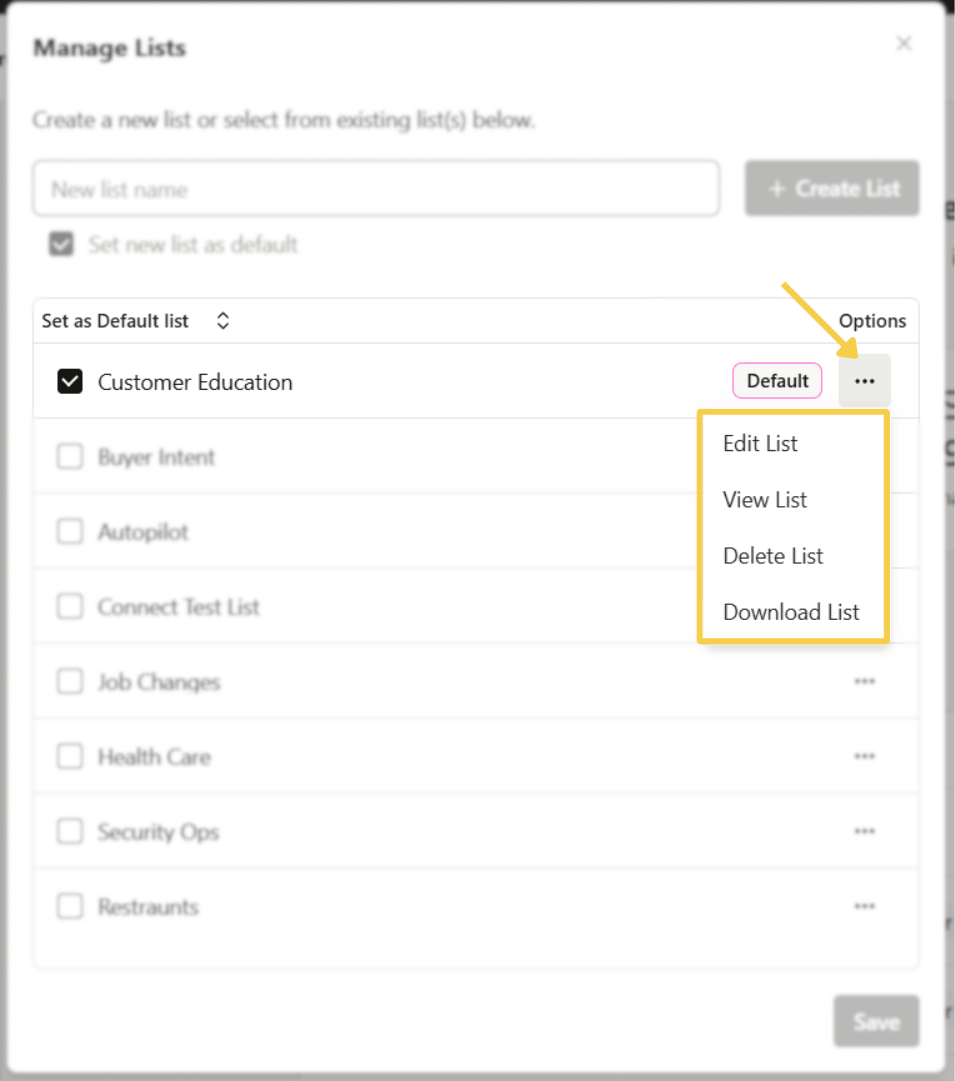
List Management Options
Users can click the 3 dots next to a list to access additional actions:
Edit List - Change the name of the list.
View List - Open the My Contacts page with a filter already applied for that specific list.
Delete List - Remove the list from the Lists section.
- Important: Deleting a list does not delete the contacts that were saved in that list.
Download List - Start the process of downloading the contacts included in that list.
Where You Can Access Lists
The Lists feature is available in multiple areas of Seamless:
- Search
- My Contacts
- My Companies
- Chrome Extension
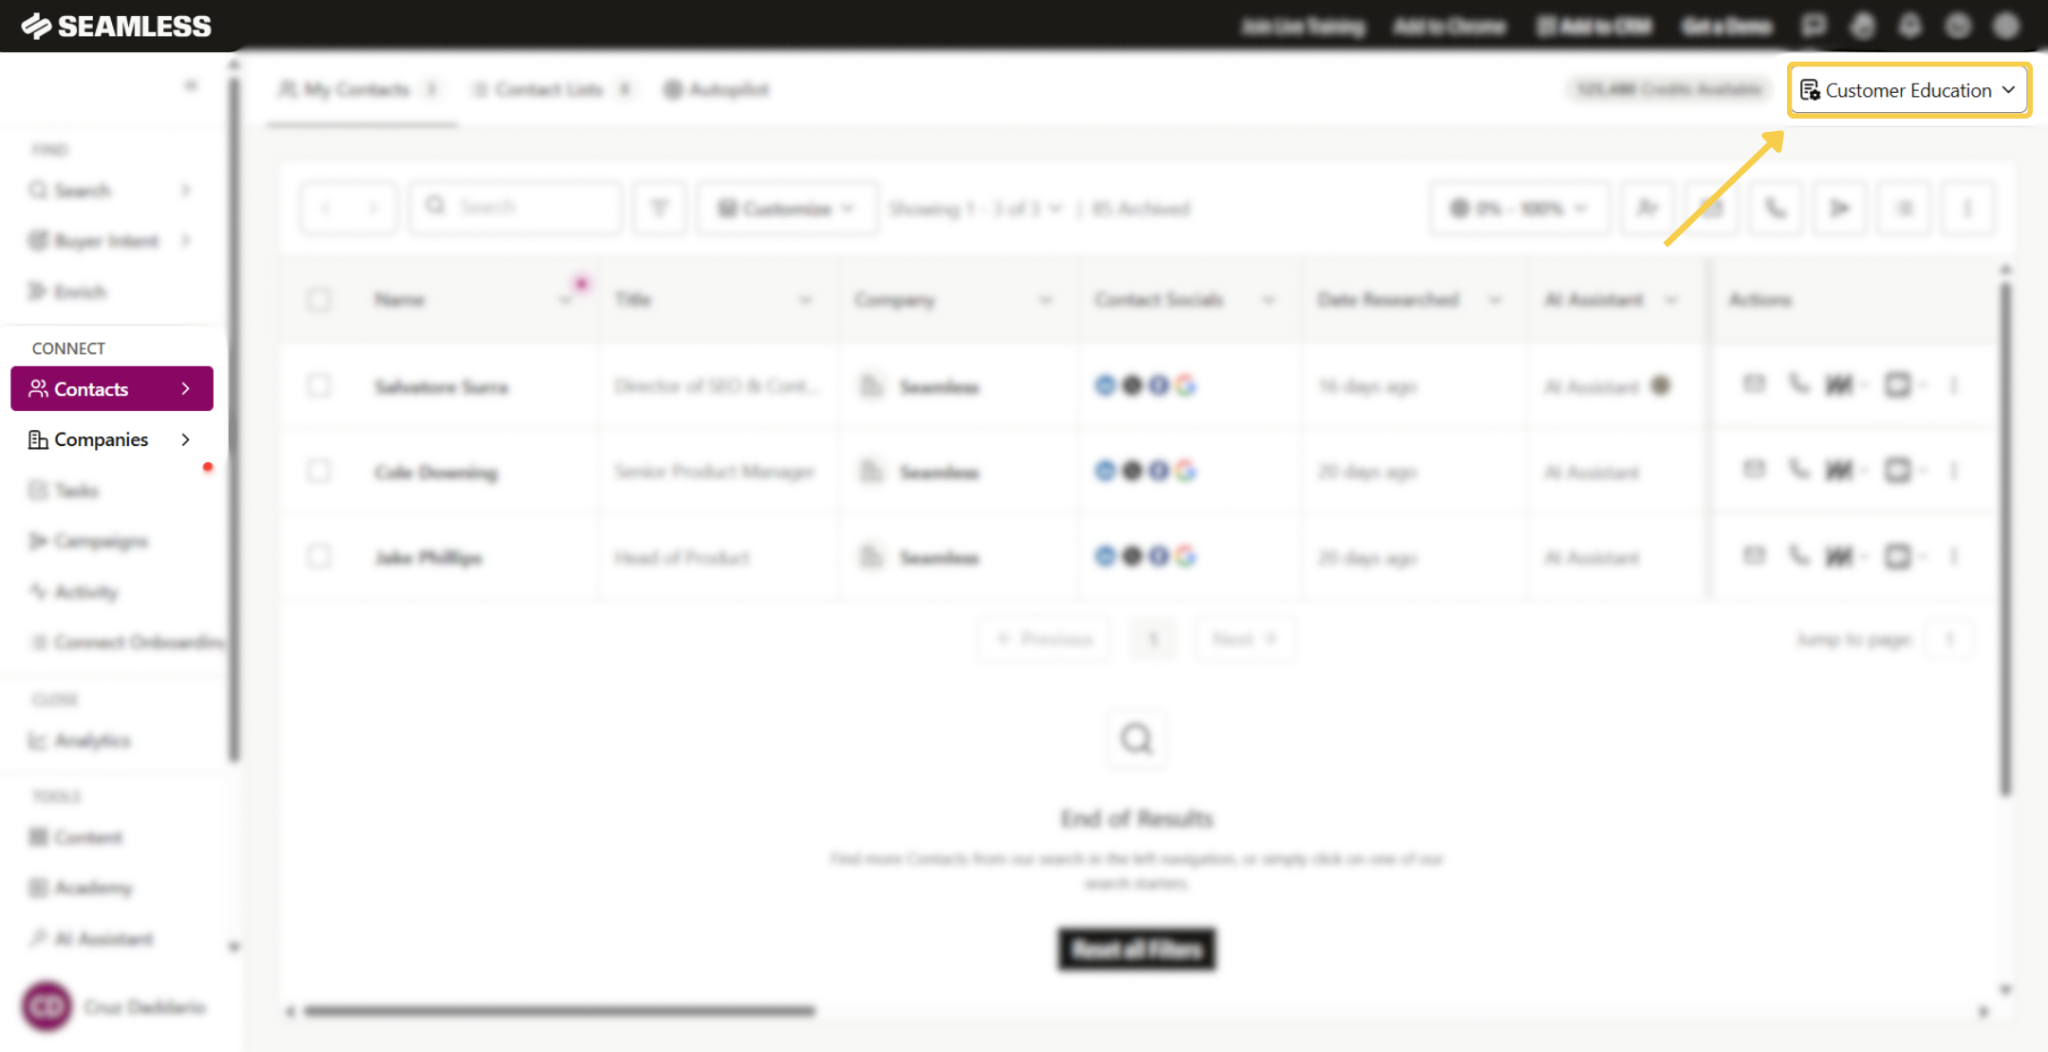
Access Lists in My Contacts and My Companies
In My Contacts and My Companies, users can access lists by clicking Manage List in the top right corner of the page.
If a default list is already set, that list name may appear there instead.
From this menu, users can:
- Create new lists
- Change the default list
- Edit a list
- View a list
- Delete a list
- Download a list
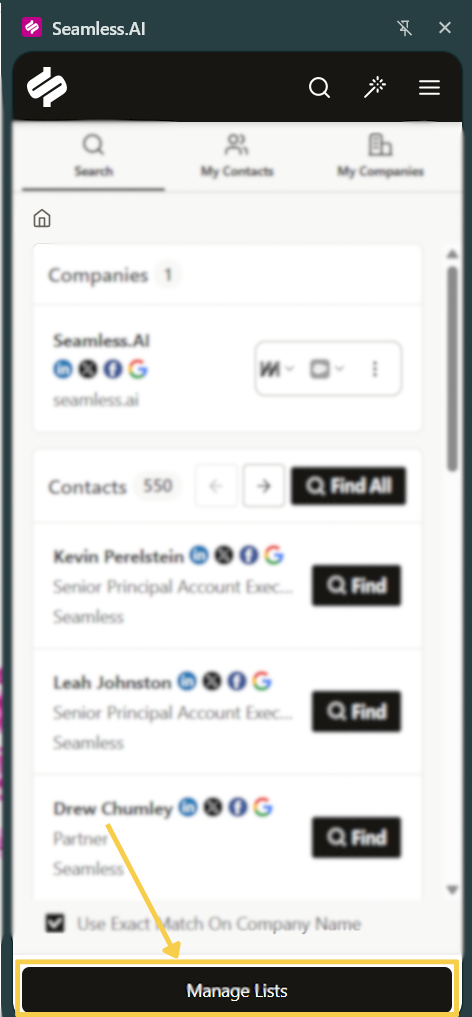
Access Lists in the Chrome Extension
In the Chrome Extension, users can manage lists by clicking the Manage Lists button near the bottom of the extension.
From there, users can perform the same actions available in the platform, including:
- Creating lists
- Setting a default list
- Editing lists
- Viewing lists
- Deleting lists
- Downloading lists
When finished, users can click the Home icon in the top left of the extension to return to the main prospecting view.
Best Practices for Naming Lists
To make lists easier to manage over time, we recommend naming them based on the use case or data set, such as:
- SMB Prospects Q2
- Healthcare Leads
- Texas Accounts
- Webinar Follow Up
- Target Accounts
Using clear, memorable names makes it easier to find the right list later and keep your workflow organized.
How to Move Contacts from One List to Another
If you want to reorganize contacts, Seamless gives you a few different ways to move them into a new list or add them to another existing list.
Move one contact at a time
If you only need to update a single contact:
- Go to My Contacts
- Find the contact you want to move
- In the Lists column, click Add to List
- If the contact is already on a list, you’ll see that list name instead
- A dropdown will appear showing your available lists
- Select the list you want that contact added to and remove the list the contact was in previously
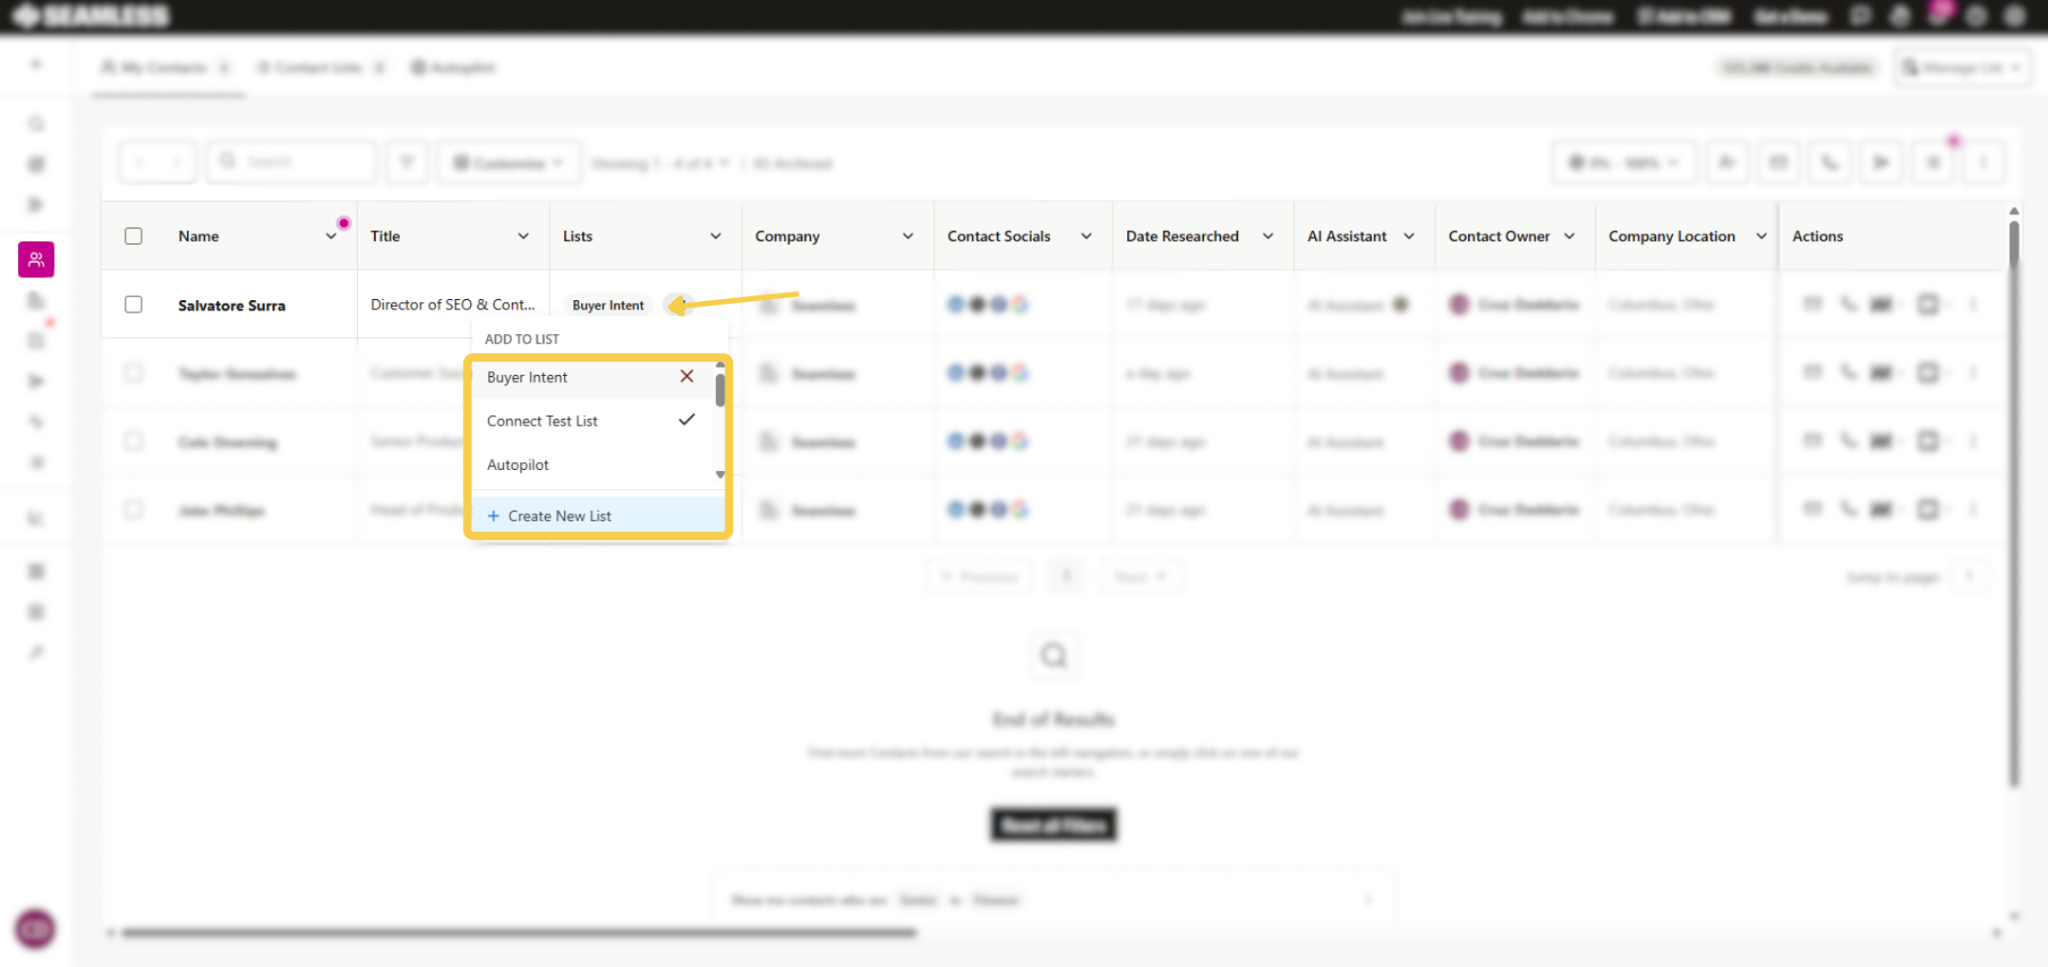
This is the quickest option when you only need to move or update one contact at a time.
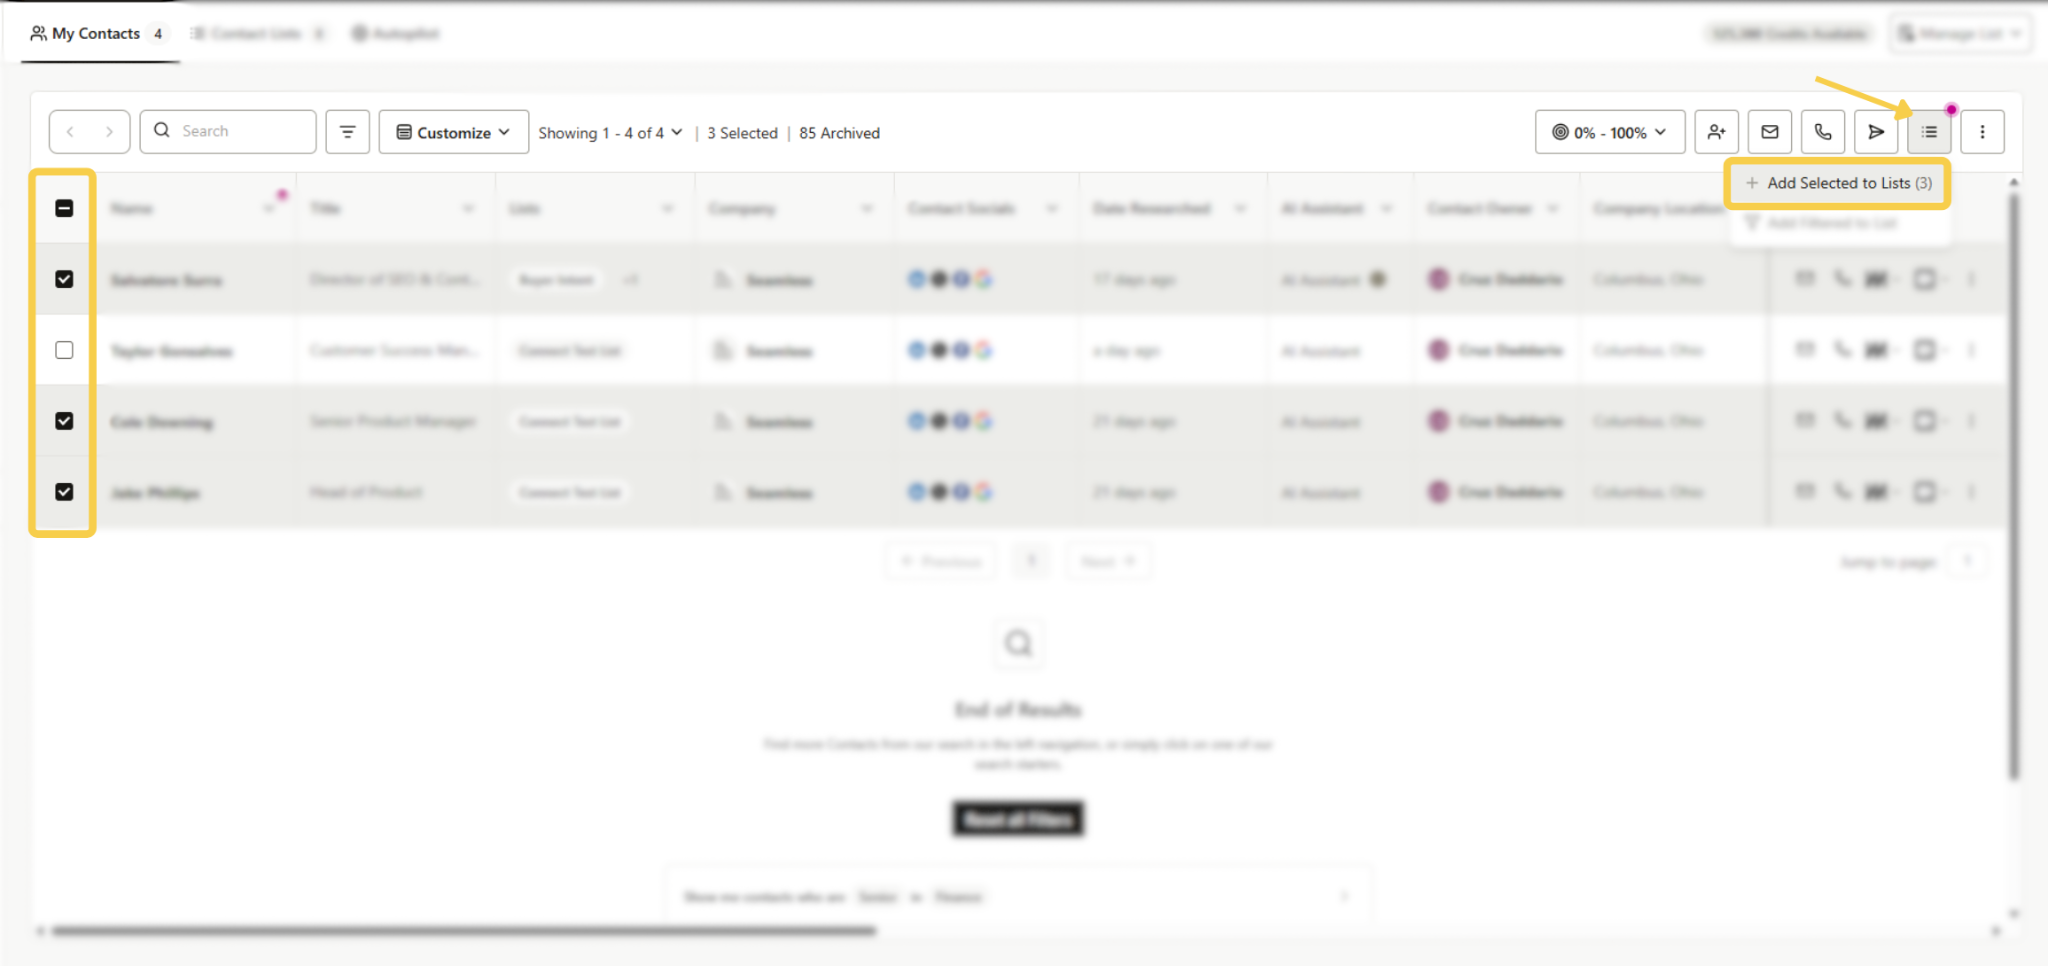
Move selected contacts into a different list
If you want to move several contacts at once:
- Go to My Contacts
- Check the box next to each contact you want to update
- Click the Lists icon at the top of the page
- Select + Add Selected to Lists
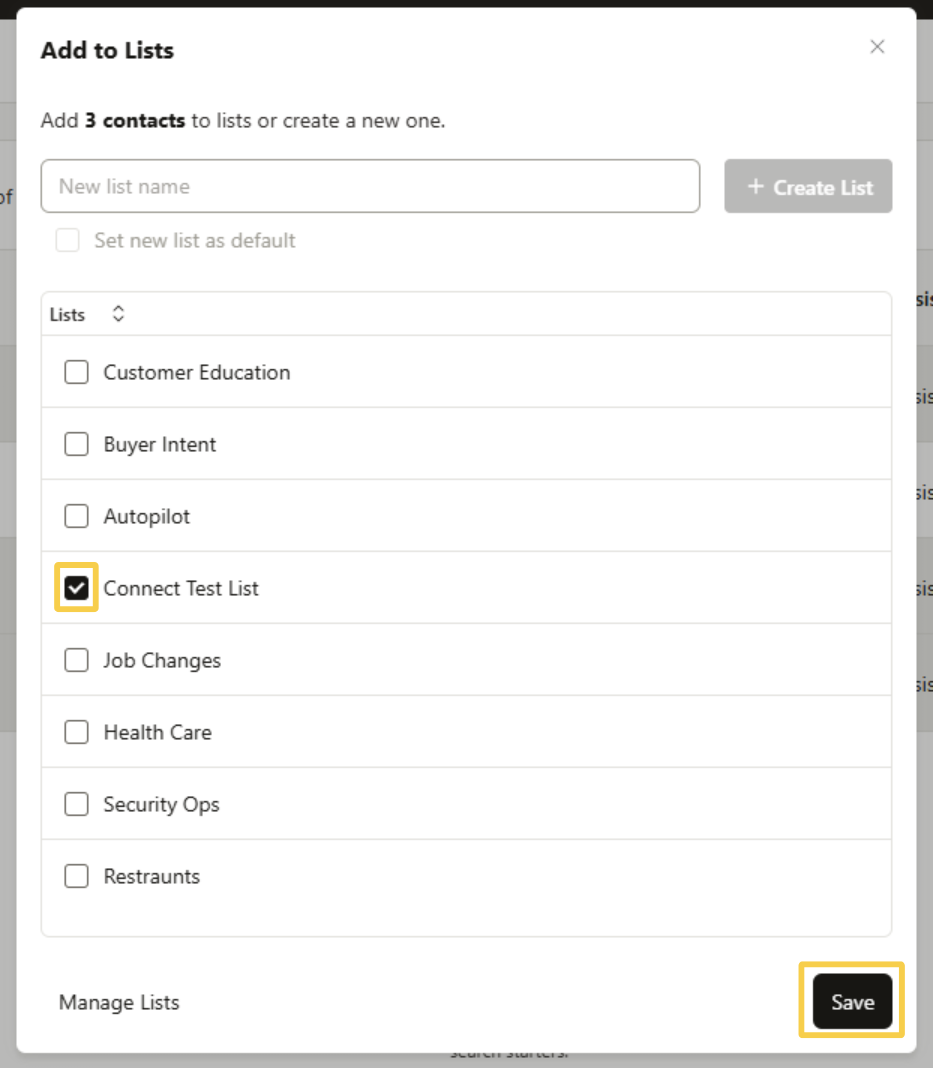
- In the list window:
- Remove the -/+ next to the list the contacts are currently in, if needed
- If the contacts are not currently in a list, simply choose the new list you want
- Click the box next to the list you want to use
- A black checkmark will appear next to the selected list
- Click Save. Your selected contacts will then be added to that list.
Move contacts in bulk using filters
If you want to update a larger group of contacts at once, using filters is often the fastest option.
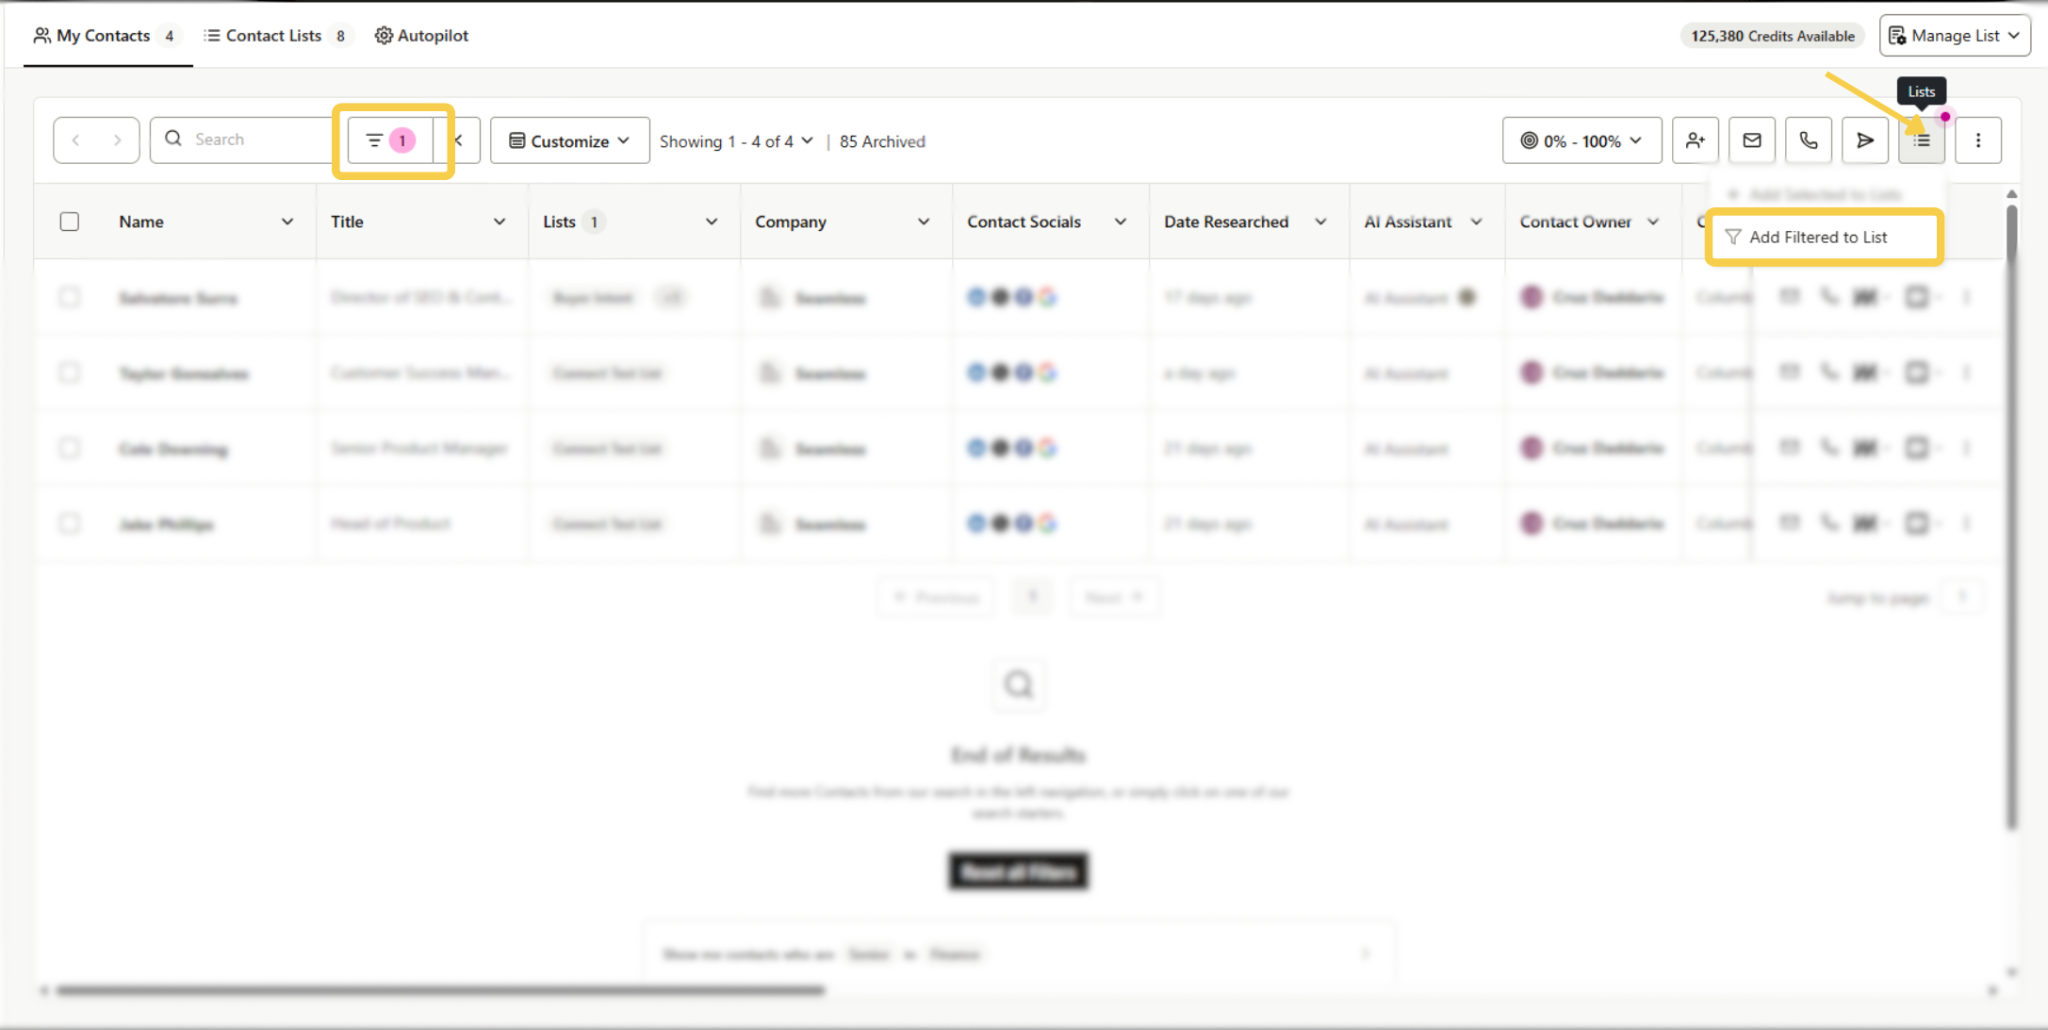
- Go to My Contacts
- Apply the filters you want
- Common examples include List, Title, and Date Researched
- After your filtered results load, click the Lists icon
- Select Add Filtered to List
- In the list window:
- Remove the -/+ next to the list the contacts are currently in, if needed
- If the contacts are not currently in a list, simply choose the list you want to add them to
- Click the box next to the list you want to use
- A black checkmark will appear next to the selected list
- Click Save
This will add all filtered contacts into the selected list.
Summary
Lists make it easier to organize and manage the contacts and companies you save in Seamless. Whether you are prospecting from Search, working in My Contacts or My Companies, or using the Chrome Extension, lists help you keep your data structured and make it easier to return to the right records when you need them.