Add Contacts to Seamless
This article explains how to add contacts to Seamless either individually through the My Contacts page and Chrome Extension or in bulk using a CSV upload. It also covers the difference between enriched uploads and standard CSV imports.
Brand refresh in progress
We recently launched a new brand, so some images and videos may differ from what you see in-product. All workflows and guidance remain accurate while we update visuals.
There are two ways to add contacts to Seamless. You can either create a single contact manually from the My Contacts page, or upload a larger list of contacts using a CSV file. The best option depends on whether you are adding one person at a time or bringing in an existing list.
Add a Contact Individually
If you only need to add one contact, you can do that directly from the My Contacts page. This is the best option when you want to create a contact record manually and include any details you already have.
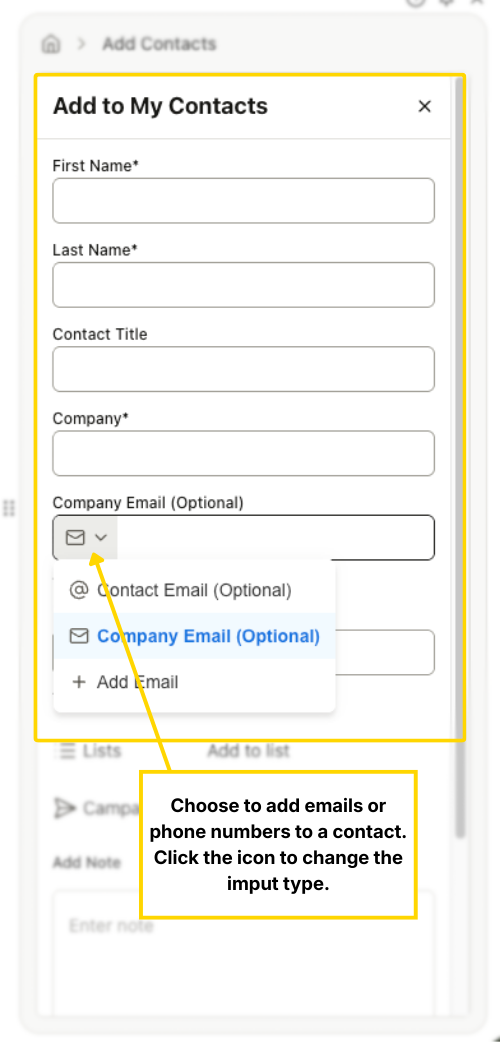
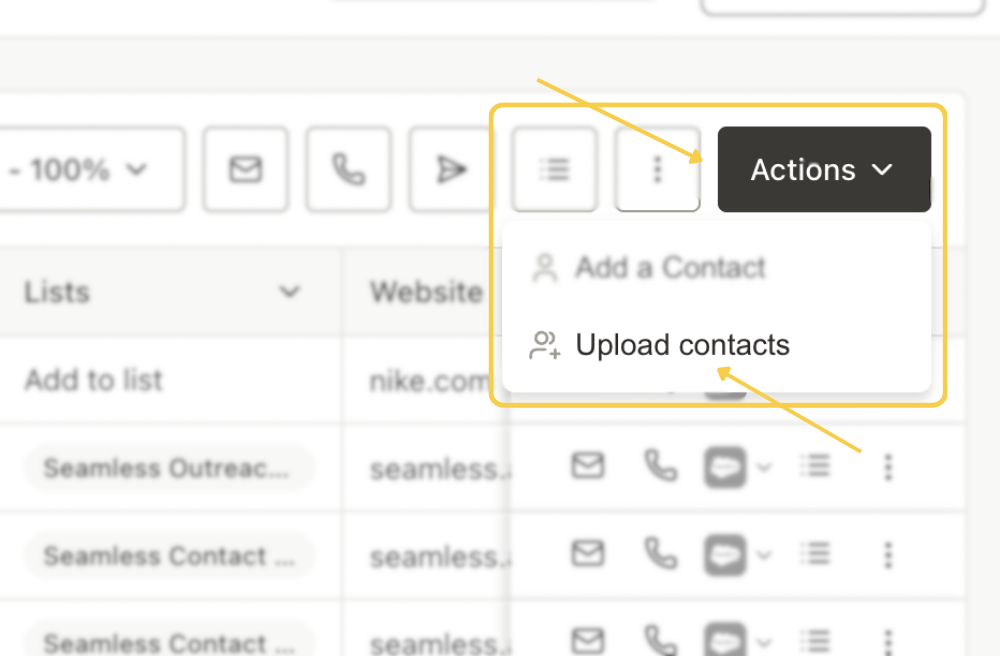
To add a contact, go to My Contacts, click the Actions drop down button in the top-right corner, and select Add to My Contacts.

From there, enter the required information:
- First name
- Last name
- Title
- Company name
You can also include additional details like email addresses, phone numbers, notes, and other contact information. If needed, you can add the contact to a list or campaign while creating the record. If your CRM is integrated, you can also choose to sync the contact there at the same time.
Once everything is complete, click Save.
Upload Contacts by CSV
If you need to add multiple contacts at once, use the CSV upload option instead. This is helpful when you already have a contact list outside of Seamless and want to bring it into your account for use in My Contacts or campaigns.
To get started, click Add Contacts, then select Upload Contacts. From there, you’ll choose how you want to upload the file.
Seamless offers two upload options depending on whether or not you want the list enriched.
Upload with Enrichment
This is the recommended option if your list is missing information or you want Seamless to help validate and complete the records during upload.
When you choose Upload with Enrichment, Seamless can fill in missing details and improve the quality of the contact data.
Important Note: Company Enrichment does use Universal Credits, at a rate of 1 credit per contact.
After uploading your CSV, you can name the list, apply tags, and choose whether to add those contacts to My Contacts. Once the upload is complete, the list will be available in View My Lists.
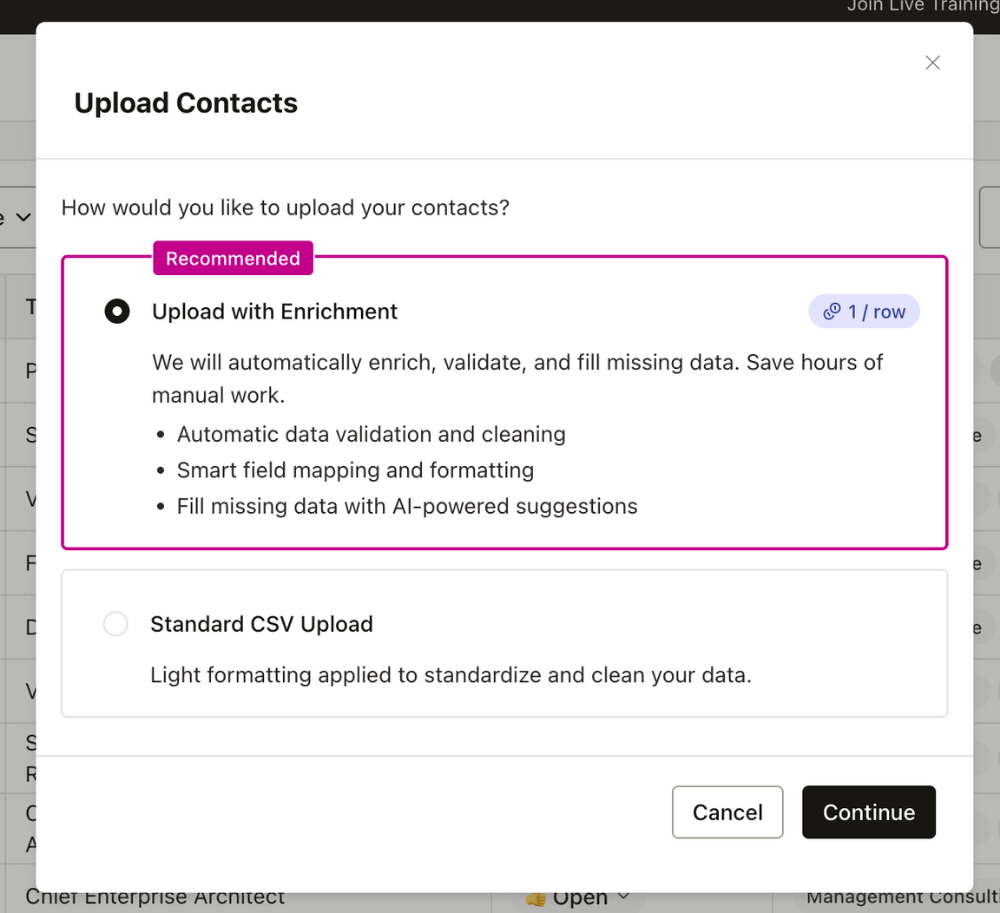
Standard CSV Upload
If your file already contains the information you need, you can use a standard CSV upload instead. This option imports the data as provided and does not enrich missing fields.
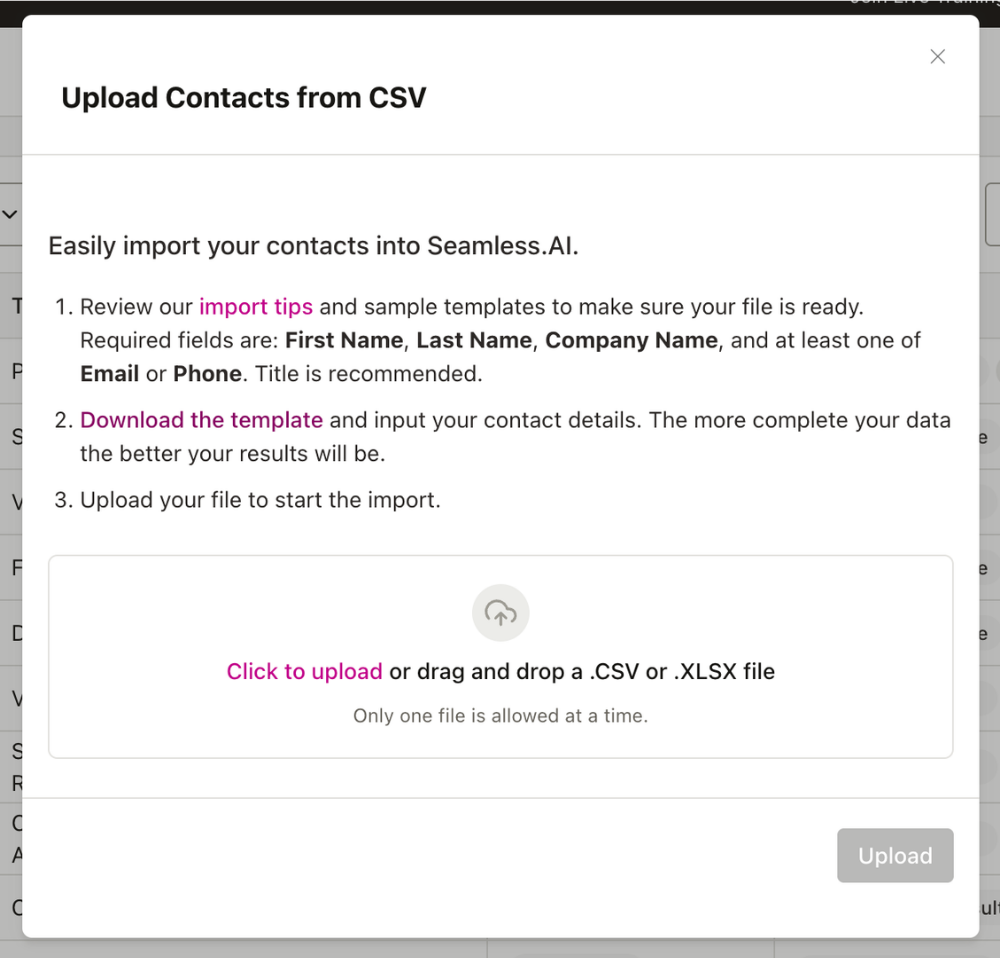
At minimum, your CSV should include:
- First name
- Last name
- Company name
It is also recommended to include fields like title, email, and phone number so the contact records are more complete after import.
Once the upload is finished, the list will also appear in View My Lists in Data Enrichment, where you can review and manage it. Or, view the contact lists and information in the My Contacts page.
Best Practice
In general, manual entry is best for one-off contacts, while CSV upload is better for bulk imports. If you want Seamless to improve the quality of the data, use Upload with Enrichment. If your list is already complete and you simply want to import it, use Standard CSV Upload.
Adding Contacts via the Chrome Extension
The Seamless Chrome Extension allows you to quickly add contacts directly from Gmail without leaving your inbox. This workflow is ideal for capturing and enriching contacts as you communicate with them.
Adding Contacts from Gmail Inbox
When using Gmail, the Chrome Extension displays an icon next to each contact’s name:
- Blue Icon → Contact is already saved in your My Contacts
- Gray Icon → Contact is not yet saved
To add a new contact, click the gray icon next to the contact’s name in your inbox and the Chrome Extension will open to create a new contact.
To create the new contact, you will need to confirm or complete the contact’s;
- First Name
- Last Name
- Company
You can also optionally add:
- Job Title
- Company Website
- Phone Numbers
- Additional emails or details
Once complete, save the contact. The icon will update to blue, confirming the contact has been added to My Contacts.
Adding Contacts from an Open Email
You can also add contacts while viewing an individual email:
- Open the email thread
- Click the icon next to the contact’s name
- The extension will open a contact form pre-filled with:
- First Name
- Last Name
- Add any additional details such as:
- Company
- Title
- Phone numbers
- Website
- Save the contact
A confirmation will appear once the contact is successfully added.
Manage and Organize Contact Details
After adding a contact, you can continue editing their profile in My Contacts. From there, you can add or update emails and phone numbers, use the dropdown menus to classify them correctly, and remove fields by hovering over them and clicking the X. During the contact creation process, you can also assign the contact to a List, add them to a Campaign, or sync them to your CRM.